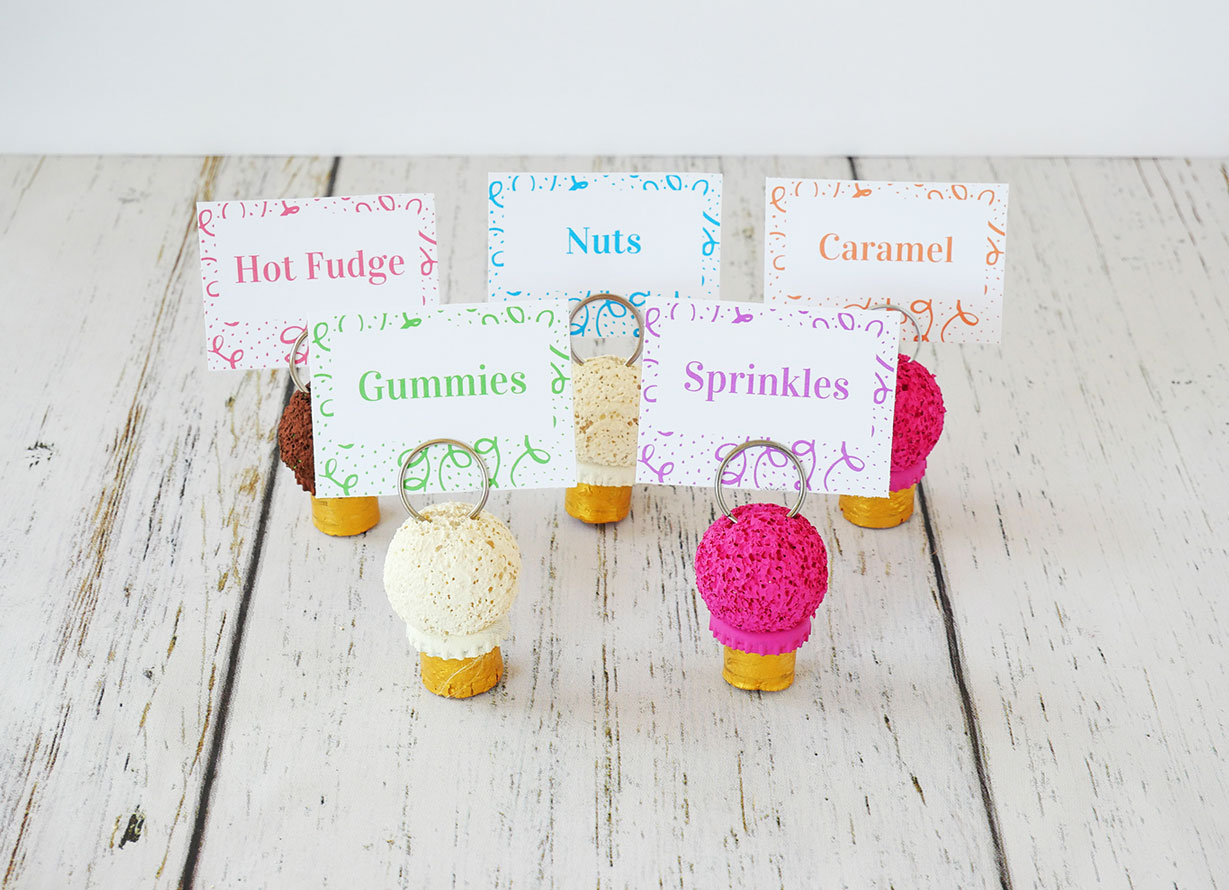
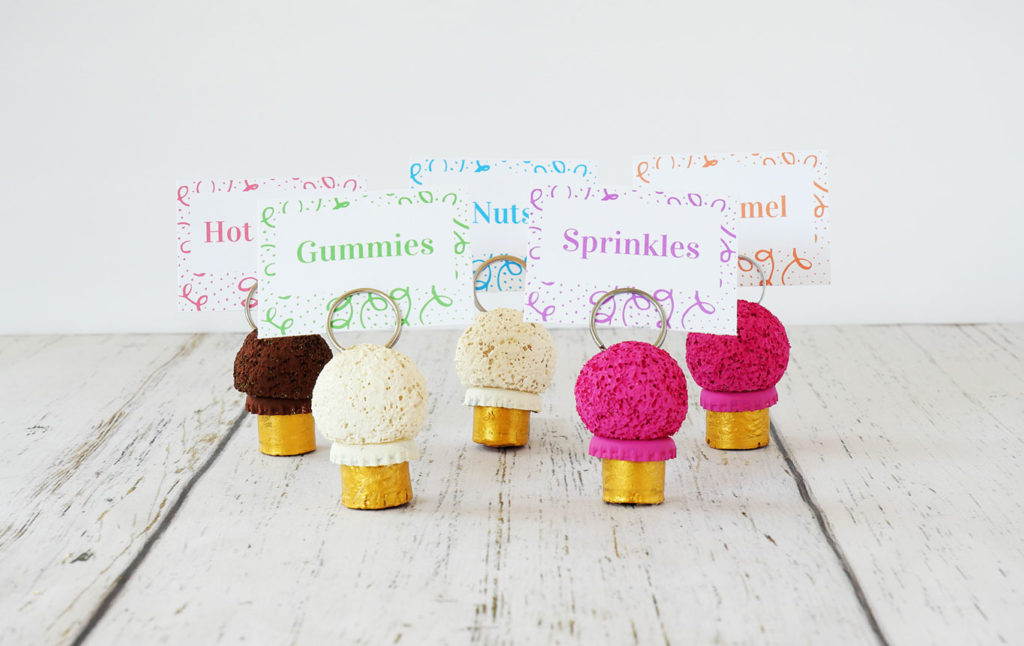
I was planning a make-your-own sundae party and decided to DIY ice cream place card holders for the buffet table.
I wanted to identify the various toppings to make it easier for guests to identify, and I wanted the holders to look cute. – like ice cream cones.
The goal was to make something that could hold food cards and be ice cream sundae related. I came up with these cute ice cream cone place card holders.
I think they turned out pretty dang cute.
Making ice cream place card holders was super easy, especially since I already had all the supplies in my craft stash.
I bet you have most everything, too.
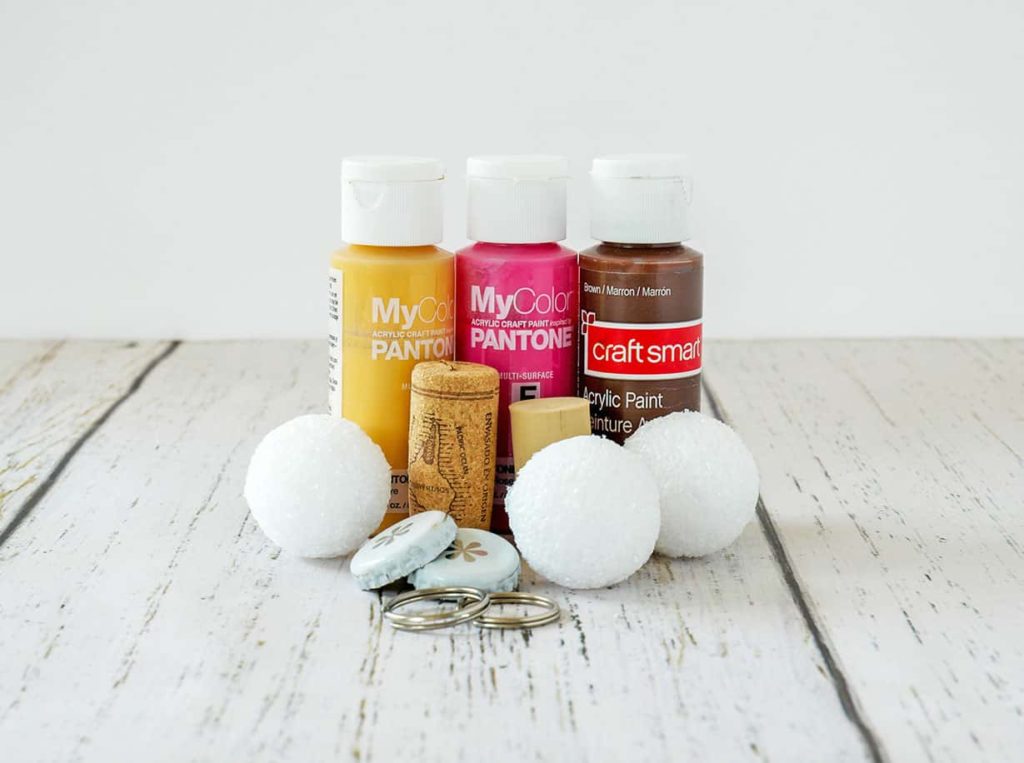
Supplies for DIY Ice Cream Place Card Holders
Please note that this article may contain affiliate links. I may get commissions (at no cost to you) for purchases made through these links. You can read my full disclosure for more details.
How to Make Ice Cream Place Card Holders
Step 1: Make the cone for the ice cream place card holders
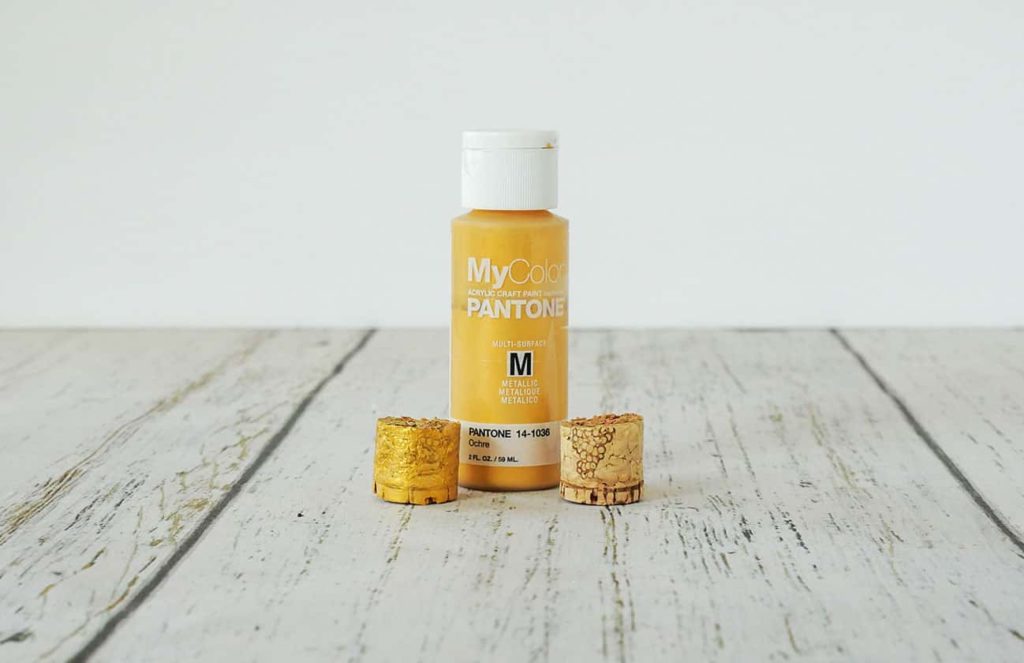
To make the cone for the place card holder, take a wine cork and cut it in half lengthwise.
I found that a regular serrated knife worked well.

If your wine cork is a little tough. steam it for about 5-10 minutes. This will soften it up and be easier to cut.
Then take a dark yellow, or gold paint, and paint the cork. It might need a few coats to completely cover any designs on the wine cork.
Step 2: Make the ice cream scoop section for the diy place card holders
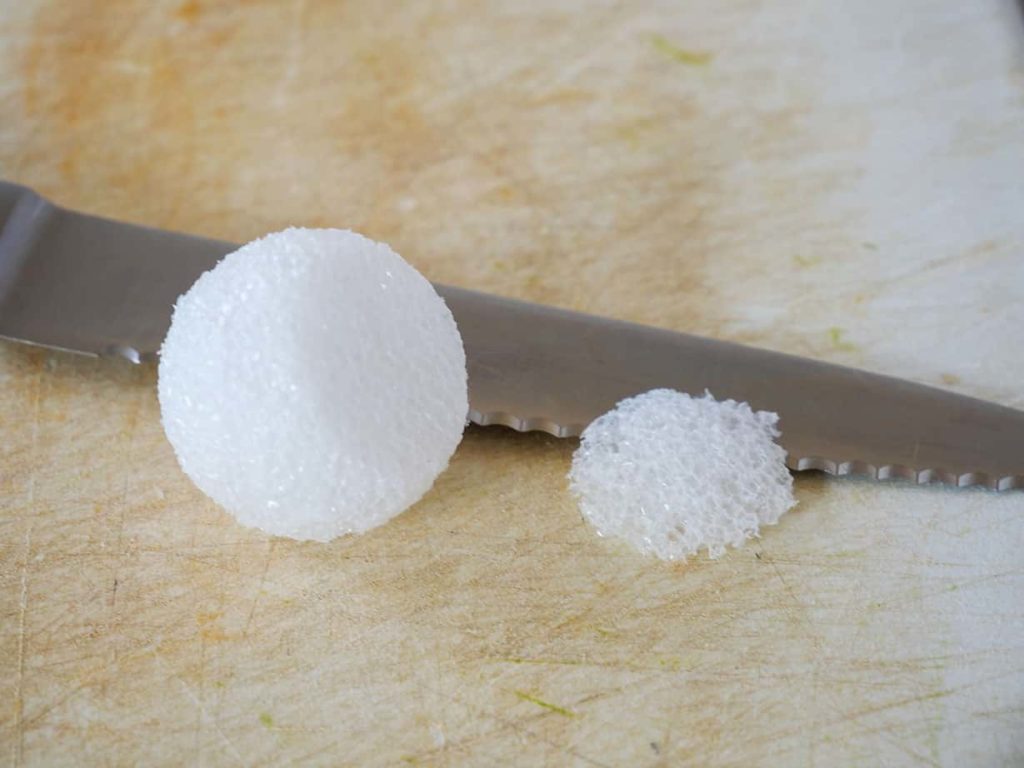
To make the ice cream scoop section of the place card holder, cut a small section off the styrofoam ball.

You want the ball to be flat, and about as wide as a bottle cap.
Now paint a bottle cap and the large rounded section of styrofoam ball the same color.
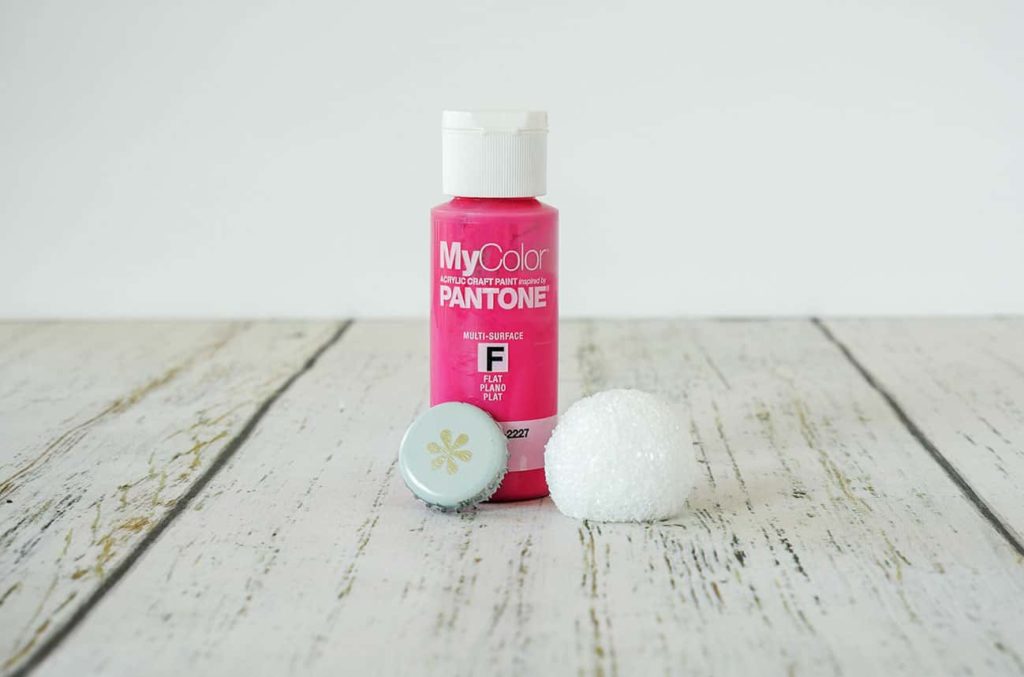
This might need a few coats, because of the nooks and crannies in the styrofoam.
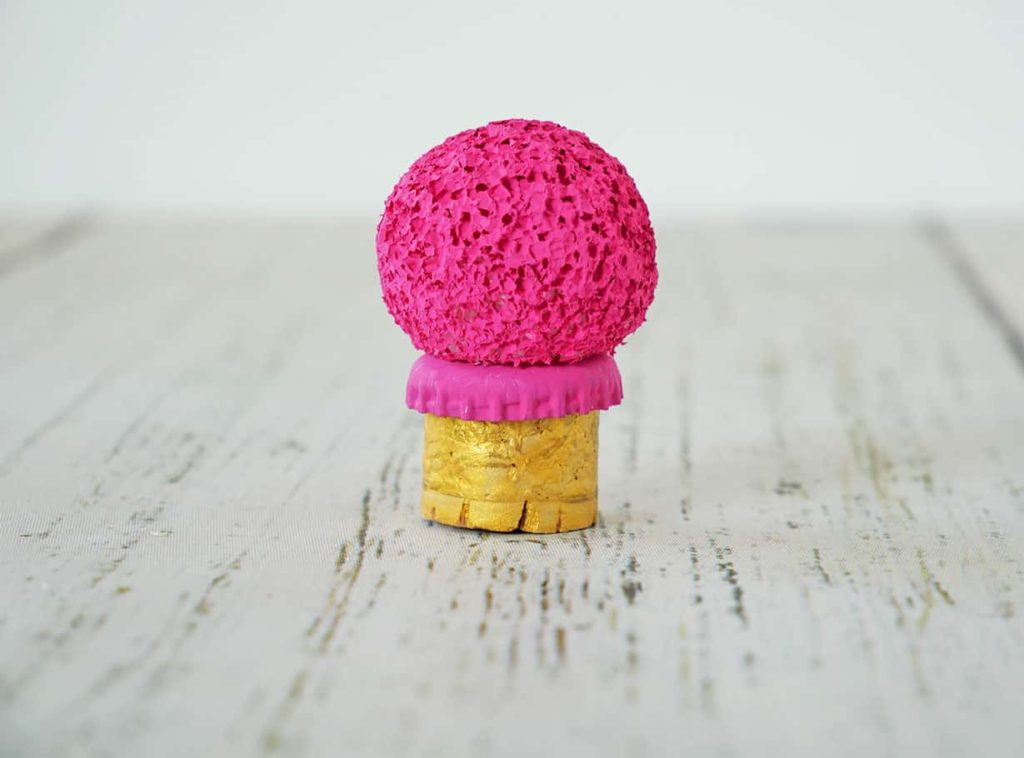
Step 3: Assemble your DIY ice cream place card holder
To assemble your diy ice cream cone place card holder, first glue the painted bottle cap on the cut end of the cork.

Then glue the flat end of the styrofoam ball onto the top of the bottle cap.
Next, you will add a keyring to the top of the ice cream scoop.
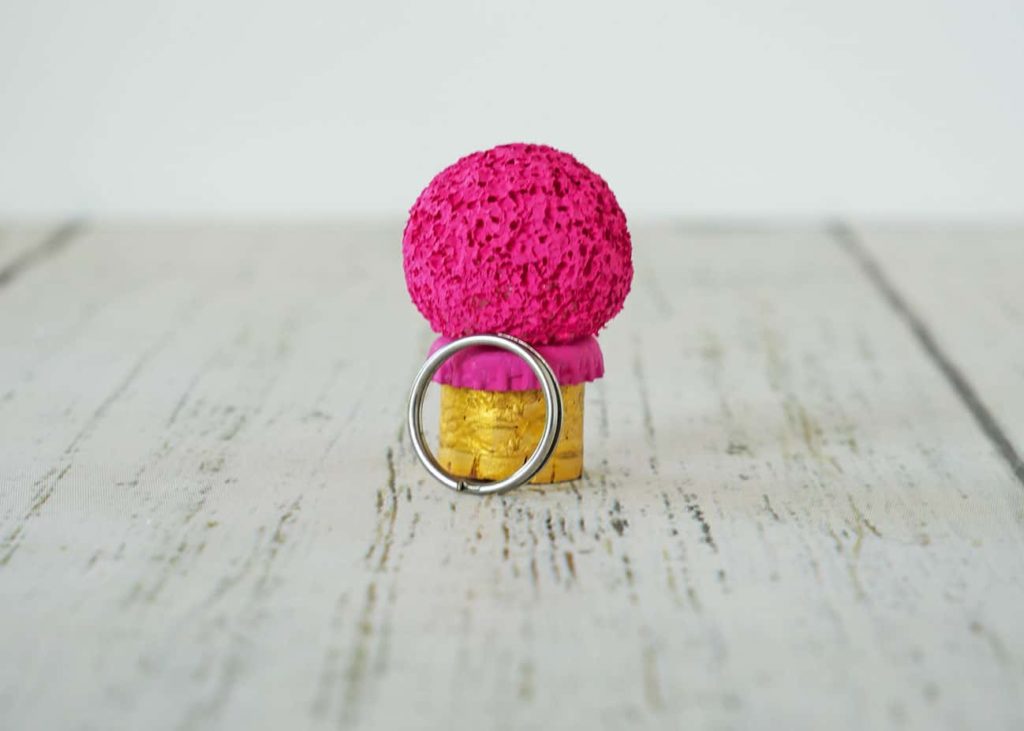
I found that taking the keyring and pressing it gently into the styrofoam worked best. Then take a little glue and adhere the keyring to the top of the ice cream scoop.
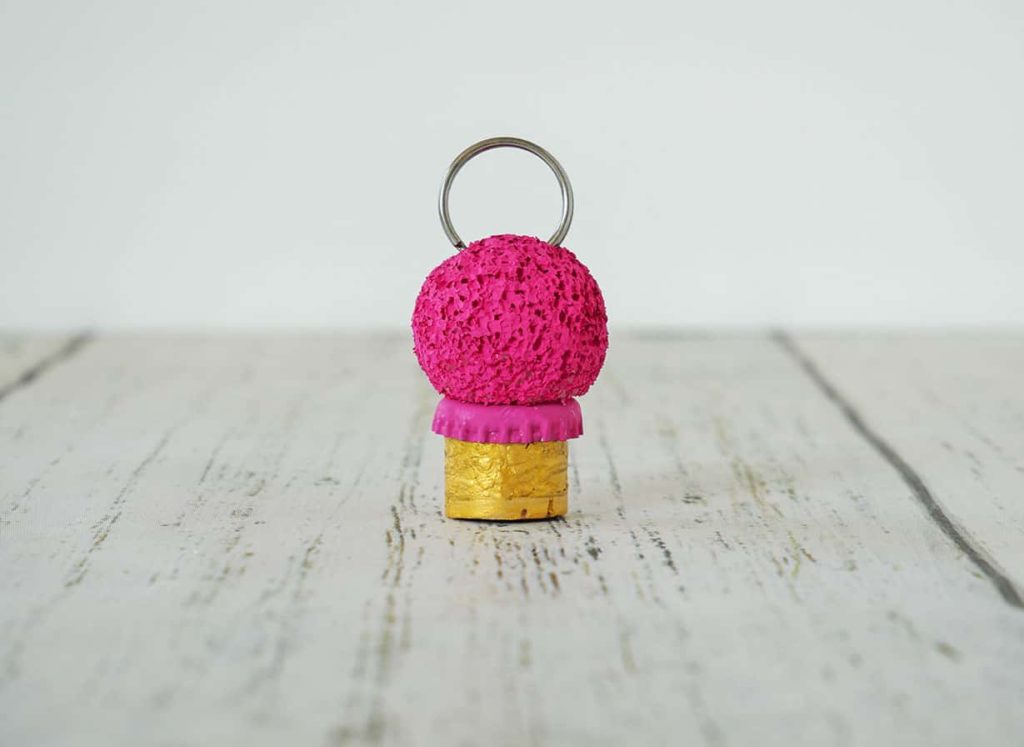
Step 4: Put your DIY ice cream place card holder to use
After you have attached the keyring to the top of the diy place card holder, it’s time to put it to use.
Just take your place card, with either your guest’s name, or as a food identifier, and slip it between the pieces of the keyring. It will be nice and snug.
Then place the ice cream place card holder on your table or buffet and wait for your guest to comment.
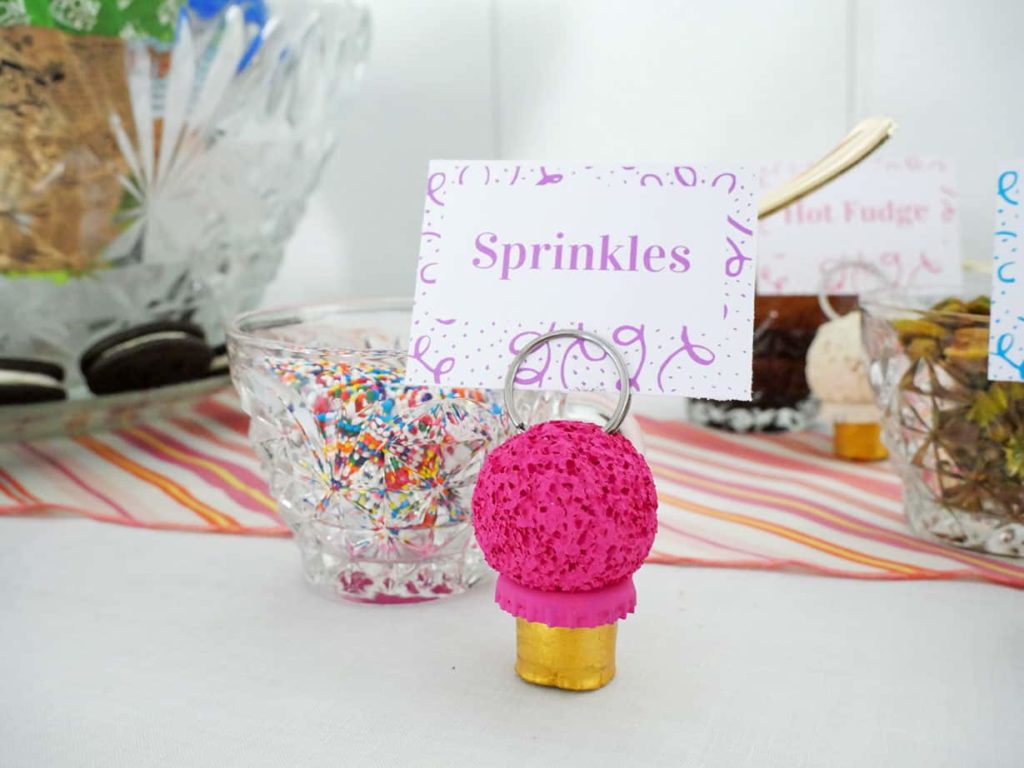
They’re gonna love ’em!
Shop the diy supplies:


Check out other easy diy projects:
- Ice Cream Party Hanging Decor
- Easy DIY Centerpiece for an Umbrella Table
- DIY Wooden Target Tray Transformation
- How to Stencil Cloth Napkins: Easy DIY
- Easiest DIY Napkin Rings for Everyday
- DIY Unique Menu Holder
- Simple DIY Wood Tray with Handles
- DIY Wine Cork Napkin Rings
- Simple Moss Bowl Centerpiece DIY
- Twisted Paper Flower Napkin Rings
These are so cute! I’m going to share with my sister since she’s the one who throws all the parties.
Awww! Thanks SO much!! Nice to hear that you like and will share them.