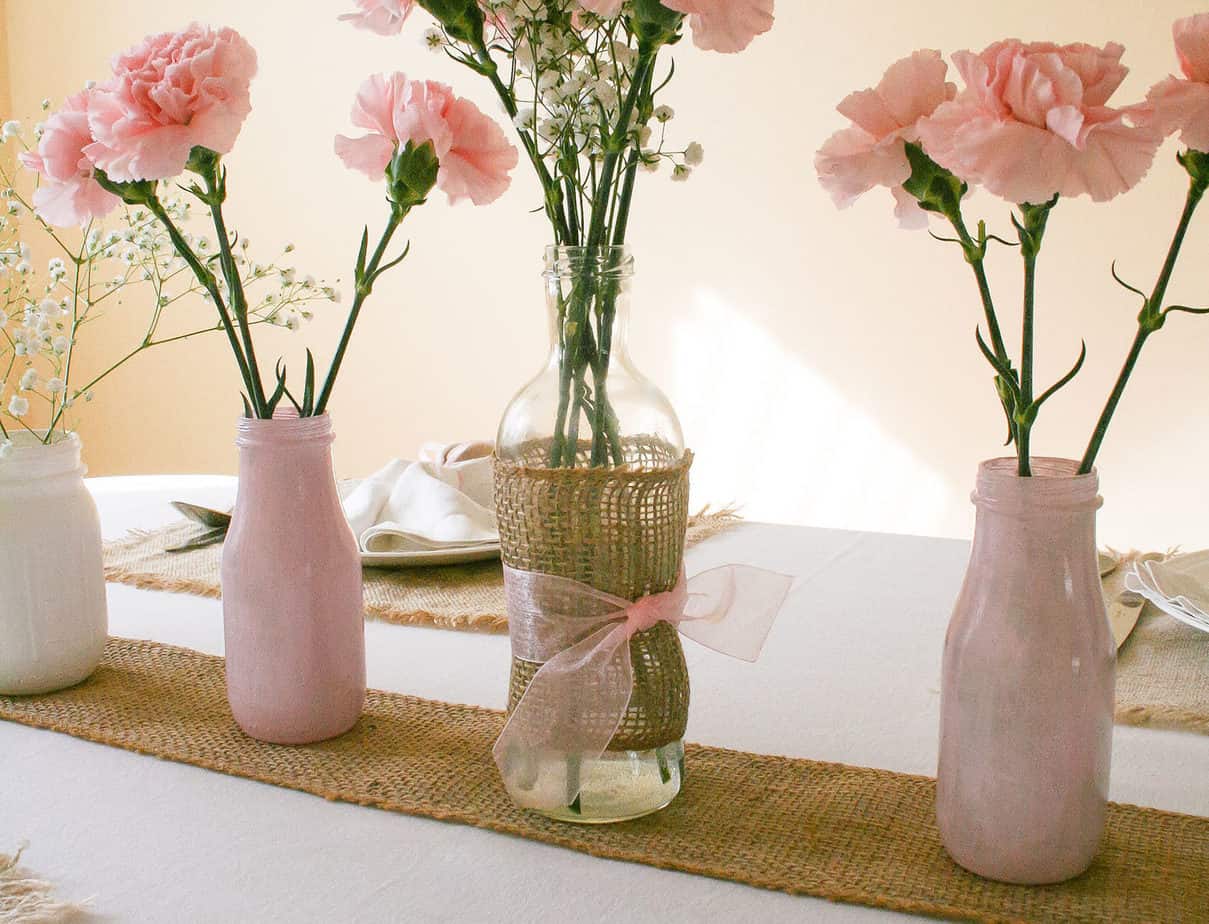
Easy DIY No-Sew Burlap Easter Vase
This DIY burlap vase is a cheap and easy project. You can use one, or many together, to create an Easter table centerpiece for your tablescape. When deciding on an easy DIY Easter table decorating idea, this one is at the top of the list.
For these Easter DIY no-sew vases I decided to reuse my saved drink bottles. I honestly don’t remember what drinks they contained. I just loved the shape of them and knew I could repurpose them. As you will notice in other projects, I love to reuse food and drink glass jars and bottles. I save the ones I think I can repurpose. They don’t cost me any more money, and the variety of sizes and shapes is awesome.
I LOVE easy, cheap DIY projects. They make me feel so accomplished that I finished the project and didn’t spend much money! A total win-win.
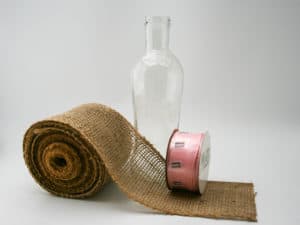
Supplies for Burlap Vase:
- Glass bottles of your choice
- Burlap garland or ribbon
- Glue
- Lace and/or ribbon
Total project cost = less than $15
- Glass bottle = no cost as you are using a bottle from a drink you previously purchased
- Burlap garland or ribbon = $5-10 a roll, depending on which you choose
- Lace or ribbon = apx. $4 a roll
Burlap Vase How-to Instructions:
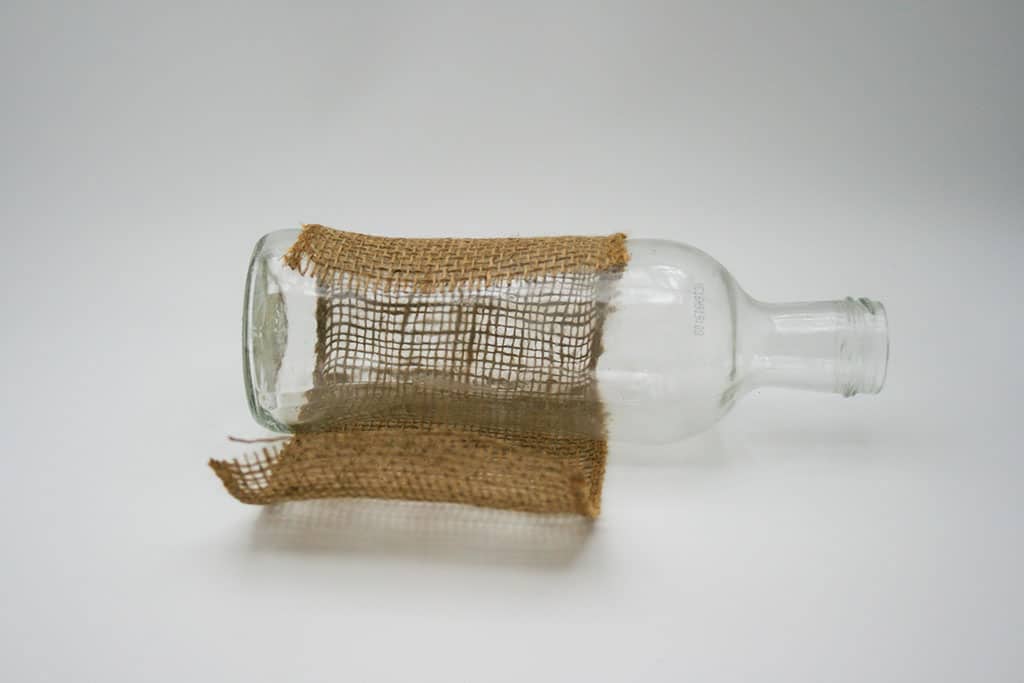
- Wash and remove any labels from the bottle(s). For those really tough labels with glue residue, Goo Gone is wonderful! It is magical how quickly and easily it removes that icky residue.
- Measure around the bottle and add a little extra to account for overlap.
- Cut burlap garland to this length.
- Add a little glue (in a vertical line) to where you want the burlap.
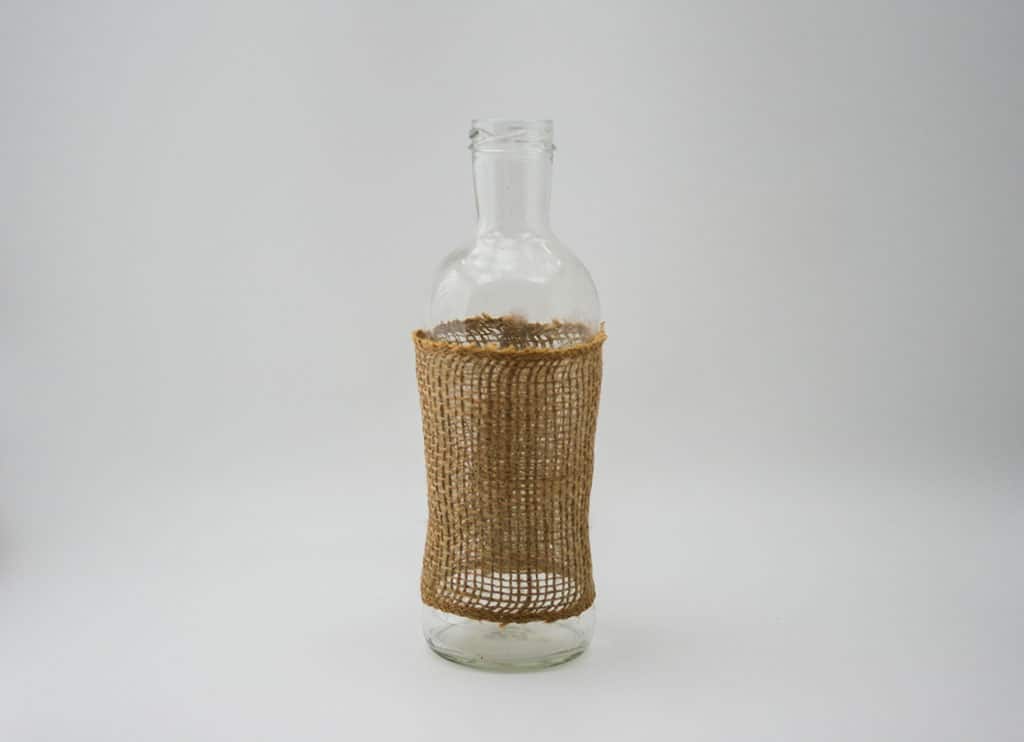
- Place one edge of the burlap on the glue and wrap the burlap around the bottle.
- Glue the other end of the burlap to the bottle so that it either touches or slightly overlaps. If you fold over the edge, it will have a more finished look.
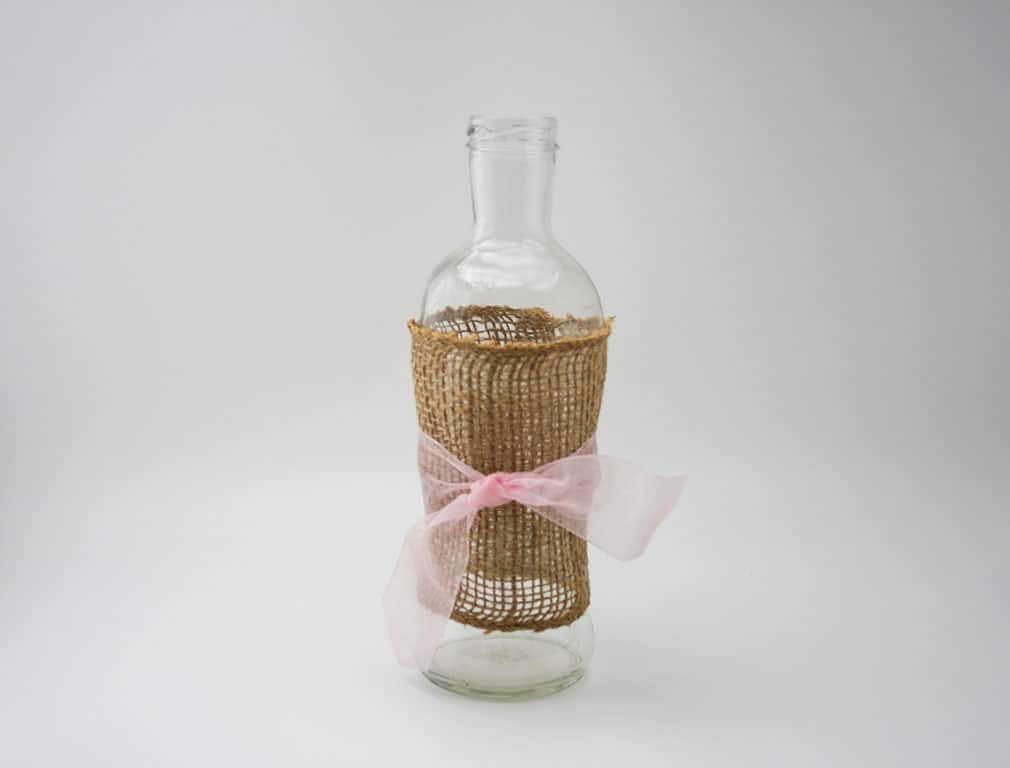
- Cut ribbon/lace 4x the length of the burlap. Wrap around the burlap and tie it into a bow. Cut off any excess, so that the ends are the same length.
- Fini!
That’s it! So easy! Sit back, admire your handiwork, and smile!!