Are you hosting a Halloween dinner party? Would you like a unique place card holder for your dining table? Look no further. I’ve got you…check out these easy diy black spider place card holders.
Aren’t they cute?
Well, maybe not “cute”, but creepy in a nice way?
And isn’t that the goal of a Halloween party and table setting? To be creepy and spooky, but still look good? Black spiders are just the ticket.
These spider place card holders are SO easy to make and definitely add an “ick” factor to your Halloween table decorations.
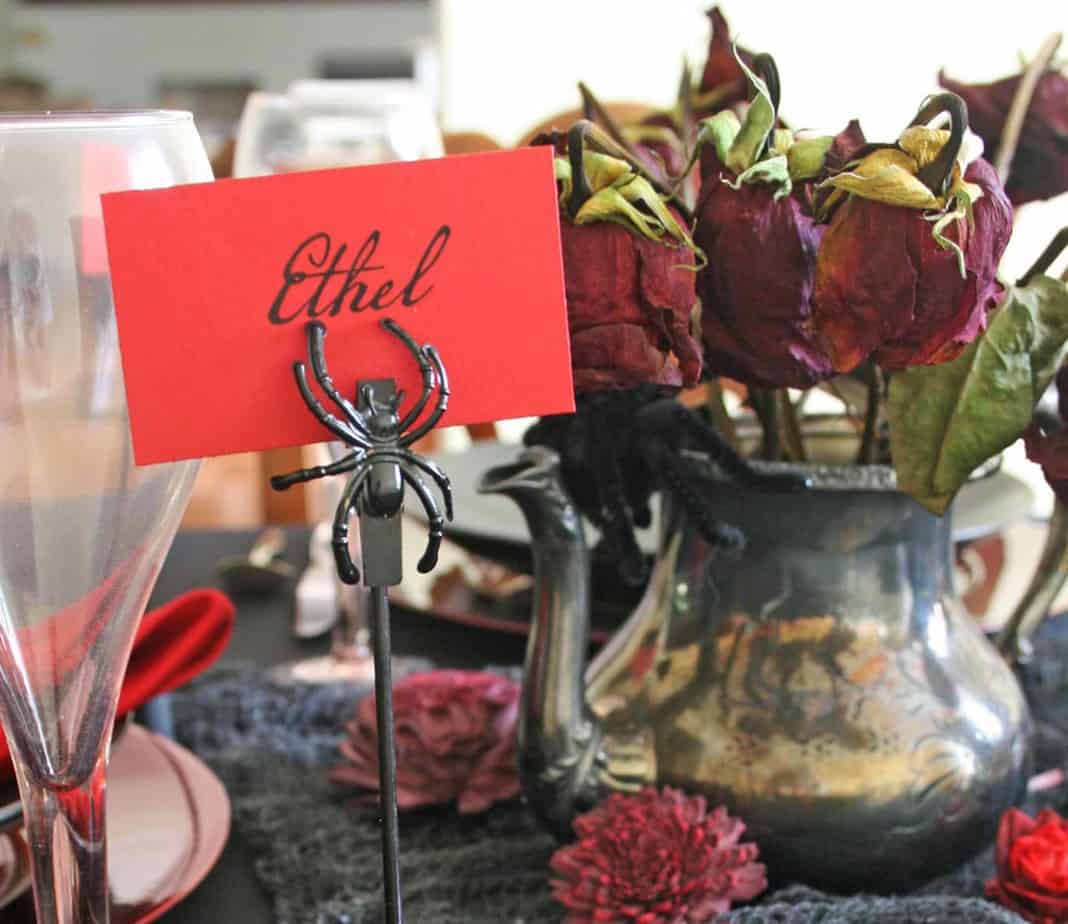
Once you are done making them, just print out name cards in a spooky font and attach them to the place card holders. Like I did here.
Your friends and family will love them!
Supplies for Your DIY Spider Place Card Holders
Please note that this article may contain affiliate links. I may get commissions (at no cost to you) for purchases made through these links. You can read my full disclosure for more details.
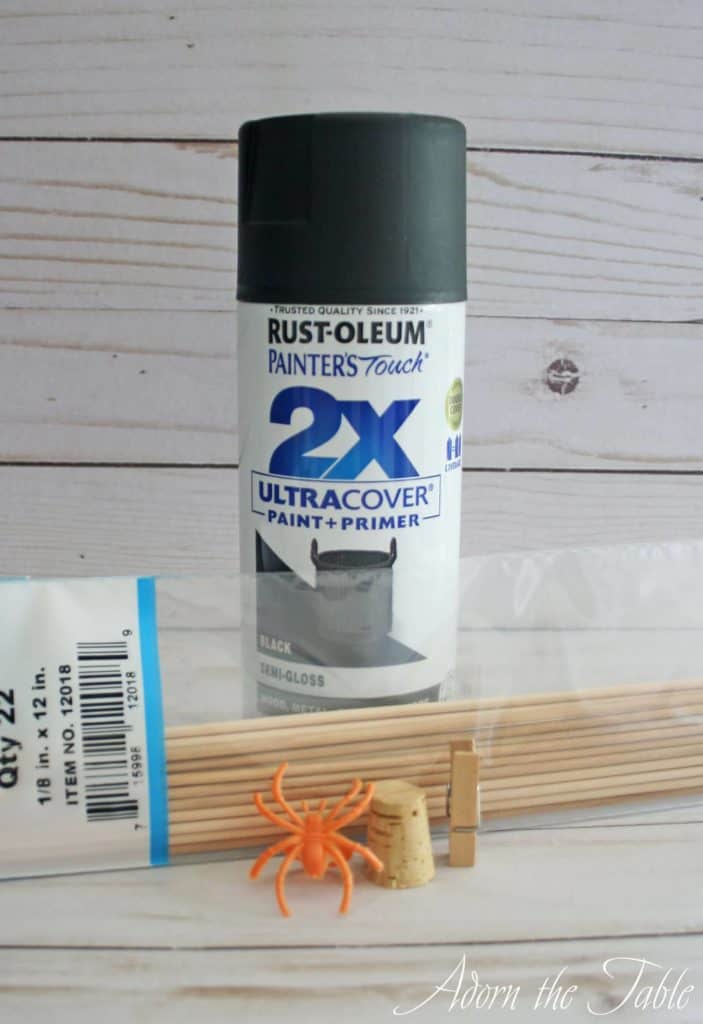
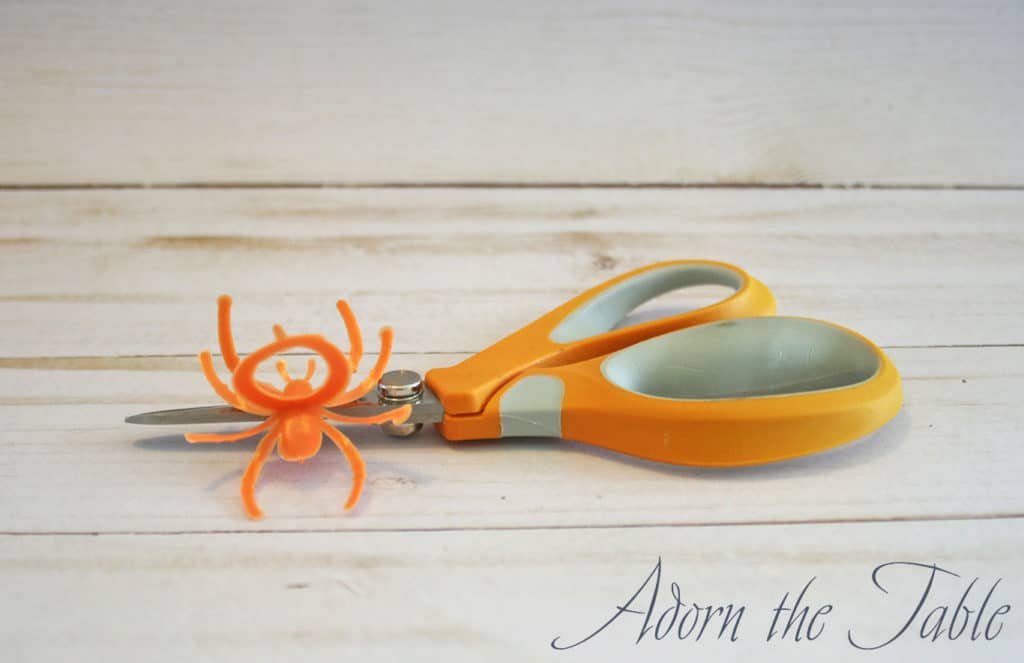
- Cheap plastic spiders (I had orange spider rings)
- Black spray paint
- Cork plug
- Wooden skewers
- Small wooden clothespins
- Glue
How to Make Unique Spider Place Card Holders
Step 1: Prep
If you are using plastic spider rings, like I did, cut off the ring section. You want just the spider.
Step 2: Assembling the place card holder
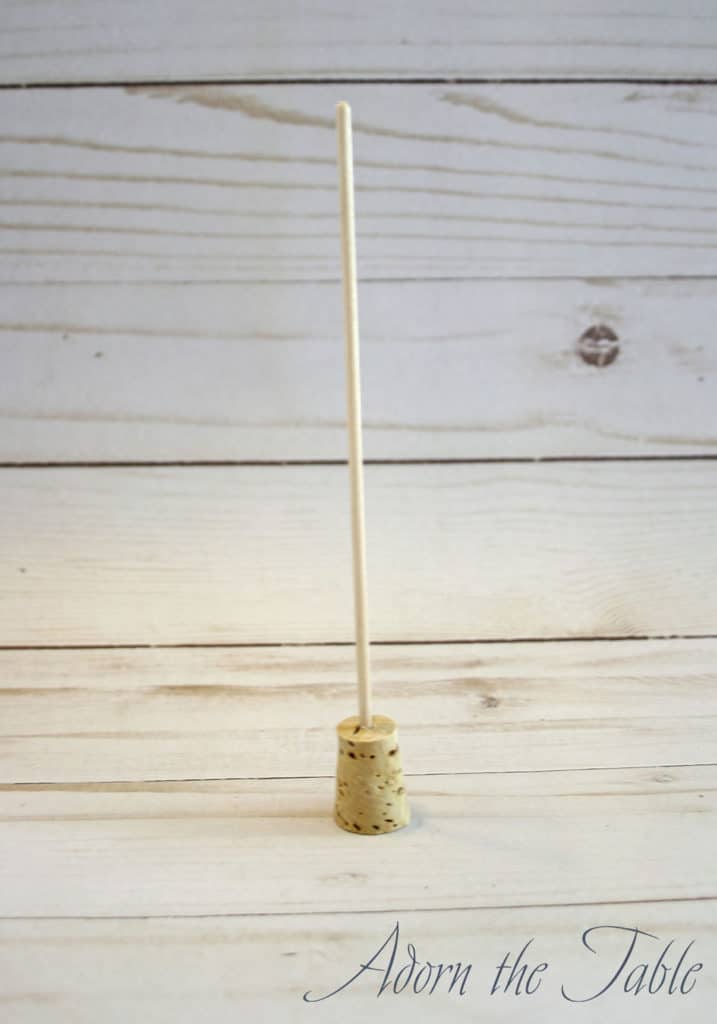
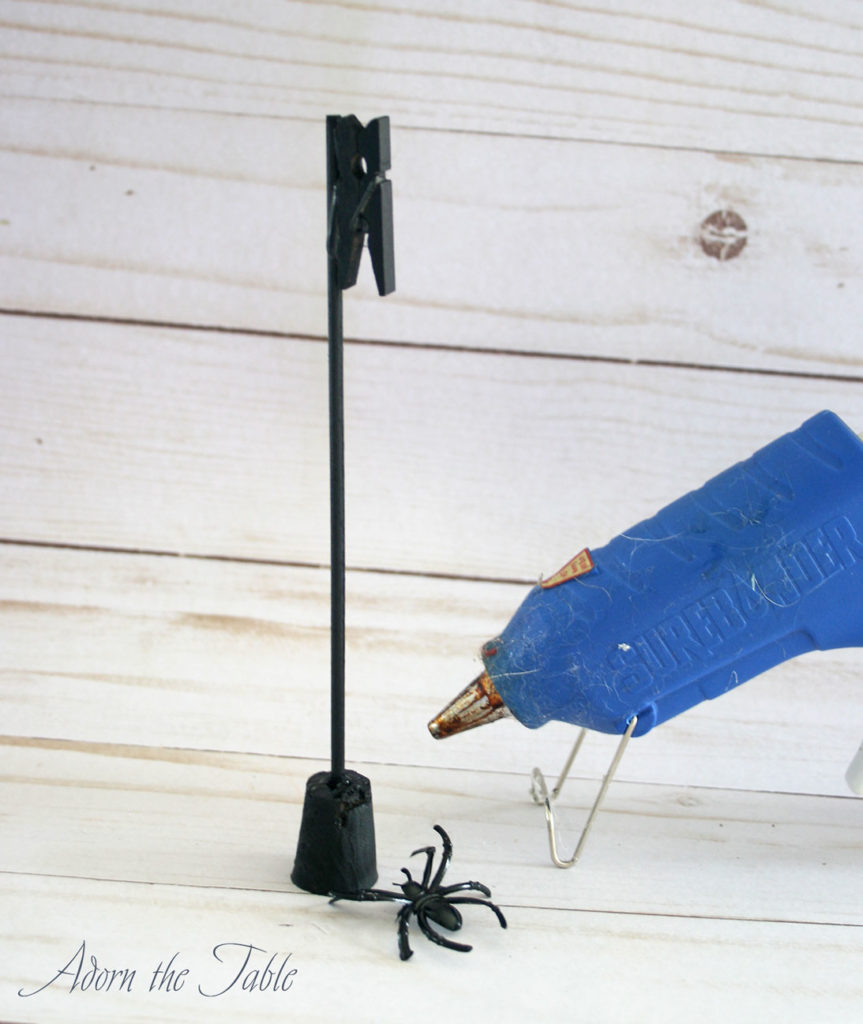
Take a pin, or the tip of a pair of scissors and create a small hole at the top of the cork plug.
Cut your wooden skewers into 6-inch lengths.
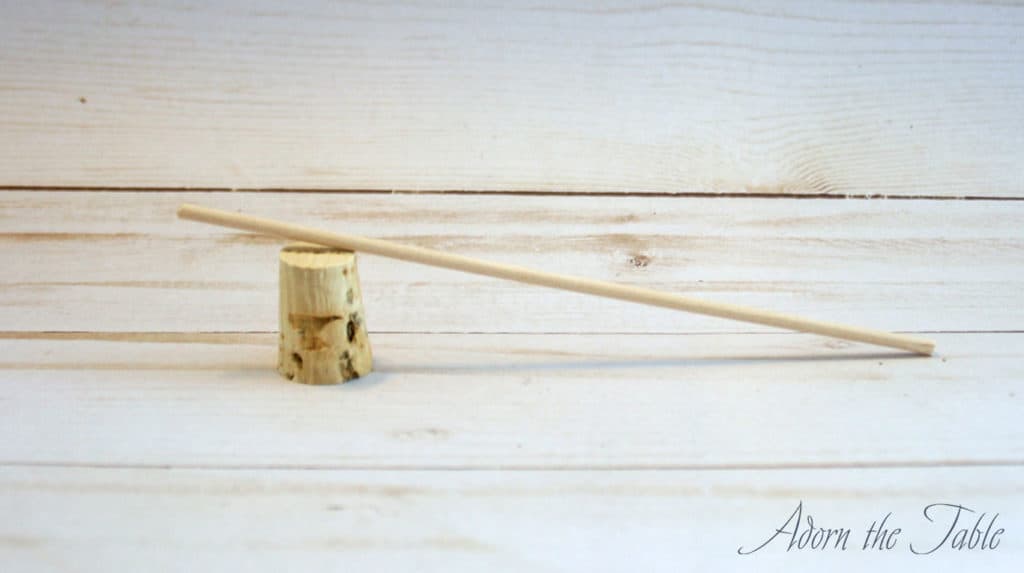
Put a dab of glue over the small hole in the cork plug and place one end of the skewer into the hole. This will be the base of the spider place card holder.
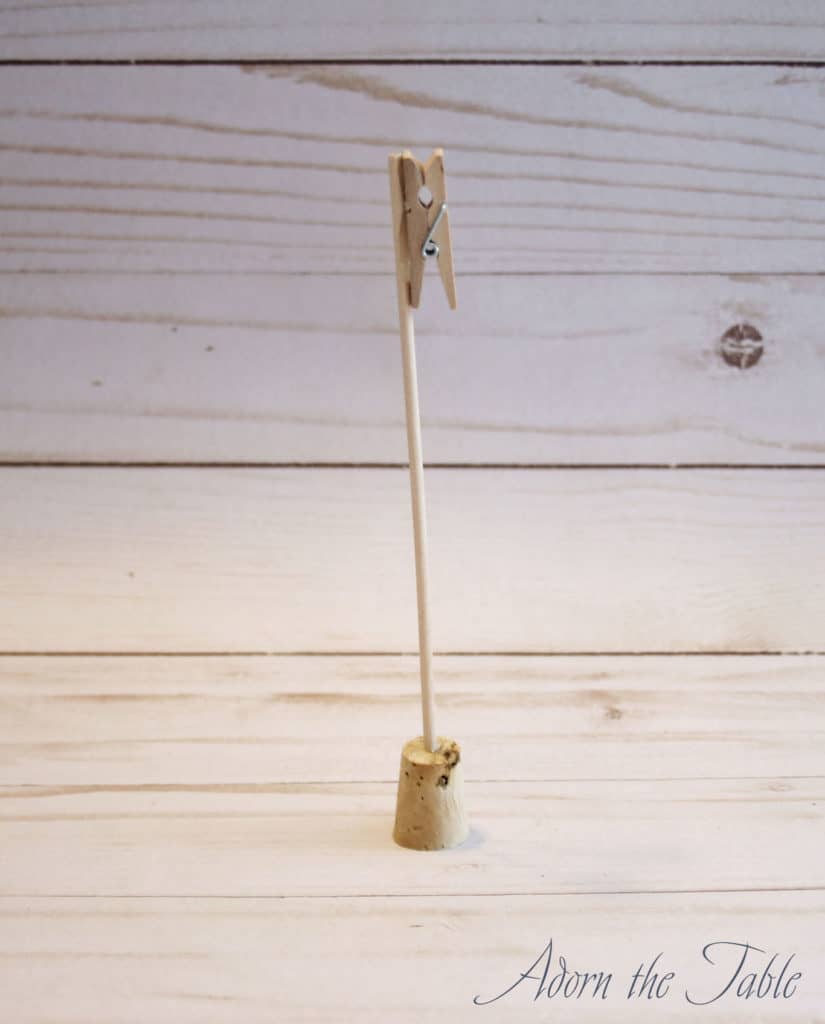
Now put a line of glue down one flat side of the clothespin and adhere it to the top of the skewer. *Be sure and put the top of the clothespin facing up. So, when you pinch the ends together, it opens at the top. The clothespin will be holding your place card.
Step 3: Spray paint your spider place card holder
Prep your area for spray painting. Be sure and layout a lot of newspaper, or a large drop cloth. You will want to spray paint in a well-ventilated room, or outside. I have a cardboard box that I transformed into a spray paint container, which is what you see in my pictures.

Spray paint the spiders and place card holder bases black. Apply a light coat of paint and add more coats as needed.
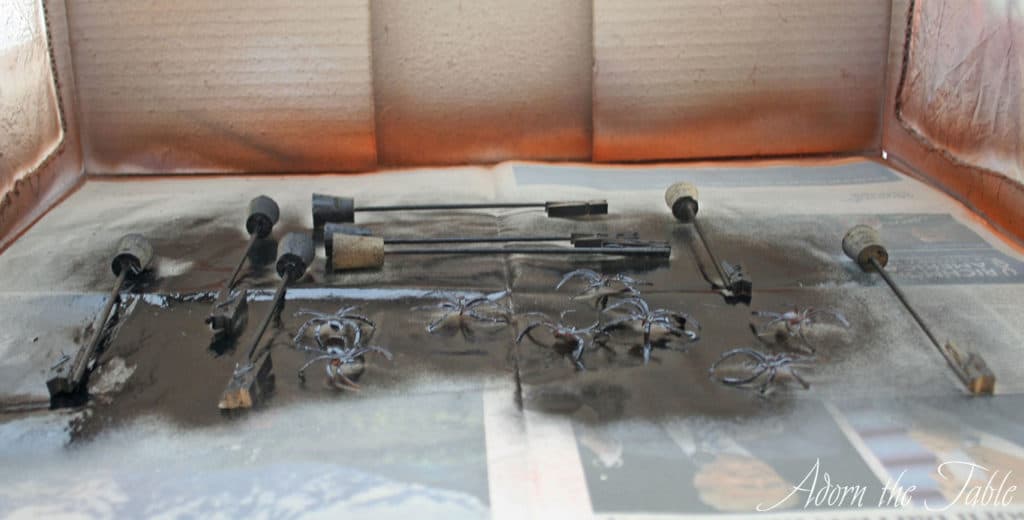
*Note: when spray painting, it is best to do multiple thin layers and let dry completely before turning over to do the underside.
Step 4: Attaching the spiders
Once the place card holders and spiders are completely black, and the paint is dry, glue the underside of the spider to the side of the clothespin. It should cover most of the clothespin so that it isn’t easy to see.
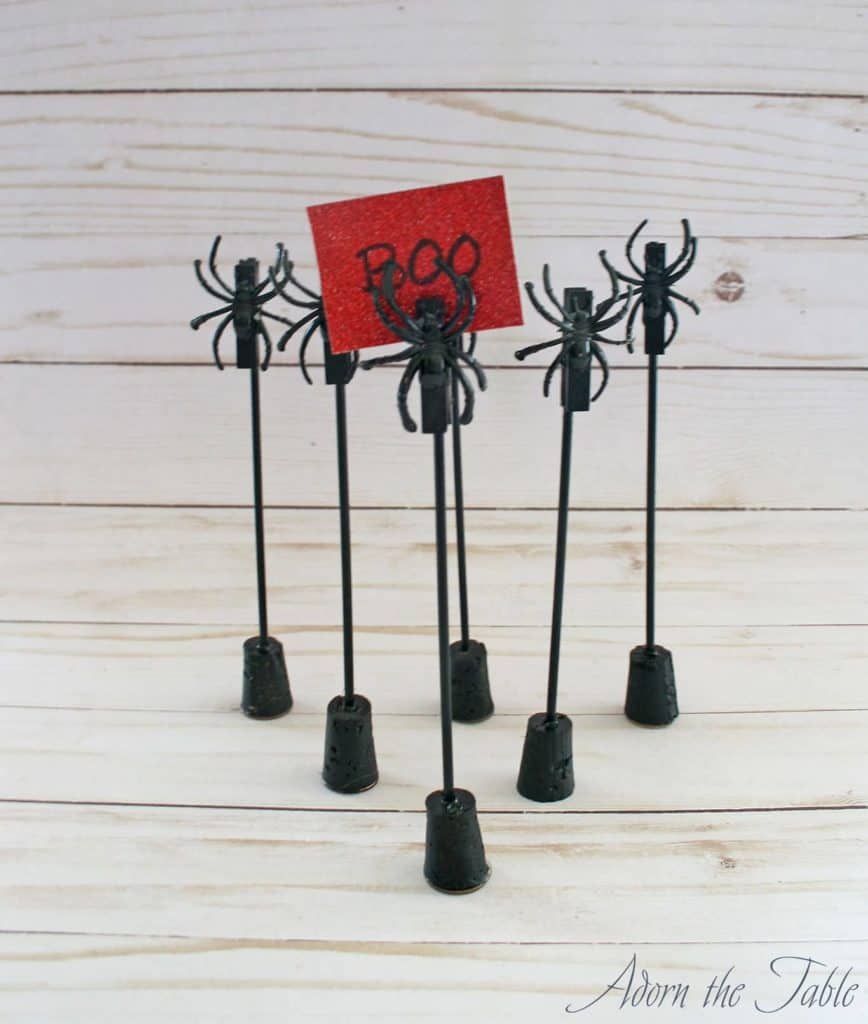
Your Halloween diy spider place card holder is now done.
Yay! Isn’t it cute and creepy?
And SO easy!

Enjoy using them at your Halloween party for the table’s place settings. Or you can use them to identify food dishes on a buffet table.
Wanna see them in action? Check out the place card holders on my creepy Halloween table setting.
*Optional additional place card holder diy step
If your spider place card holders for Halloween are a little top-heavy, take a small black magnet (or a penny) and glue it to the base of the cork plug. That will provide additional weight and stability to the holder. You can then take a black sharpie and color the edge of the penny so it blends with the rest of the Halloween place card holder.
Shop for DIY Supplies

Spider Rings
Black Spray Paint

Cork Plugs

Wooden Skewers

Mini Clothespins