This pretty Galentine’s Day table setting is perfect if you’re planning to celebrate Valentine’s Day with your girlfriends. You can easily recreate it.
It’s not filled with hearts and Valentine’s decor, but it’s girly, has pink, and I’m sure your besties will love it.
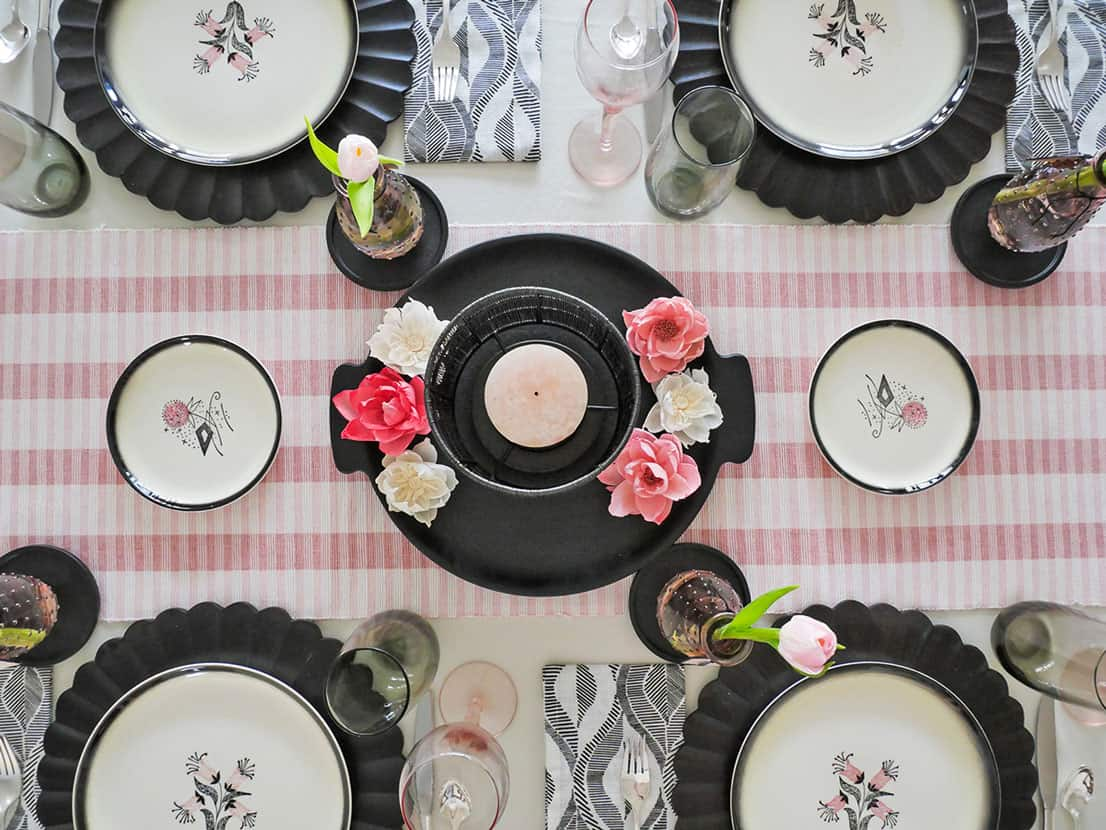
The inspiration for my pink and black Galentine’s Day tablescape was a set of plates I found at an estate sale. I immediately fell in love with them. They’re SO unique!
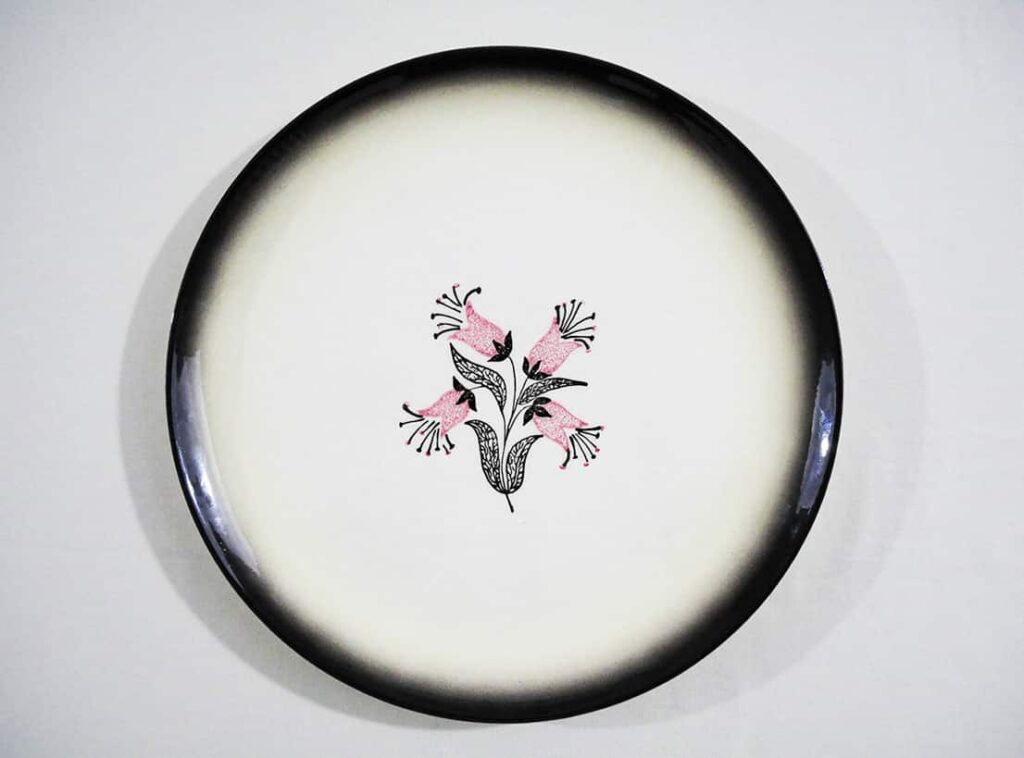
Totally mid-century modern.
I mean ~ they’re actually from the 1950s!
Aren’t they perfect for a table to celebrate Galentine’s Day with my besties? They aren’t too girly. But they’re obviously feminine.
Love ’em!!
Any-whoo. I knew they’d be perfect for Galentine’s Day, or even a pretty Valentine’s Day table setting.

* Now, I know I’m gushing over the plates used in this table setting, but if you want to recreate this table’s look, don’t worry about finding similar dishes. You can easily use solid color plates instead. Pink or cream will look great too.
The other thing about creating this pretty Galentine’s Day tablescape is it incorporates, new pieces with old pieces. It’s not about going out and buying a ton of stuff just to entertain your girlfriends.
Start with what you already own and then build from there.
How to Create a Pretty Galentine’s Day Table Setting
Watch how I create the table setting…
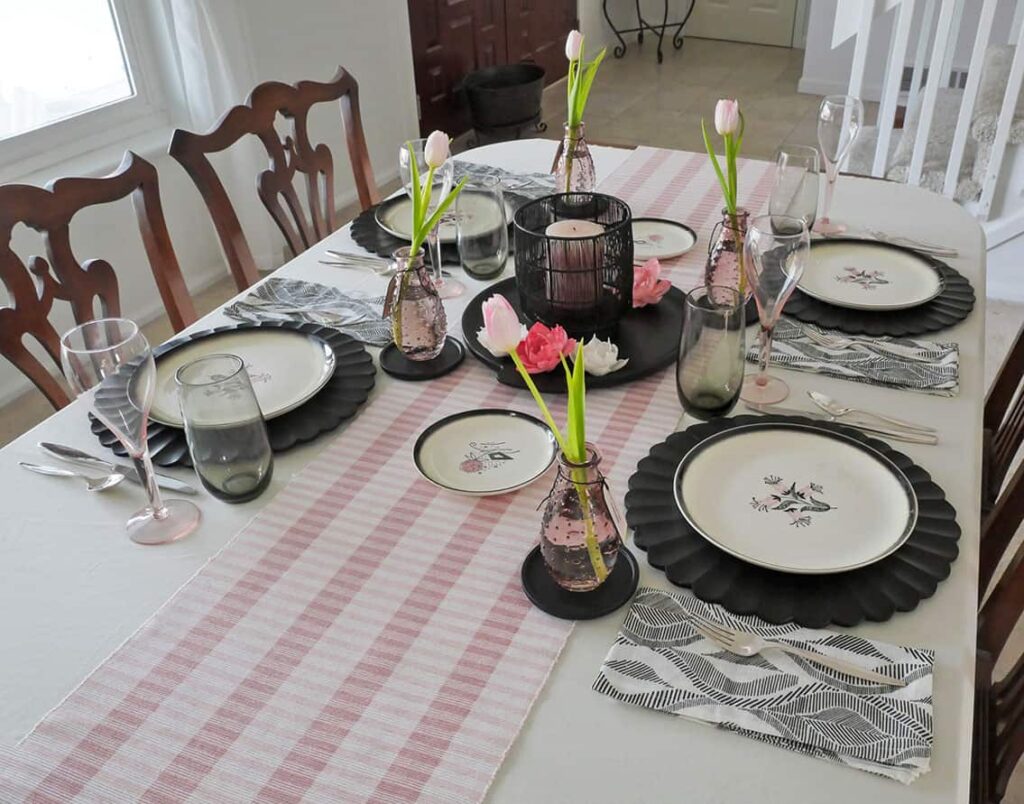
When I started creating this pretty Galentine’s Day table setting, I knew I’d need to stay true to the mid-century look of the plates. This meant the tablescape needed to have clean lines and not go crazy on the embellishments.
A mid-century table setting needs to be minimal. Not over-the-top, ornate, or filled with an abundance of decor pieces.
That’s also why it’s easy to recreate a mid-century tablescape ~ you don’t need a lot of items to make it work. Less is definitely more when it comes to this design look.
1. Select the foundation for your pretty Galentine’s Day tablescape
The foundation for your tablescape is what your centerpiece and place settings will rest on.
Will you use placemats, a table runner, a tablecloth, or nothing at all?
Since this is a mid-century modern (MCM) inspired tablescape, you’ll want your foundation to be minimal in style. In fact, having a bare table totally works with MCM design.
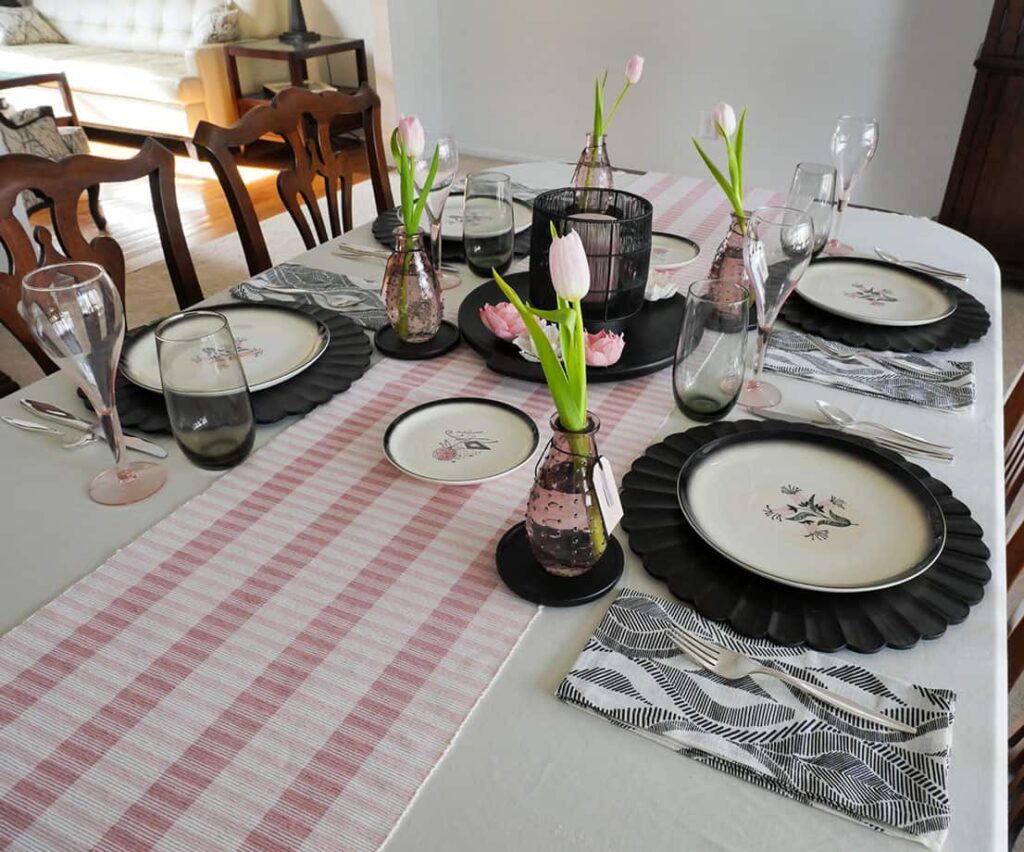
If your table is too ornate and doesn’t fit with the MCM look then cover it with a tablecloth. That’s what I did. My table is clearly not of the mid-century modern design, so covering it was the best option.
Once you decide on your foundation, then you can start building your Galentine’s Day tablescape.
I didn’t have a tablecloth that matched the color of my plates, so I opted for a piece of cream-colored polyester fabric.
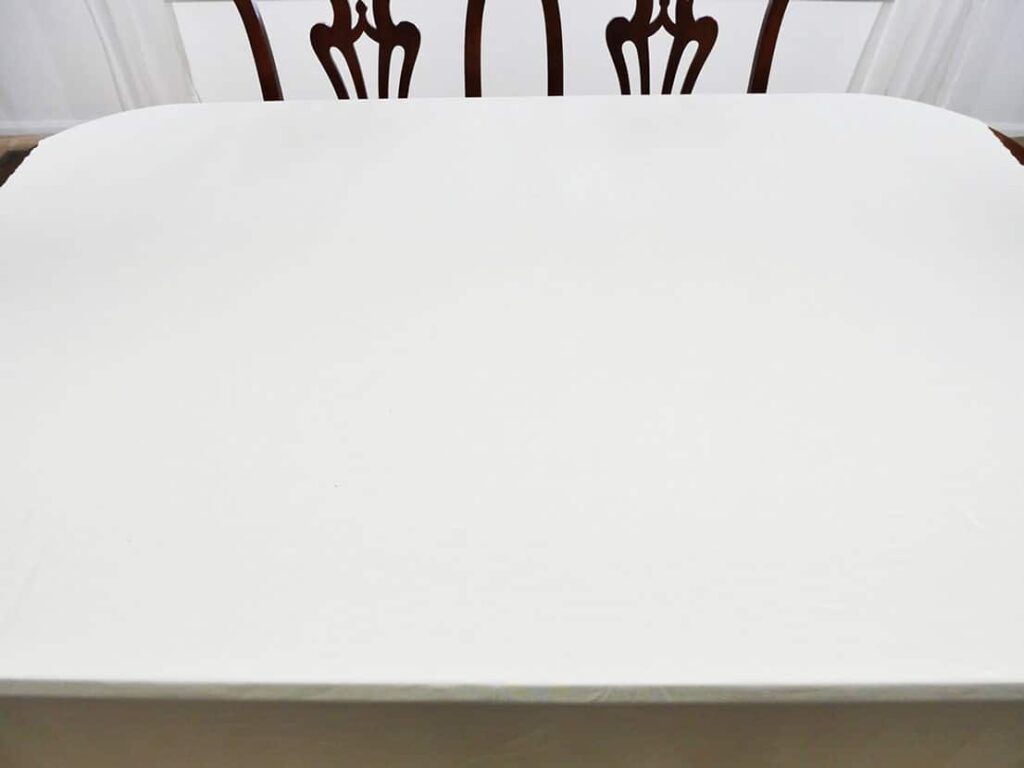
Since the fabric was 100% stretchy polyester, I didn’t even bother hemming it. Just left it with a raw-cut edge.
Perfect for those of you that don’t sew!
Just get a few yards of fabric and trim it to the length you need. *Make sure you know the length of your table before you go, and add 16 inches (8 inches to drape on each end).
*Note: I used fabric I already owned, which is why it doesn’t drape on the ends. But my friends wouldn’t even pay attention to that detail unless I point it out.
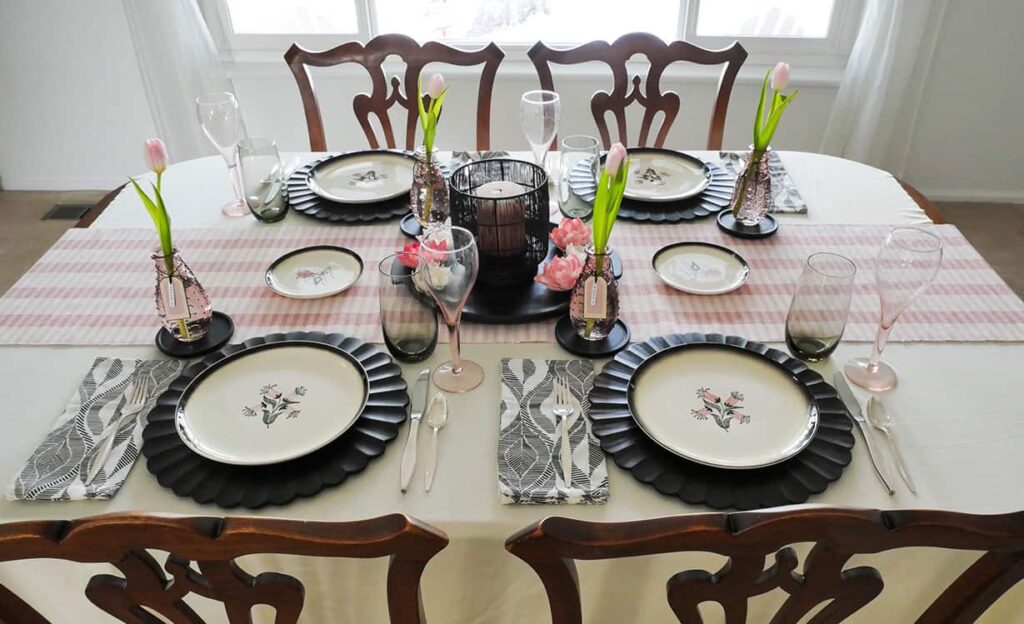
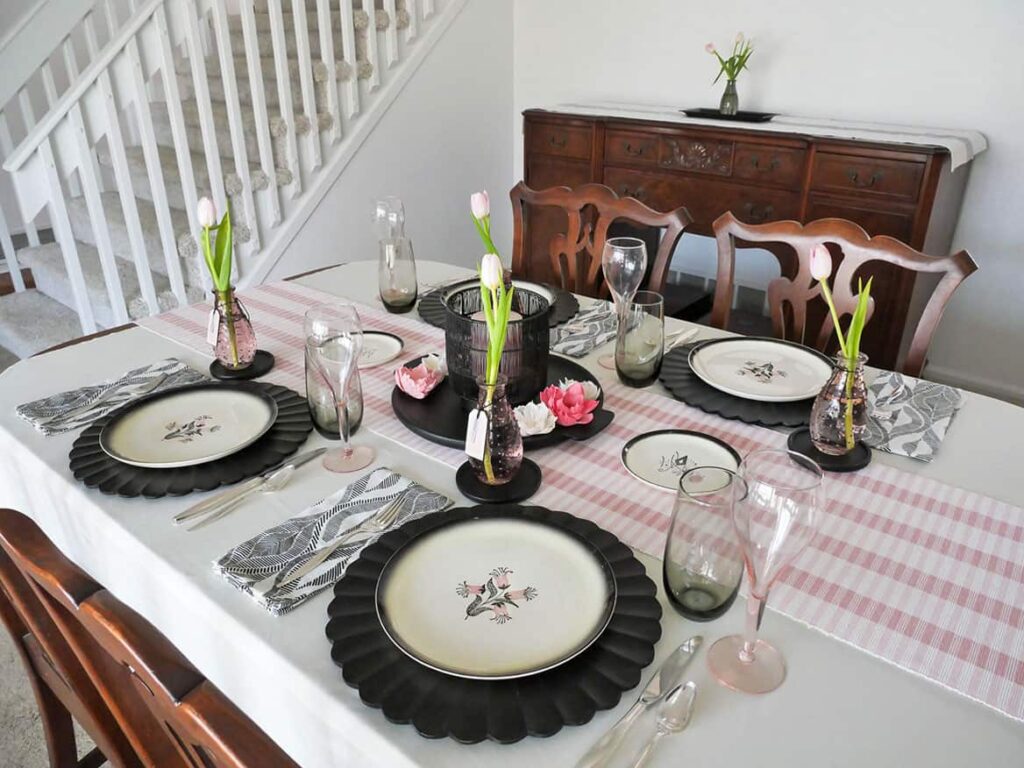
2. Create your Galentine’s Day centerpiece
Once you have the foundation on your table (unless you’re going with a bare table), it’s time to create your Galentine’s Day centerpieces.
Remember to keep it simple. This is a mid-century modern centerpiece.
The flowers on my inspiration plate were a dusty pink, so I brought my plate with me when I was looking for items for my table setting. That way I’d ensure the colors would match.
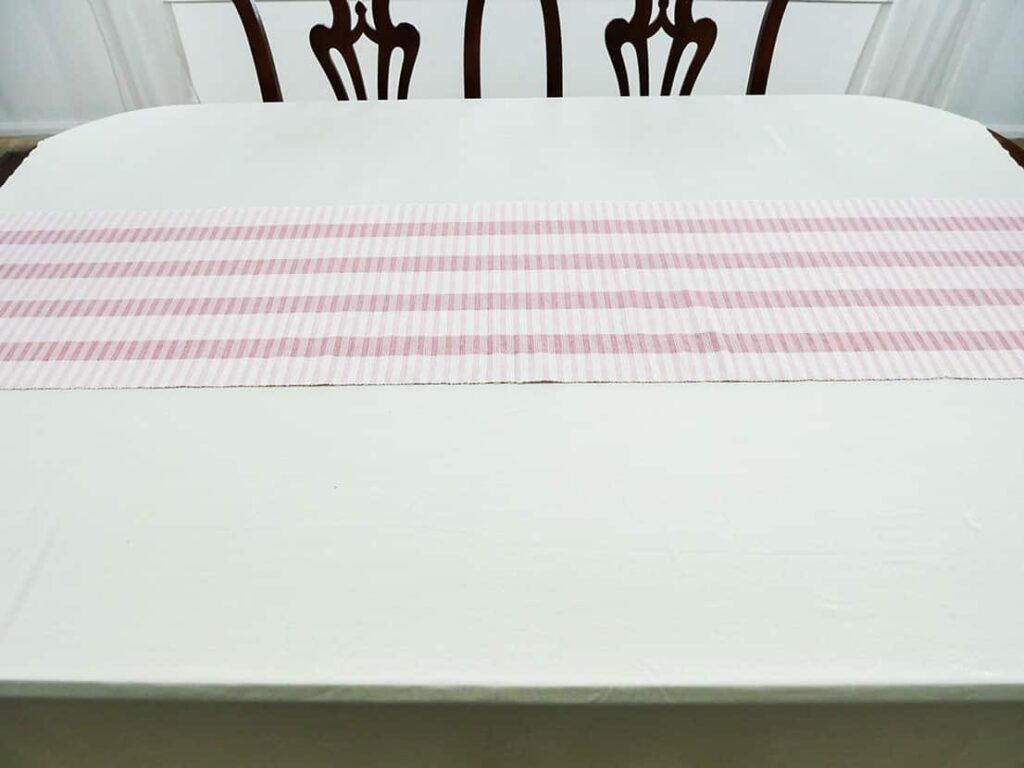
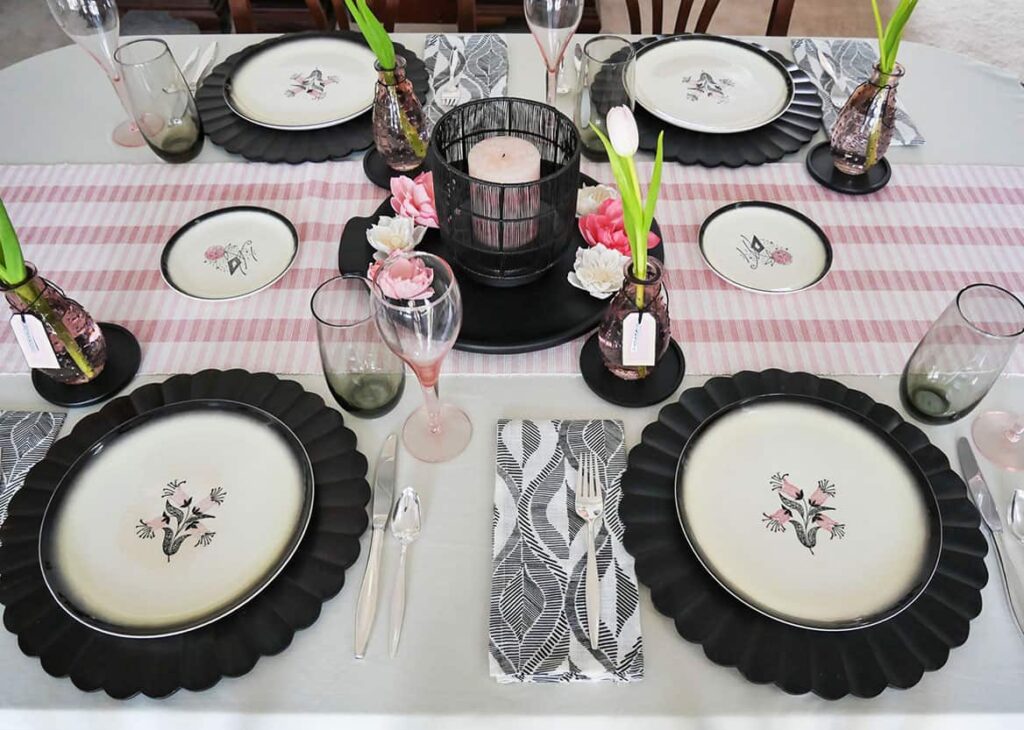
I found this two-tone light pink runner at Target. It matched the pink on my plate perfectly and worked well with their design.
(I know because I brought my plate with me when I was shopping.)
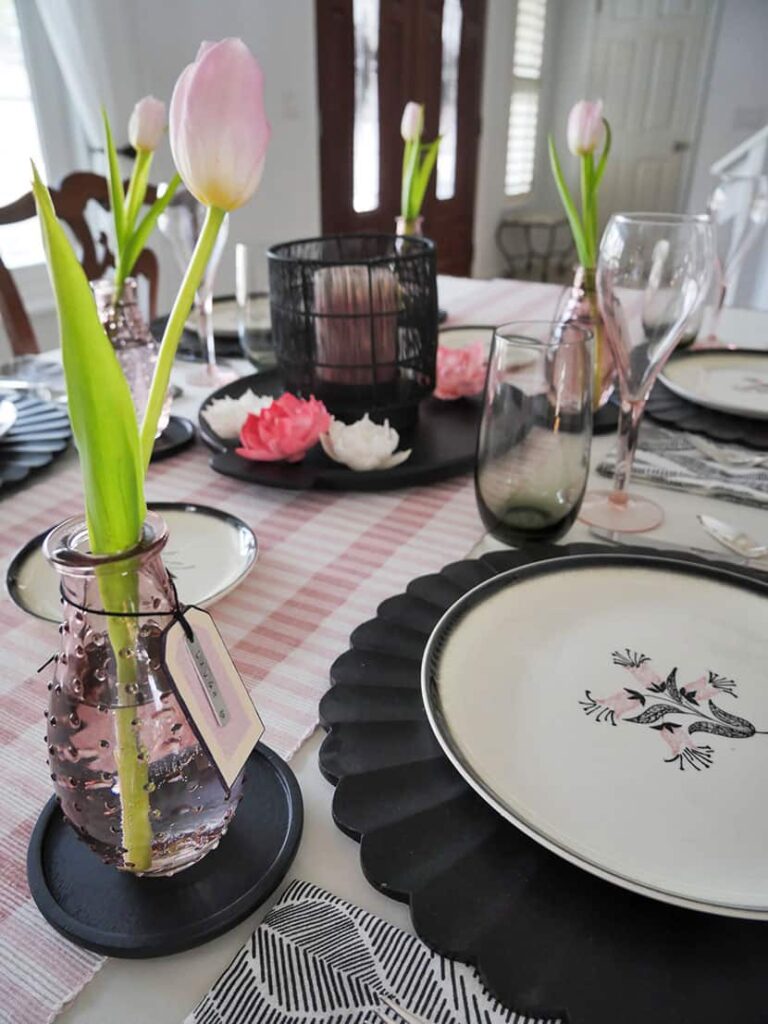
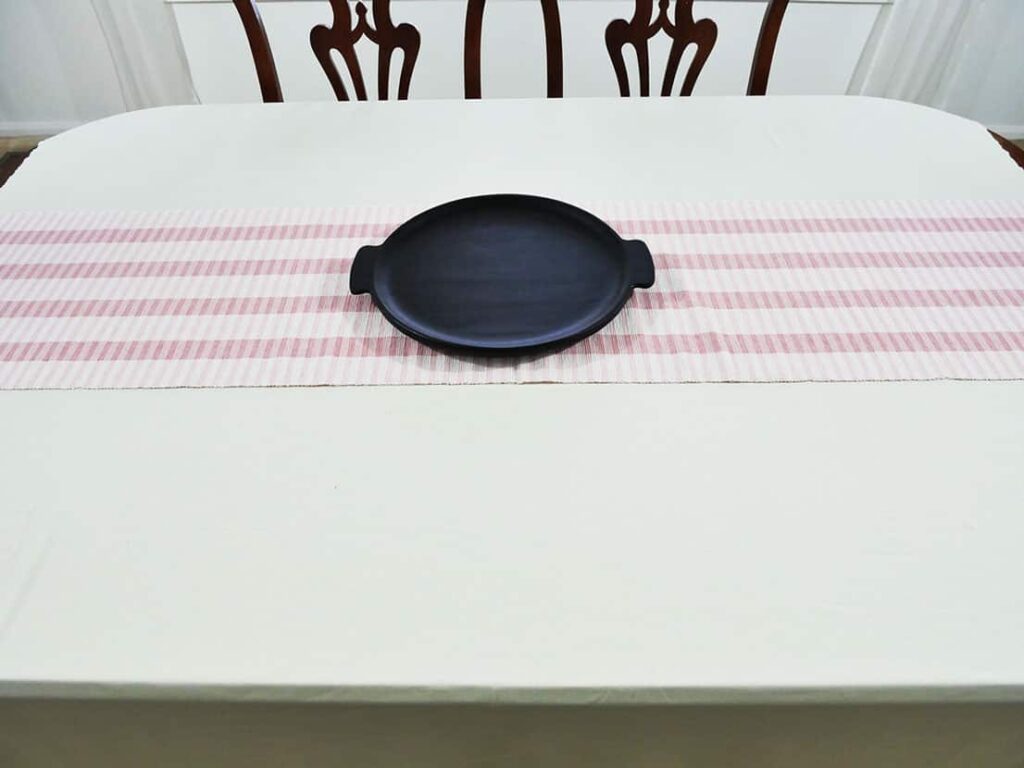
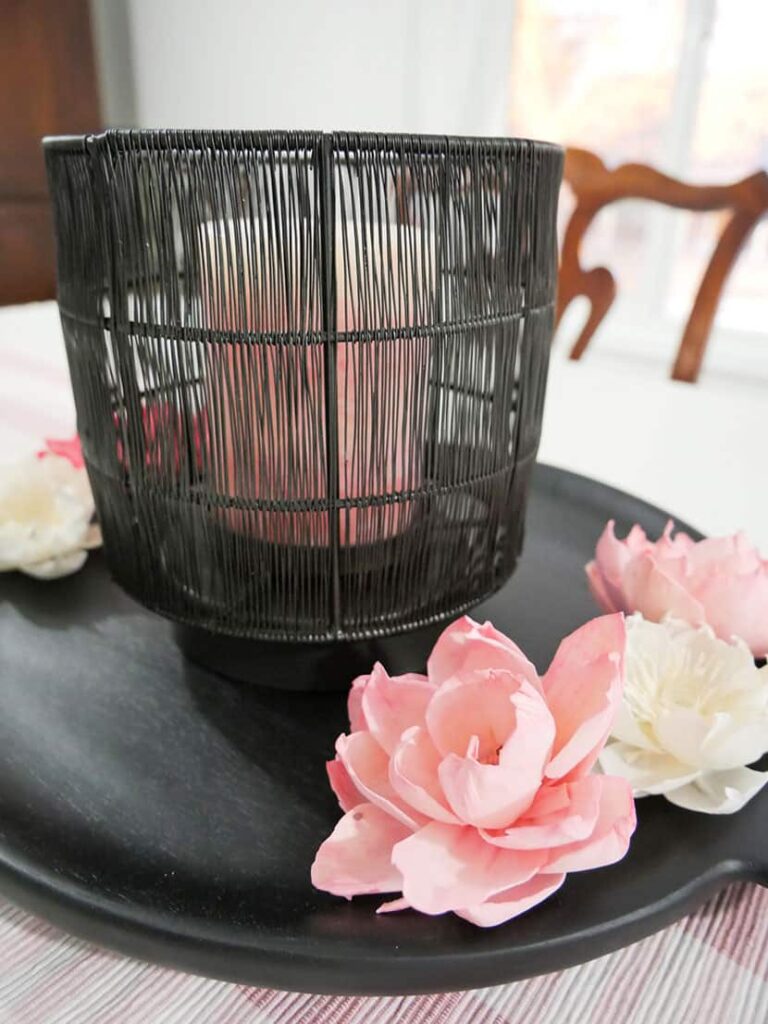
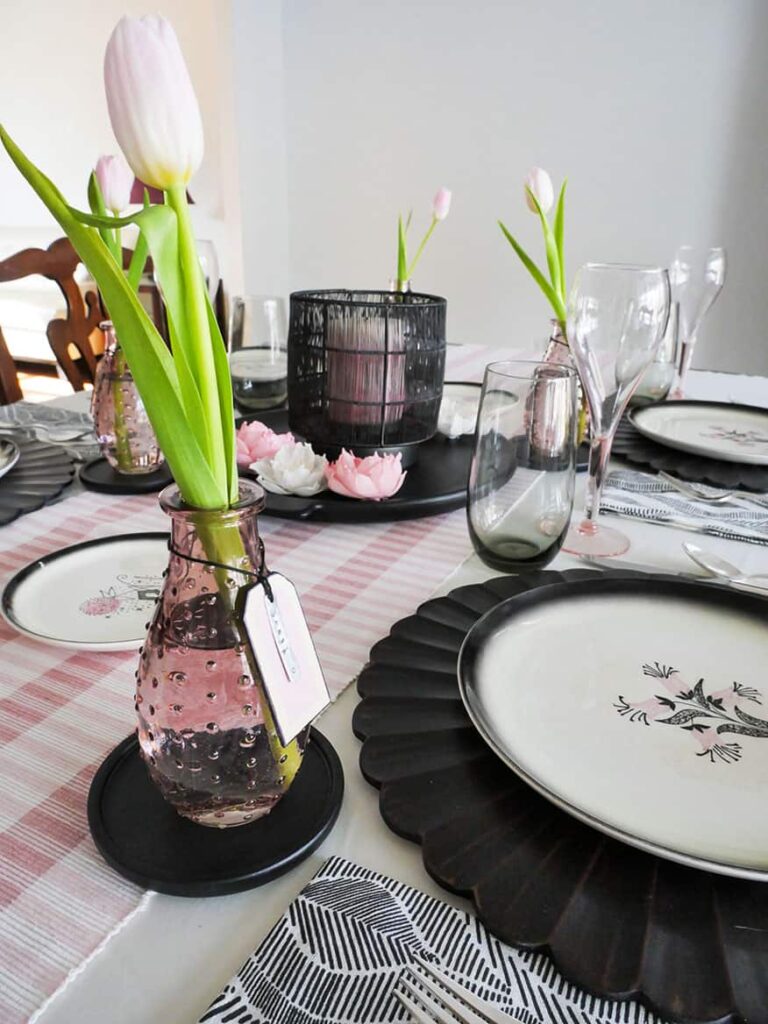
Then I added a large black wood platter in the middle of the runner, and I placed a large round candle holder on top of the dish.
I found the candle holder at World Market. The metal cage of it echoed the line details in the flowers on my plate. Plus it had that simple MCM aesthetic.
Perfect!
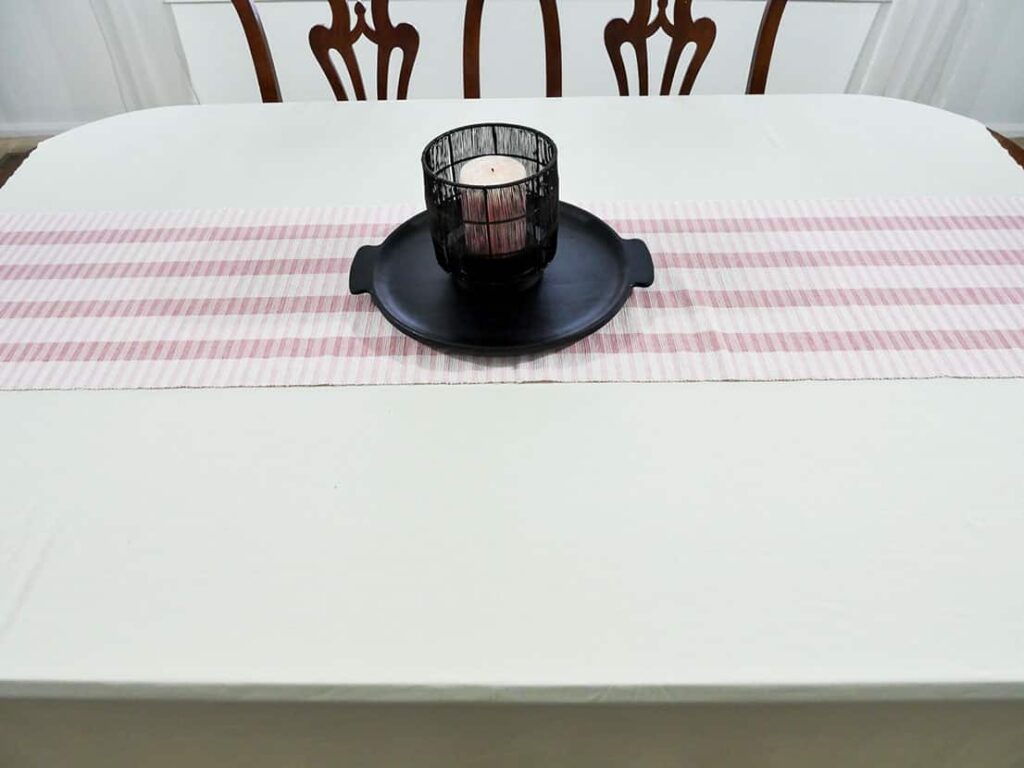
Next, I added a pink candle that matched the pink on the plates and added a few sola wood flowers around the platter.
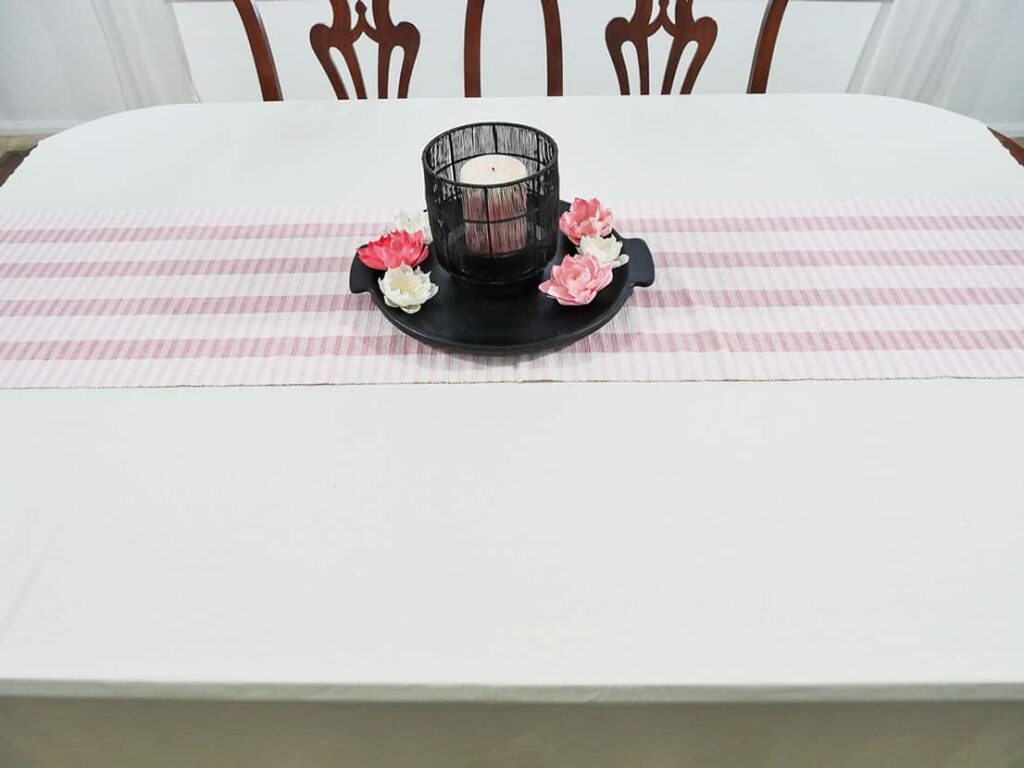
I love sola wood flowers because you can color them to match your table decor. They’re naturally cream in color, but you can transform them into any color you want.
I had a few pink ones I’d already dyed that happened to match perfectly. Total luck!
(Check out this post to see how easy it is to color these awesome flowers: DIY Dyeing Sola Wood Flowers: How to Instructions)
To complete the centerpiece for my pretty Galentine’s Day tablescape, I added two small plates that matched the dinner plates. The center design wasn’t the same, but that doesn’t matter, as it’s the perfect complement.
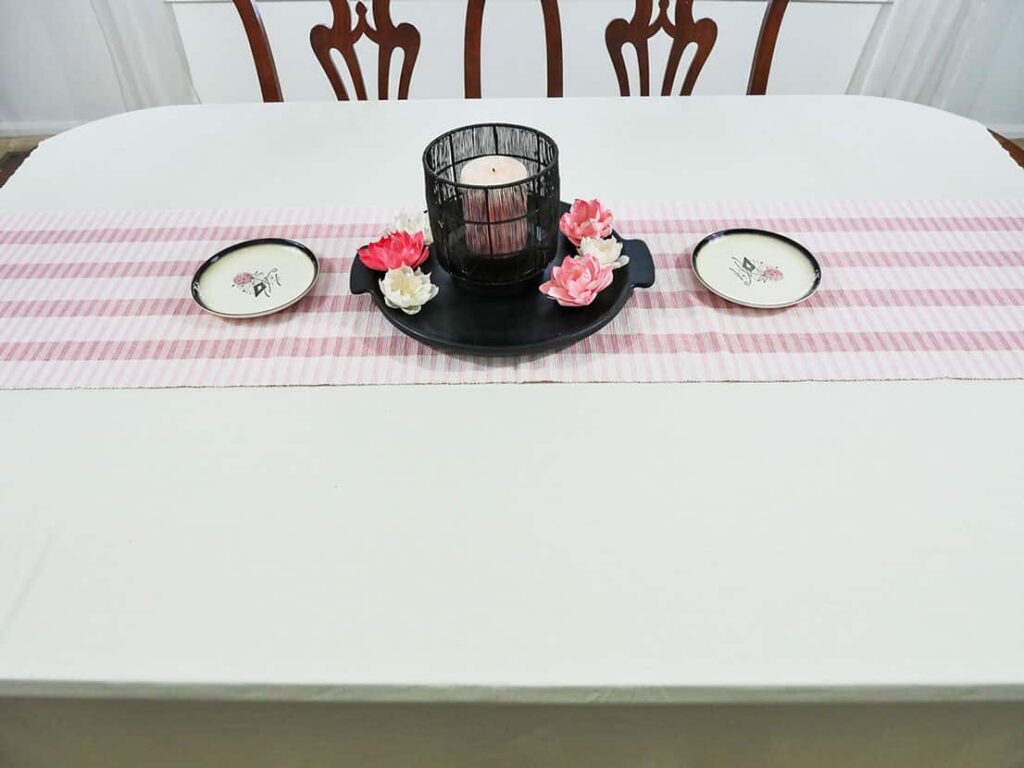
That’s it. Super simple and easy to copy!
*Tip: if you have an inspiration piece for your table setting, bring it with you when you’re shopping. That way you can match colors and styles, and not go off your memory.
3. Create the place settings for your retro Galentine’s Day table setting
After you have your Galentine’s Day centerpiece done, start setting out the place settings.
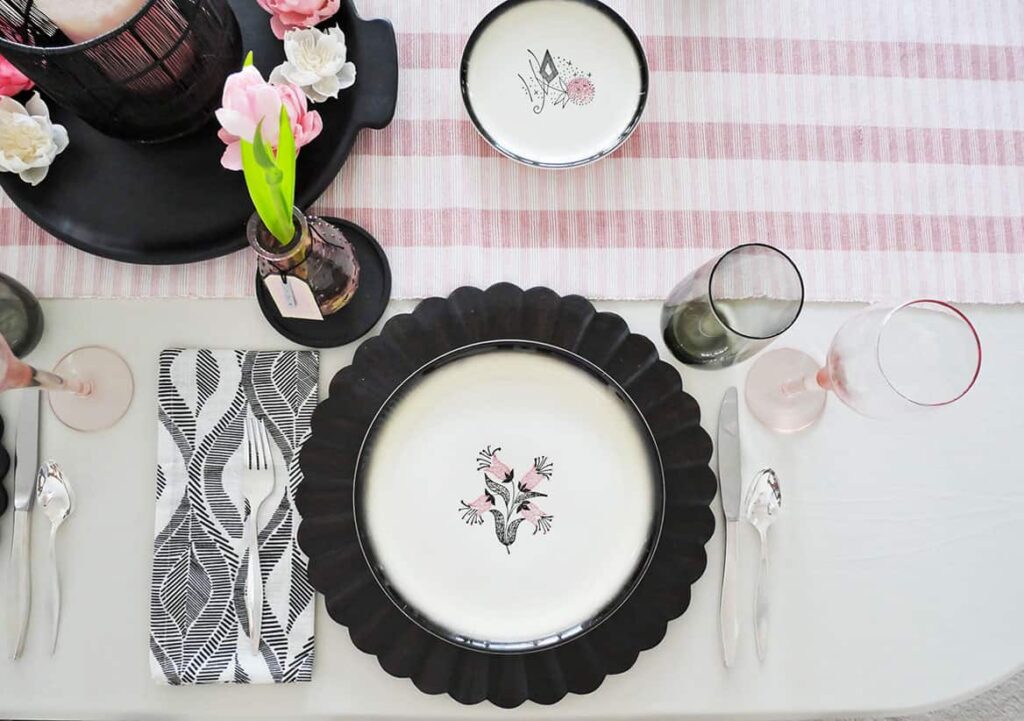
I like starting with charger plates. They don’t serve a purpose, except to enhance the look of the table setting.
I started with black wood scalloped chargers I’d found at a secondhand store. I knew they’d be perfect for this tablescape.
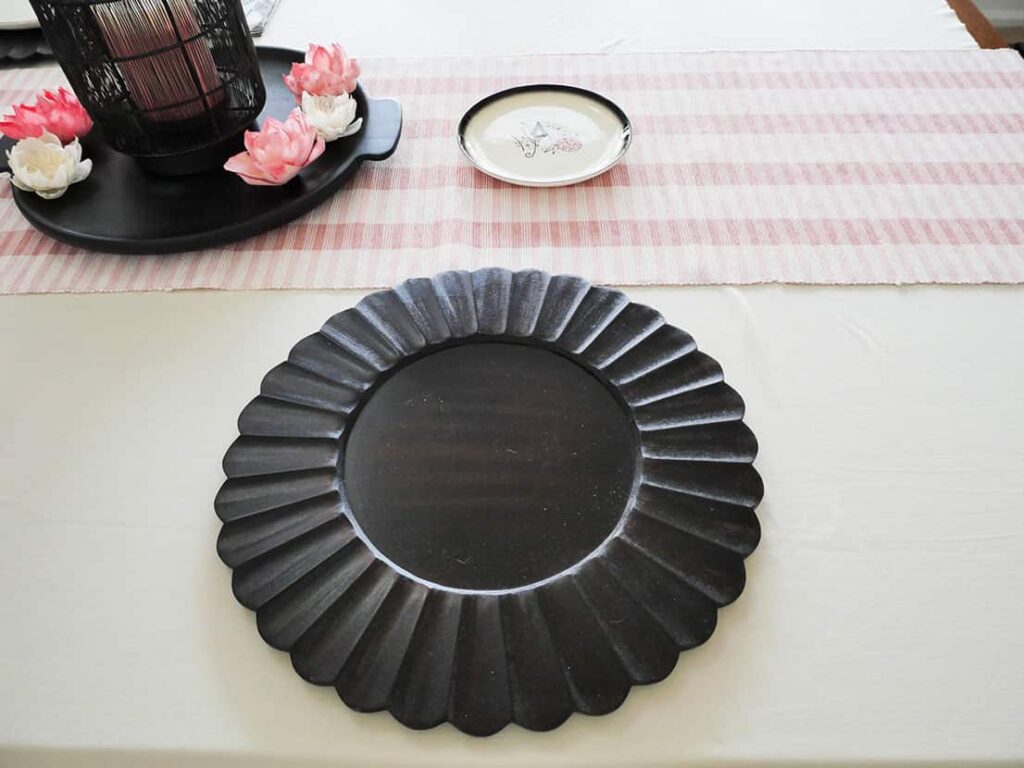
Don’t they make you think of a flower?
And how the black pops off the cream tablecloth ~ yep!
Then I added my pretty mid-century modern plates.
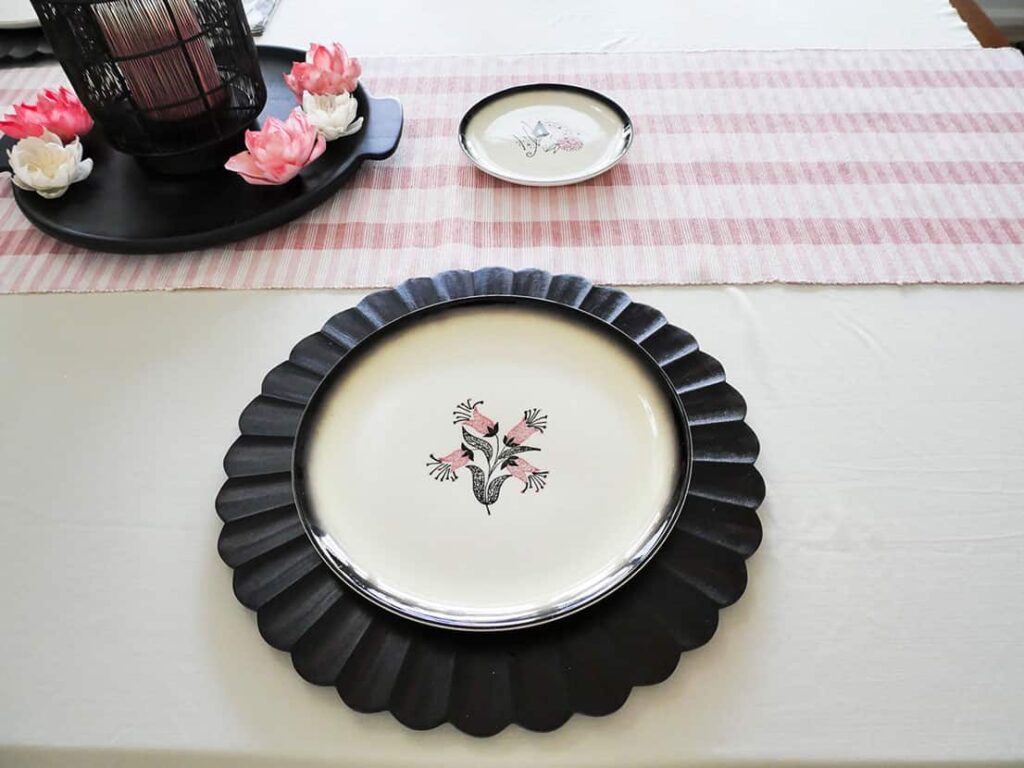
Love it!!!
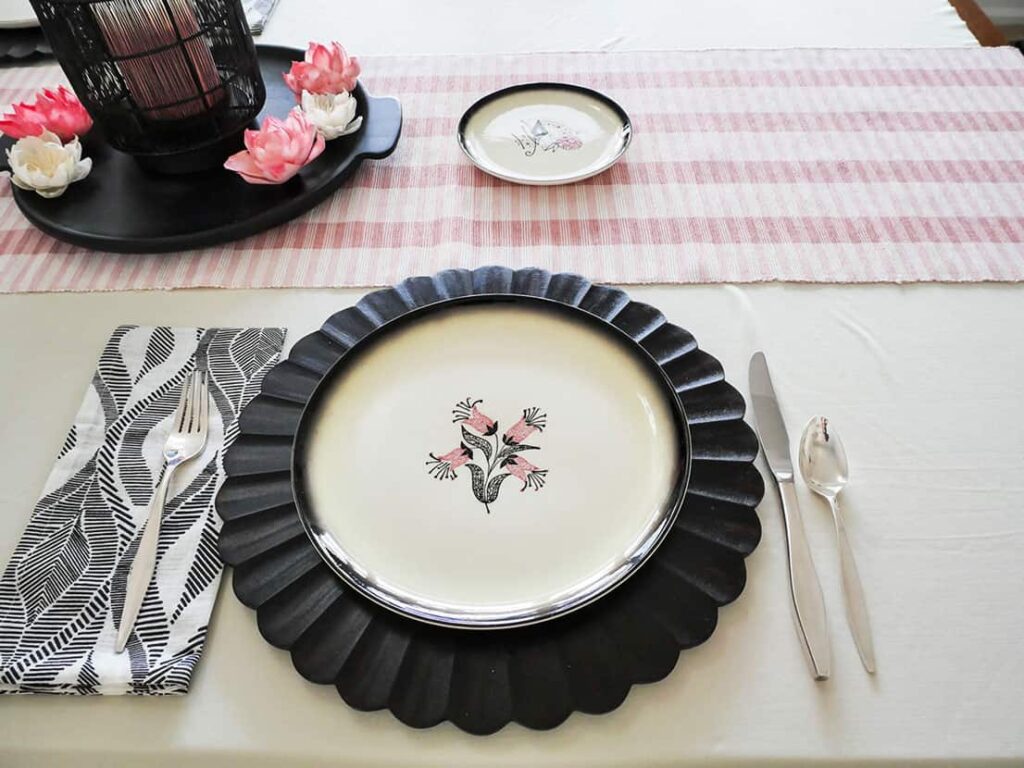
Next, I added napkins to the left of the charger. I found them at World Market. They’re cream-colored, and I love how the black detail design complements the detail in the flowers on the plate, and the lines of the candle holder. Plus, they don’t distract from the plates.

On top of the napkin, I added a dinner fork, and to the right of the charger, I added a knife and spoon. I didn’t need any other utensils, as I’m not including a salad plate or soup bowl. Plus I didn’t want to cover the dinner plate’s design. After all, it was my inspiration for this pretty Galentine’s Day tablescape.
To complete the place setting, I added a smokey gray water glass (also from World Market) above the knife and a pink wine glass I’d picked up at an estate sale to the right of the water glass.
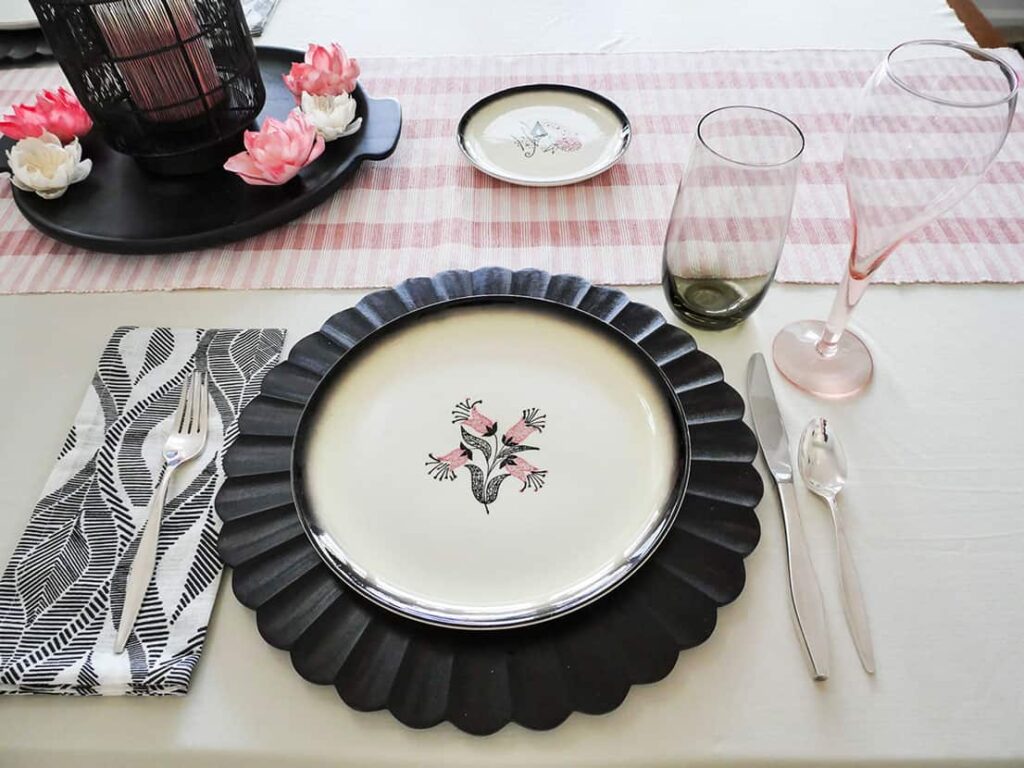
I love using the two different colors and how they look on the table. Plus their clean lines are a perfect match for the MCM design,
*Estate sales are GREAT for finding deals on dishes and glassware. Especially if you don’t want to spend much, and might only use them a few times. You won’t feel like you’re investing in something that’s barely used.
4. A little something for your besties
To complete my pink and black Galentine’s Day table, I wanted to have a little something for my besties. Something they could take home.
So I placed a black wooden coaster with a cute pink bud vase on the upper left side of each place setting. I felt that the coaster grounded the vase to the table, and provided a little more black to the tablescape. It also helped the light pink vase stand out on the table.

Then I added a fun diy memento around each vase and filled each vase with a tulip. Because the dinner plate had tulips, I HAD to use tulips on my table. And I was SO lucky that my store had the perfect tulips with a hint of pink.

Of course, you can use roses for your Galentine’s or Valentine’s Day tablescape, or any other flower that will match your table setting.
It’s just fun to provide a cute gift for your friends. It makes the gathering extra special.
5. Finishing touches
After your stylish Galentine’s Day tablescape is complete, take a look around your room. Are you able to incorporate any of the table setting design elements into the room?
I have a buffet next to my table. Adding a design element from my table on top of the buffet is a great way to bring the room together.
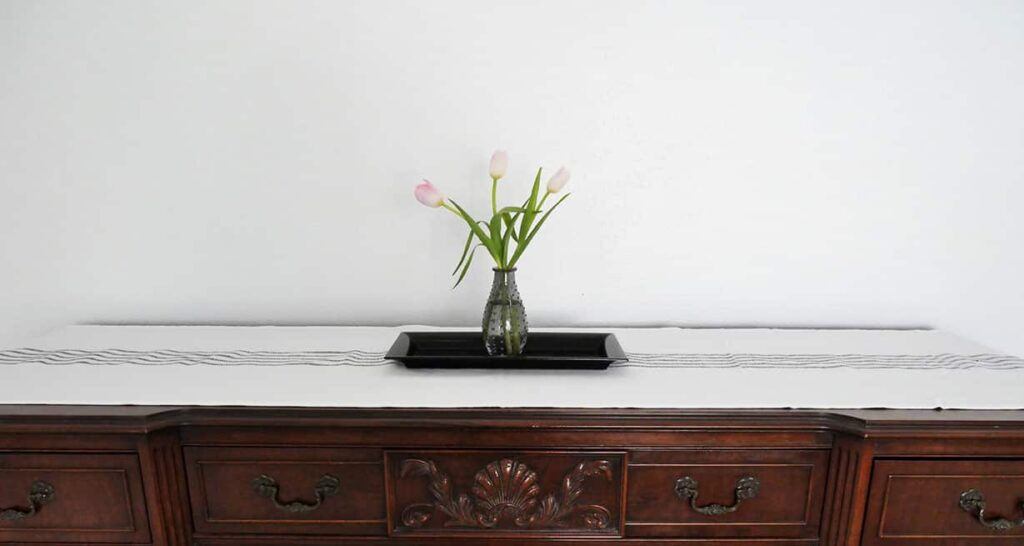
As you can see, I kept it super simple.
Just a table runner with a black tray that held a smokey gray vase (which matched the pink ones on the table) holding three tulips.
Not only did this coordinate with my retro Galentine’s Day table setting, it also allowed space for adding food dishes during the party.
The Key for How to Decorate a Table for Galentine’s Day
The key to decorating your own tablescape for Galentine’s Day is to start with a piece that inspires you. Something that you want to build off of. Something you want to represent the look of your whole table setting.
Then look around your home and see what you already own that works with that piece. Look for items of the same color or design style.

Next, see if you already own items that coordinate with your inspiration piece. They might not be the same pattern (like my dinner and small plates), but if the colors or design match, they will probably look good together.
And finally, figure out what you don’t have that you need to shop for. Don’t forget to bring your inspiration piece with you!

It sucks to buy items you think will match, only to bring them home and they don’t look good together. Which means more shopping and needing to return the pieces.
But most important ~ enjoy the process!
Enjoy learning how to decorate a Galentine’s Day table setting that your friends will love. And have fun!!
Check out the easy DIY projects used to decorate this tablescape:
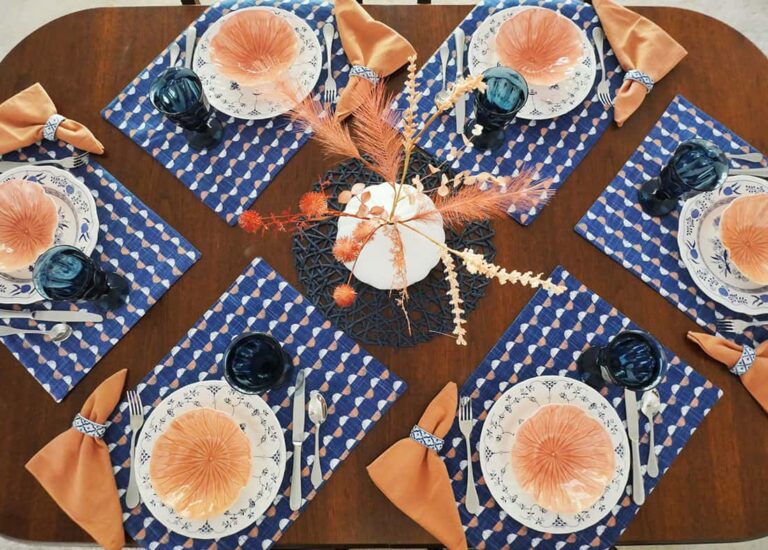
Check out other table settings:
- Create a Simple Hot Cocoa Station
- Simple Galentine’s Day Tablescape
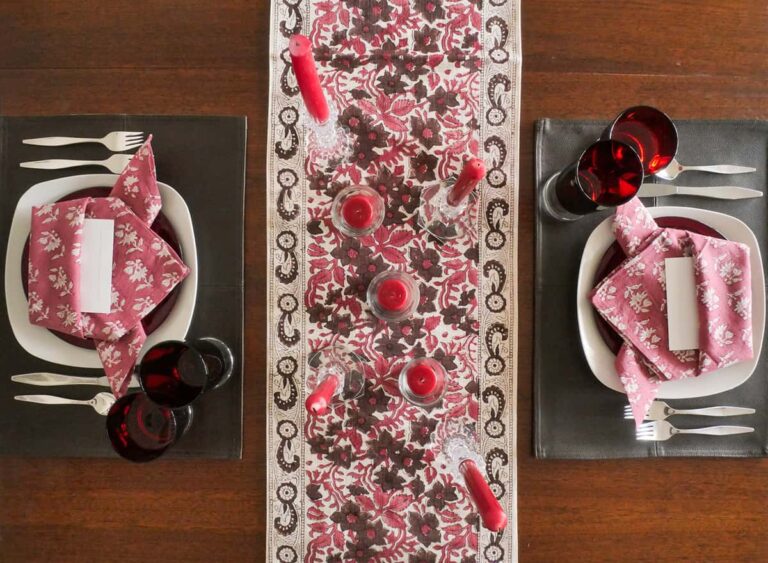
- Romantic Table Setting for Two for Valentine’s Day
- Festive Mardi Gras Tablescape
- Create a Fun Mardi Gras Party Buffet
- Simple DIY Winter Wonderland Tablescape
- Coastal Grandmother Table Setting
- Setting a Pretty Table for Your Girlfriends: Pink & White