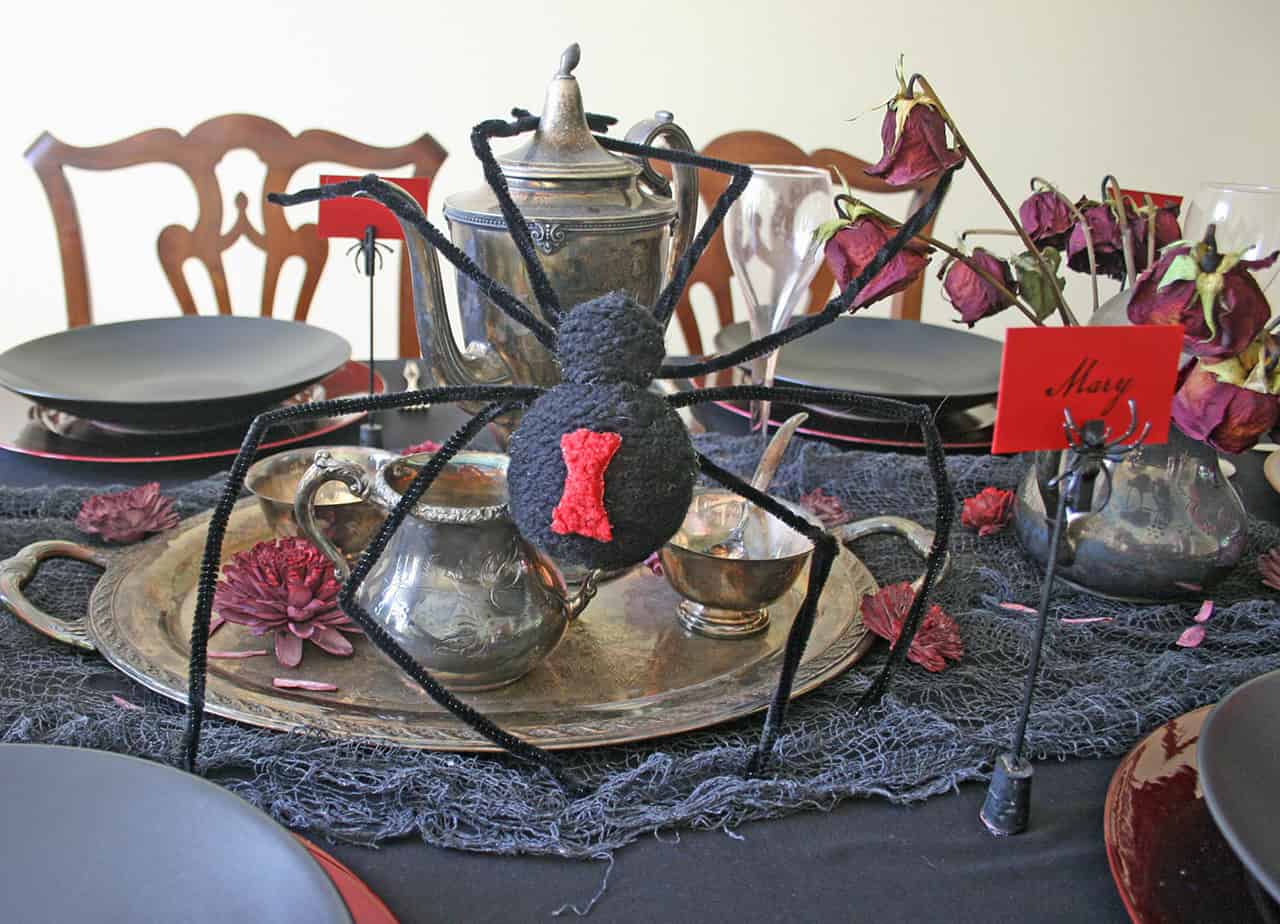
Creepy, crawly spiders are synonymous with Halloween. So making these easy large diy fake spiders was a perfect project for my Halloween tablescape. Plus, they make great Halloween table decorations.
Bonus!
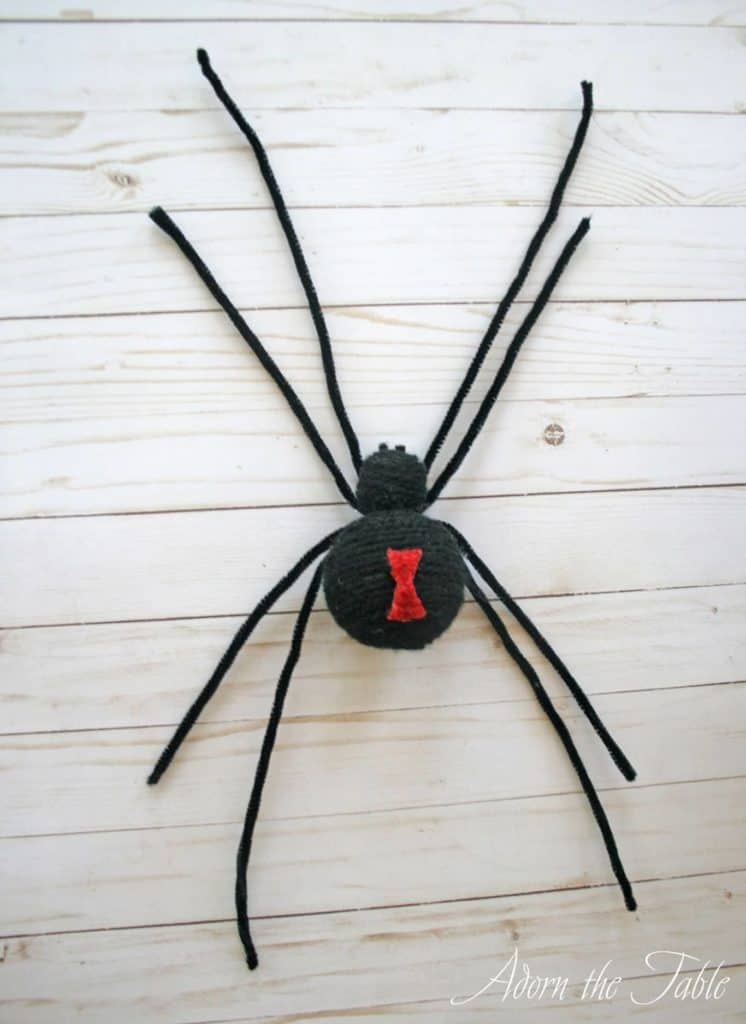
There is something about a large, black furry spider that just sends chills through me. Especially a Black Widow spider.
Even these simple diy oversized spooky spiders give me the heebie-jeebies!
Yuck!!
Are you the same way?
Halloween is the only time I will allow spiders in my house – lol!
Check it out below. Making large spiders for Halloween decorations is fun and easy.
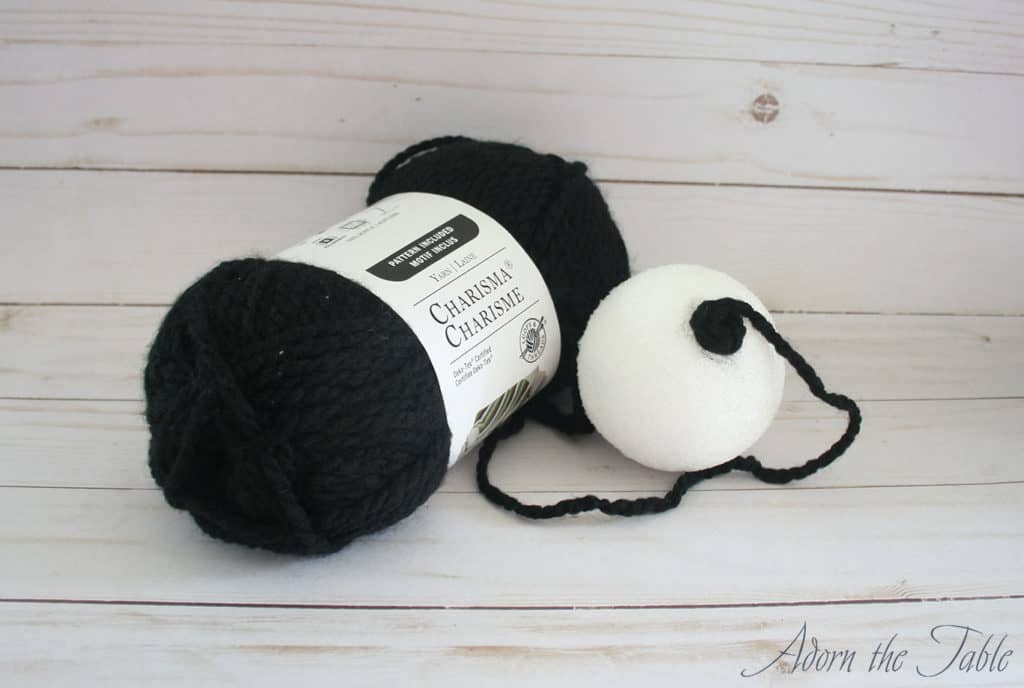
Supplies to Make a Big Spider for Halloween
Please note that this article may contain affiliate links. I may get commissions (at no cost to you) for purchases made through these links. You can read my full disclosure for more details.
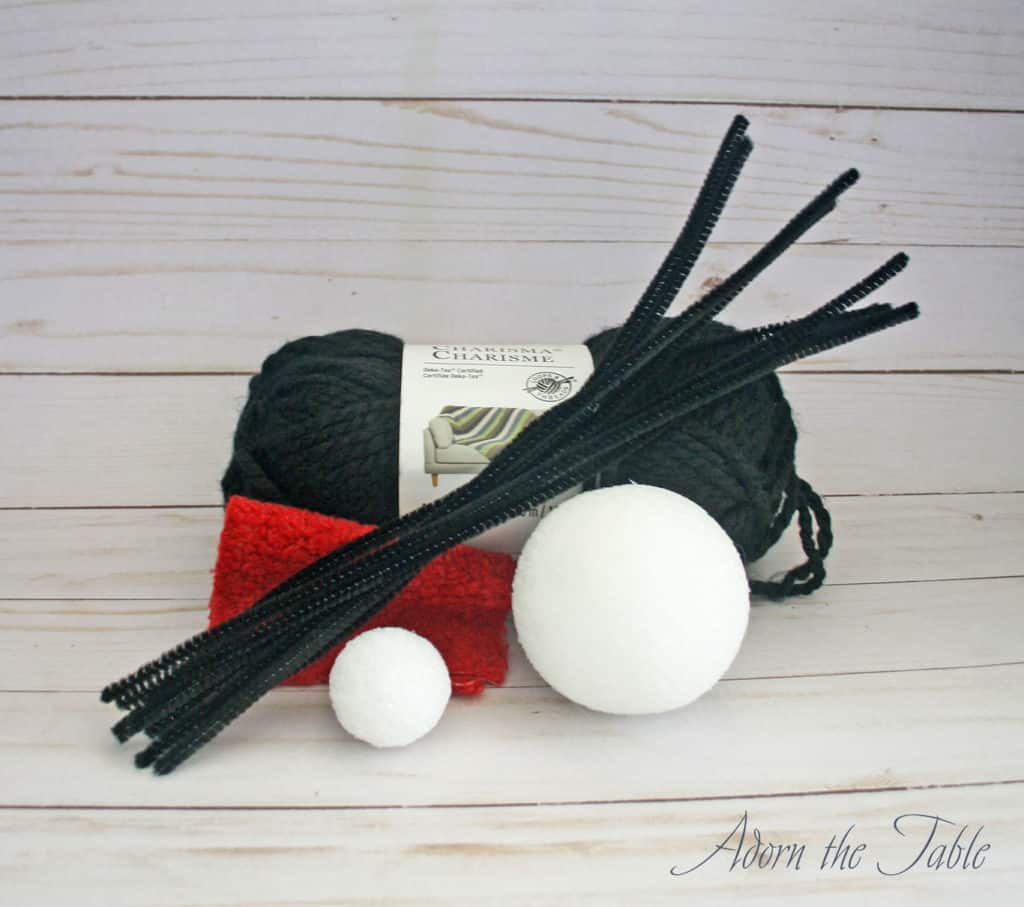
- Styrofoam balls – 2 sizes
- Large for the body
- Small for the head
- Black yarn (I used this furry yarn)
- Black pipe cleaners (chenille stems)
- Red fuzzy felt
- Glue
How to Make a Large DIY Fake Spider for Halloween Decorations
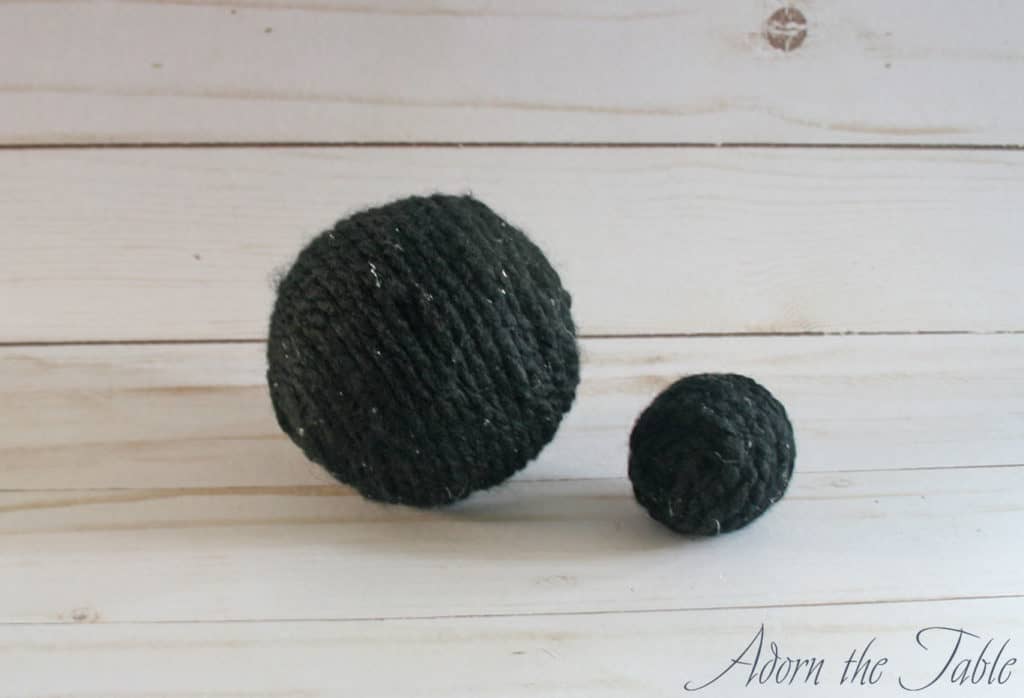
Step 1: Making the Fake Spider’s Body
Starting at the top of the large Styrofoam ball, place a dot of glue and then the end of black yarn on the glue. Add a little more glue around the yarn end and start wrapping the yarn around the Styrofoam in a tight circular pattern.
Continue to add glue to the ball, and yarn on top of the glue, until the whole ball is covered in black yarn.
This will be the body for your large diy fake spider.
Step 2: Make the Head for the DIY Spider
Do the same thing with the small Styrofoam ball and completely cover it with the black fuzzy yarn.
This will be the head of the oversized Halloween spider.
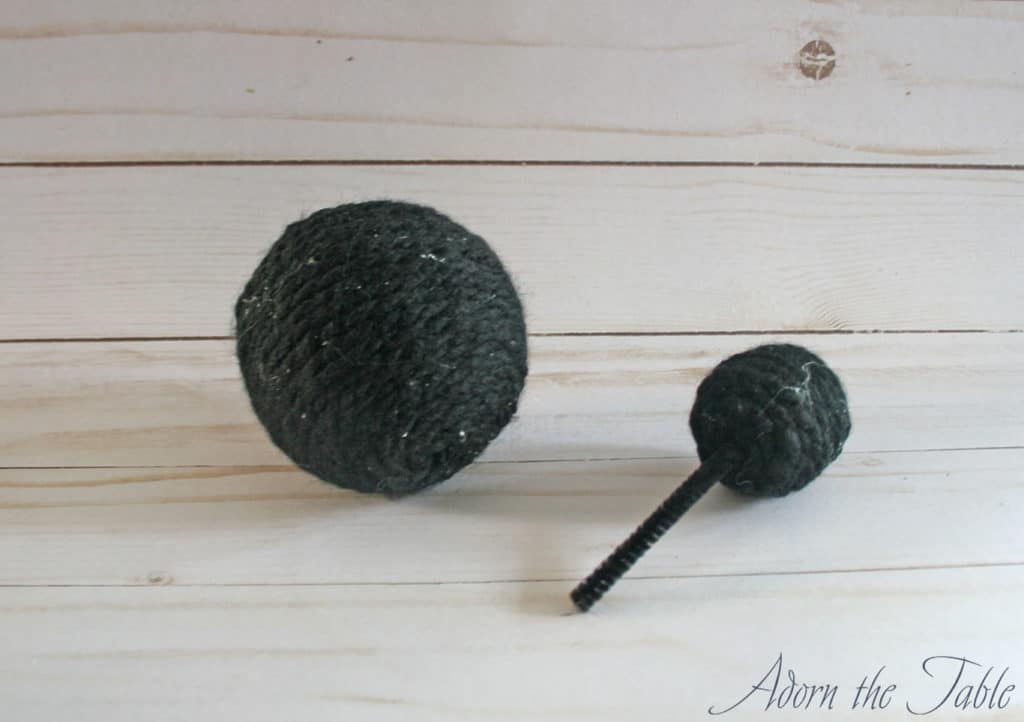
Step 3: Connecting the Head & Body
Cut a 2” piece of pipe cleaner. Put a dab of glue on one end and push it into the large ball. Then put a dab of glue on the other end and push it through the small ball, until you don’t see any pipe cleaner and the two balls are connected.
Step 4: Adding the Large Spider’s Legs
A Black Widow spider’s four front legs point forward, and the four back legs point backward.
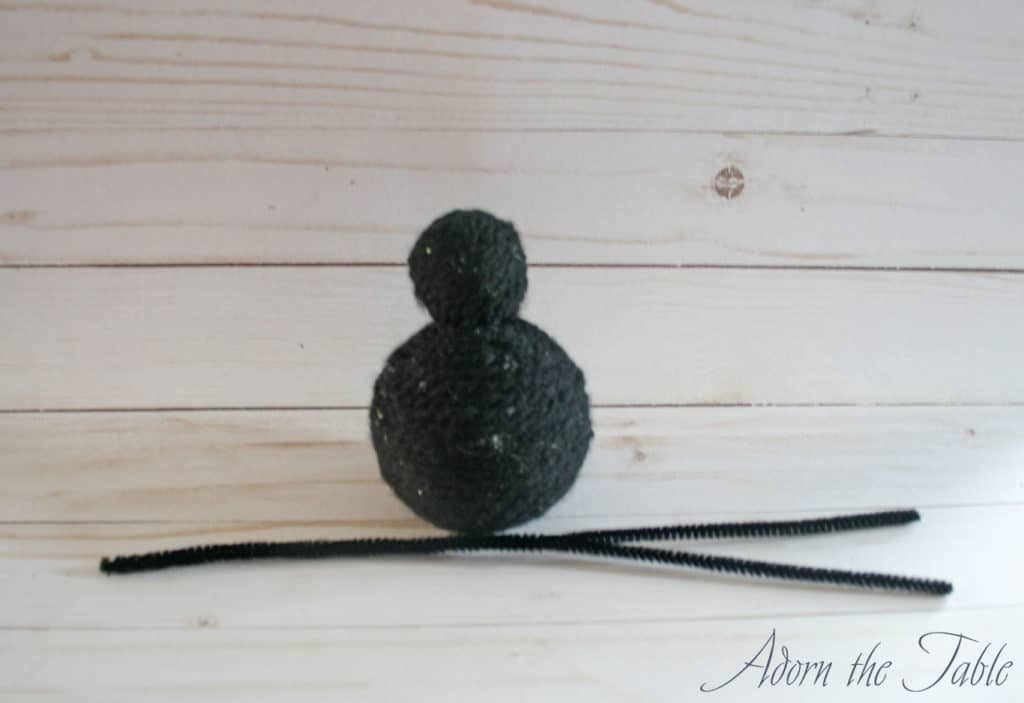
I found that adding the front legs to the base of the small ball (the head) and adding the back legs to the large ball (the body), made it look more realistic.
To add the legs, dab a bit of glue on one end of a pipe cleaner and push it through the Styrofoam ball. Continue to do this for each leg.

Step 5: Adding the Red Hourglass
Black Widow spiders have a red hourglass shape on the top of their bodies. To replicate this look, cut out an hourglass shape from a piece of red felt.
Here is how I made an hourglass shape:
- I first cutting a rectangular piece the length of the hourglass
- Then I folded the rectangle in half lengthwise
- I made two cuts from the fold, out to the ends of the rectangle. Making an almost triangular shape when it was folded.
- When the felt is unfolded, it looks like an hourglass
Glue the red felt hourglass to the top of the spider’s body
Final Step: Shaping the DIY Large Furry Black Widow Spider
You will most likely need to manipulate the spider’s legs to go in the desired direction and angle in such a way to look like a real spider. Have fun with this last step, as you can make it look like the spider is crawling, or stationary.
Now add your Halloween spider diy decoration to your table setting or other places throughout your house.
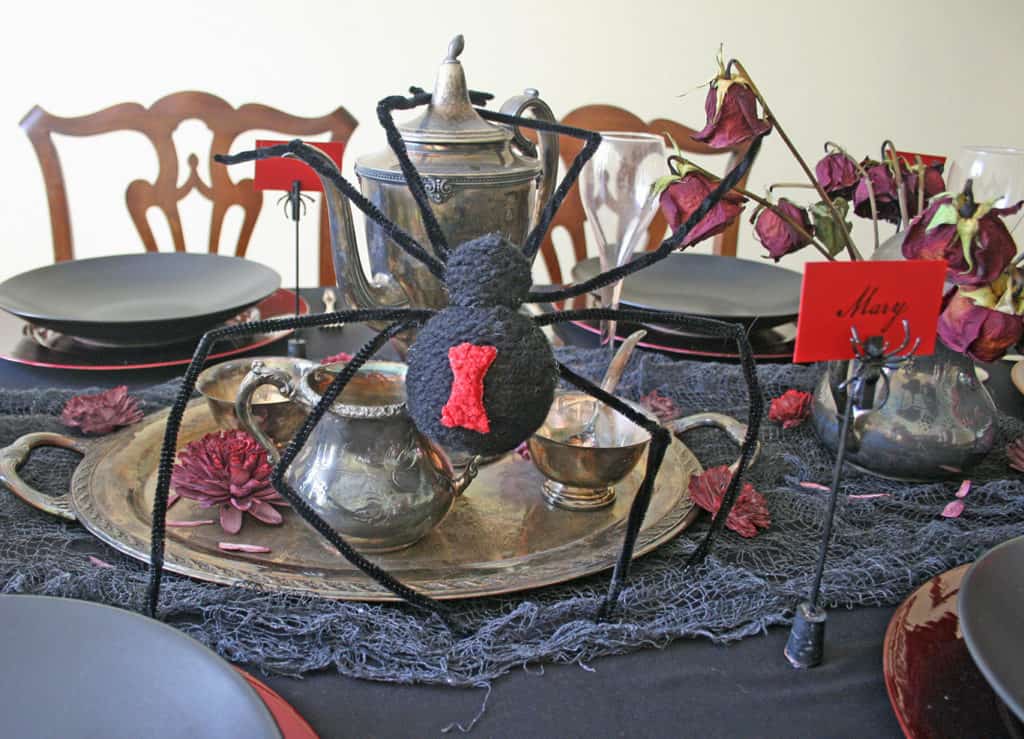
Just looking at these oversized Halloween spiders on a table gives me “the willies”. Check them out on my creepy Halloween tablescape.
Eww!
Enjoy decorating your home, or table, with these great big spooky diy spiders.
Shop for the DIY Supplies

Small Styrofoam Balls

Large Styrofoam Balls
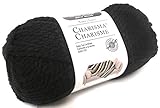
Black Yarn

Black Pipe Cleaners

Hot Glue Gun