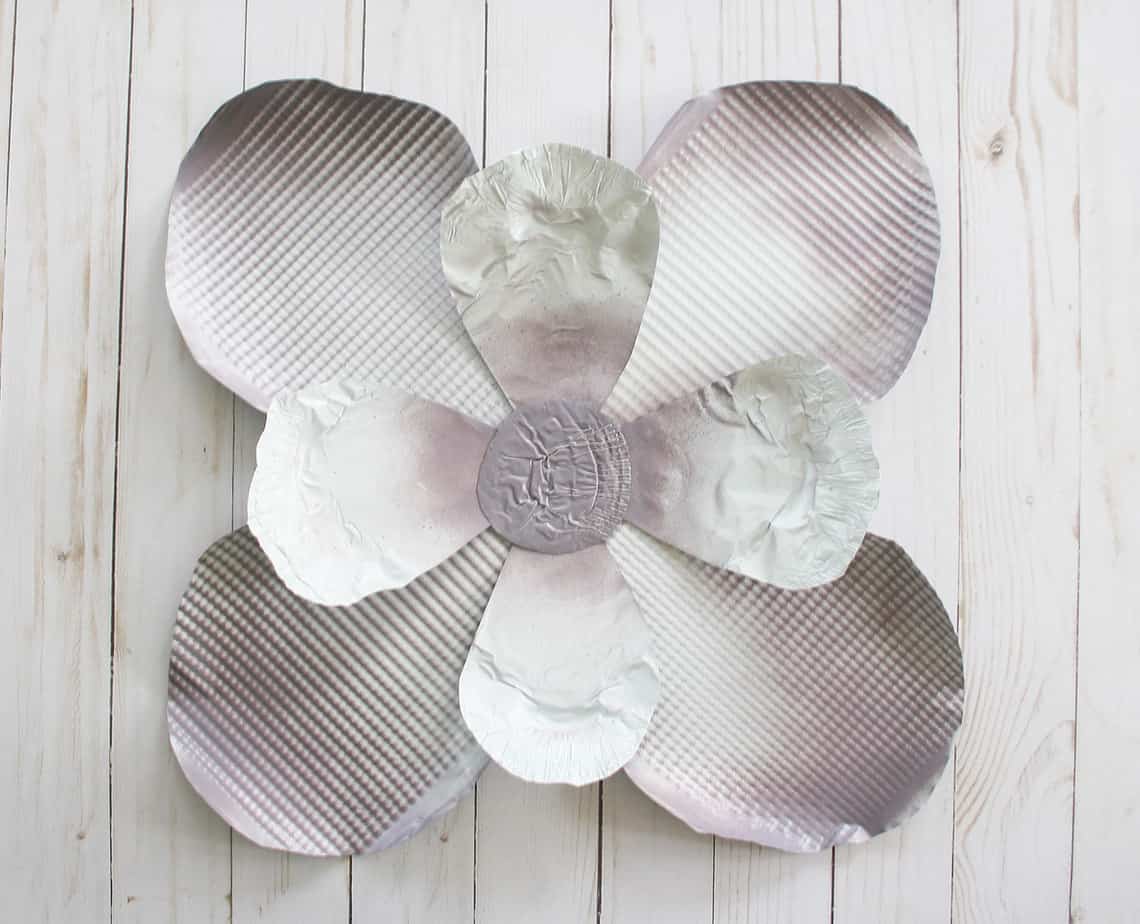
Have you seen these cute metal DIY foil cookie sheet flowers online? Also called Dollar Tree Metal Flowers (because they are made from cookie sheets bought at Dollar Tree ~ haha). Usually, I see them as wall décor. But I was thinking they would make a great centerpiece for my Boho lilac and white table setting.

Why would I use them as a centerpiece when everyone else seems to hang them on the wall?
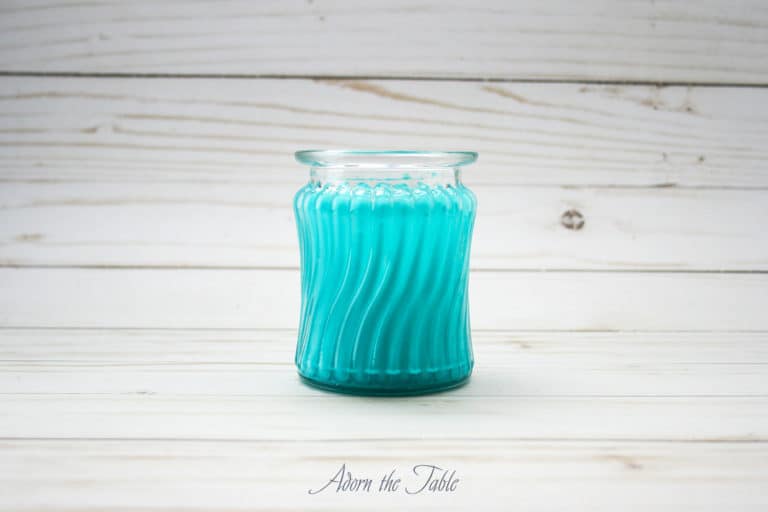
Well, since they are made of metal, I figured they would be great as a candle base. The candle would be the center disc of the metal flower.
Pretty good idea, huh!
Plus, once you are done using it as a centerpiece on your table setting, you can then hang it on a wall. Double-duty! Woot-woot!!
Anything that can serve more than one purpose is a win-win in my book. Don’t you agree?
These metal DIY flowers are SO quick and easy to make. I think what took me the longest was deciding on the shape and size of the flower petals, lol!
I decide to free-hand my petals, but there are lots of free patterns you can download online. Just search “giant paper flower template” for loads of options.
Supplies for Dollar Tree DIY Cookie Sheet Flower
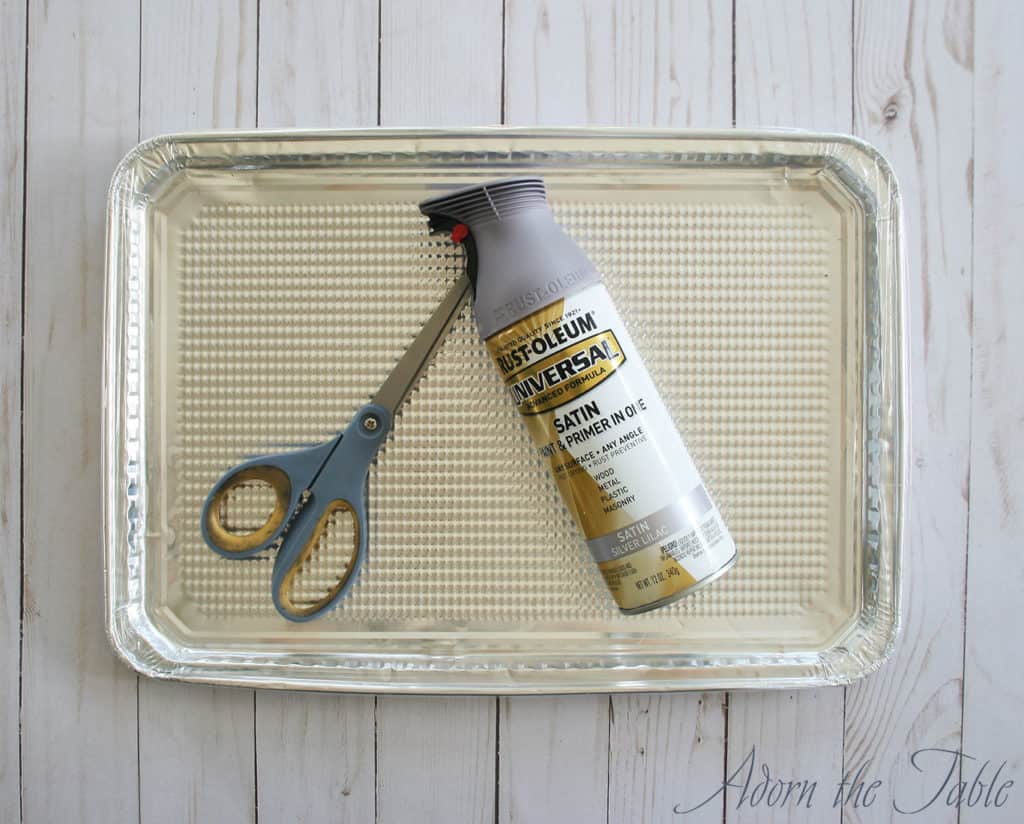
- Foil cookie sheet from Dollar Tree (comes as a pack of 2)
- Spray paint
- Marker
- Glue
- Scissors
- Cardboard
How-to instructions to make your DIY Metal Flower
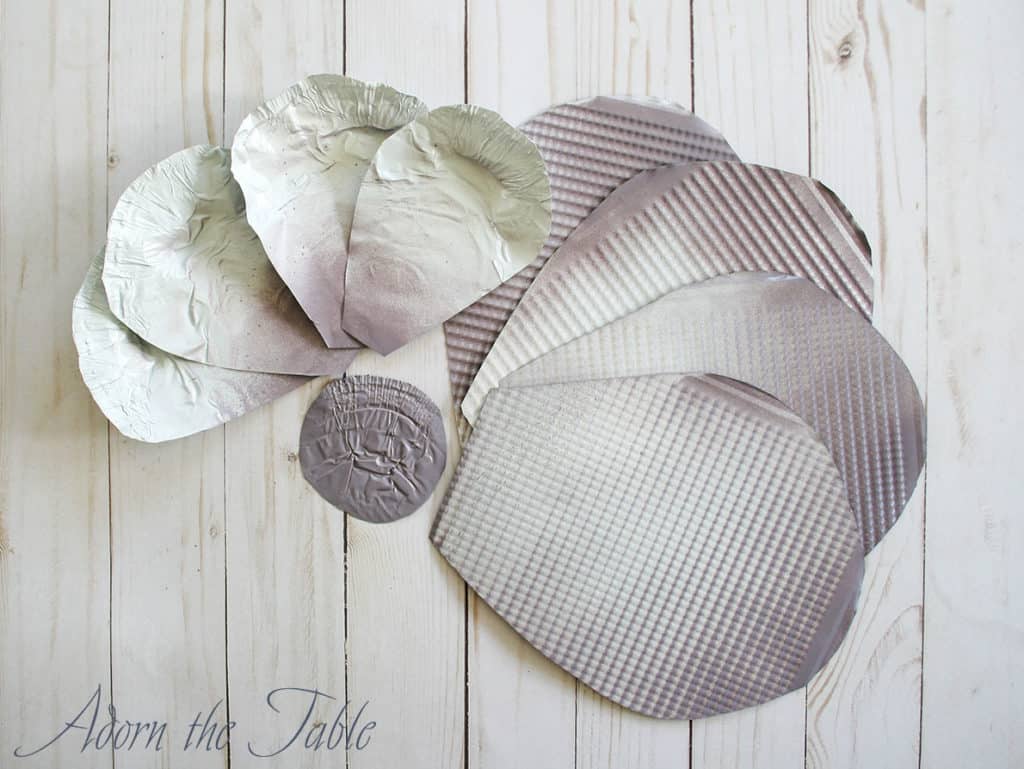
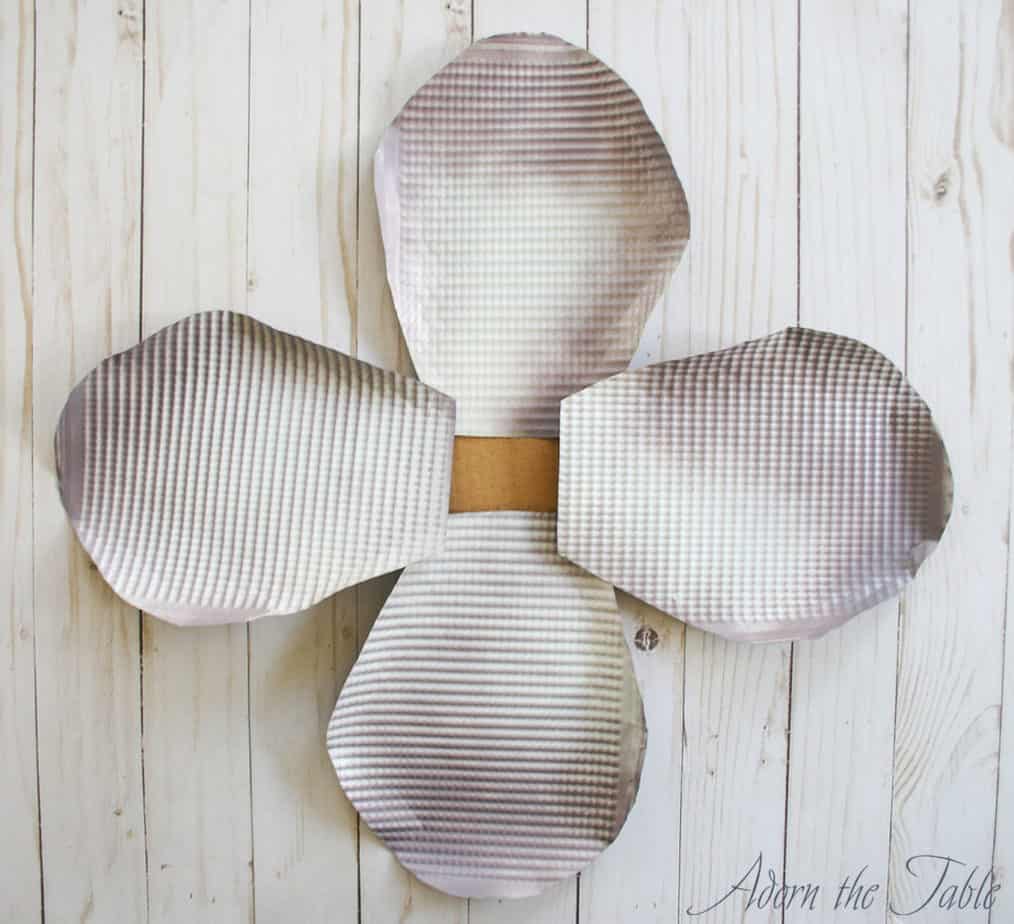
Step 1: Determine the size and shape of your flower petals. I wanted two different petals sizes and was able to get 2 large and 2 small petals from each cookie sheet. Since there are two foil cookie sheets to a pack, that make a total of 4 large and 4 small metal flower petals. If you want more petals, you will need another pack of cookie sheets.
Trace the petals on the cookie sheet and cut them out. Since the Dollar Tree cookie sheets are made of foil, they are super easy to cut with regular scissors. In fact, the foil can tear easily, too.
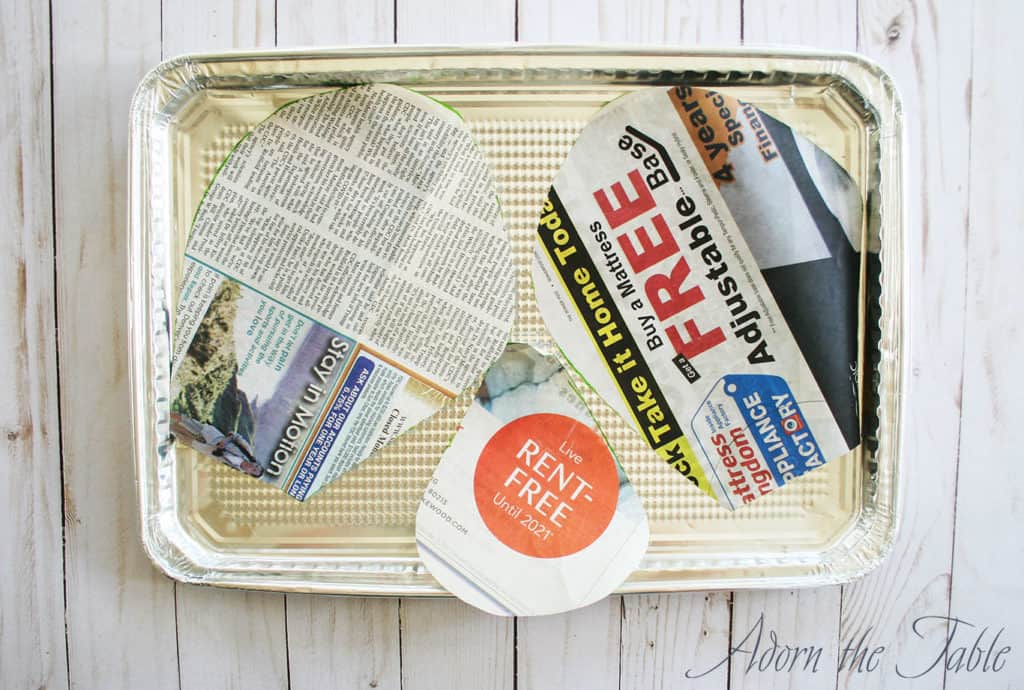
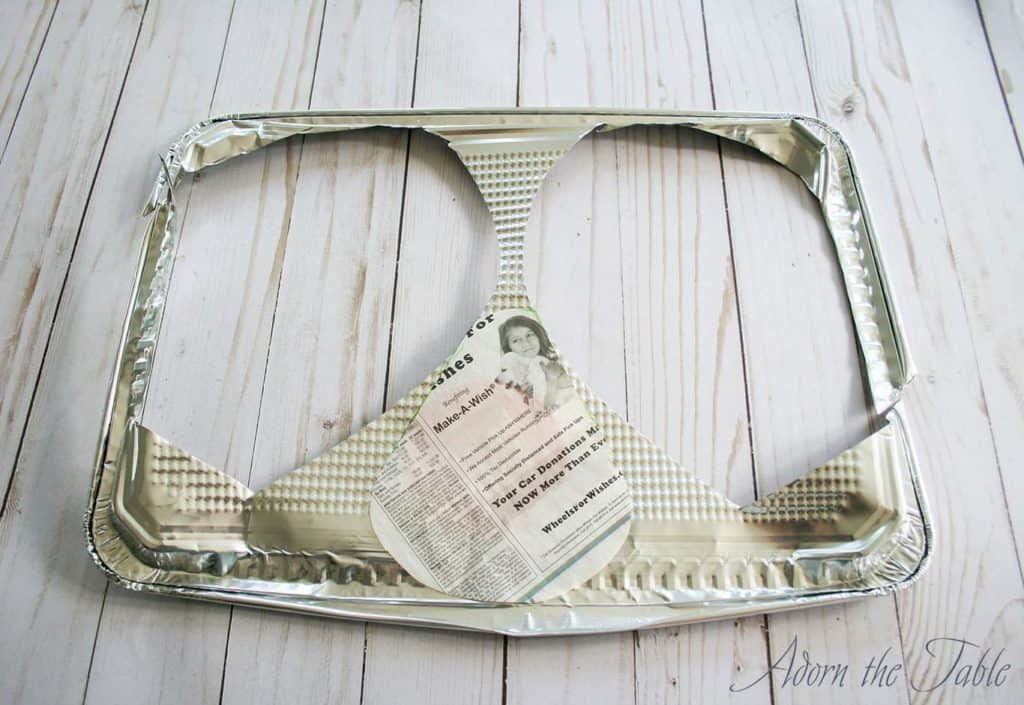
Don’t forget to cut out a center disc for your flower. I found that smoothing out the corner of the foil cookie sheet was a good place to use for the center. Trace the base of your candle on the foil for the correct size disc.
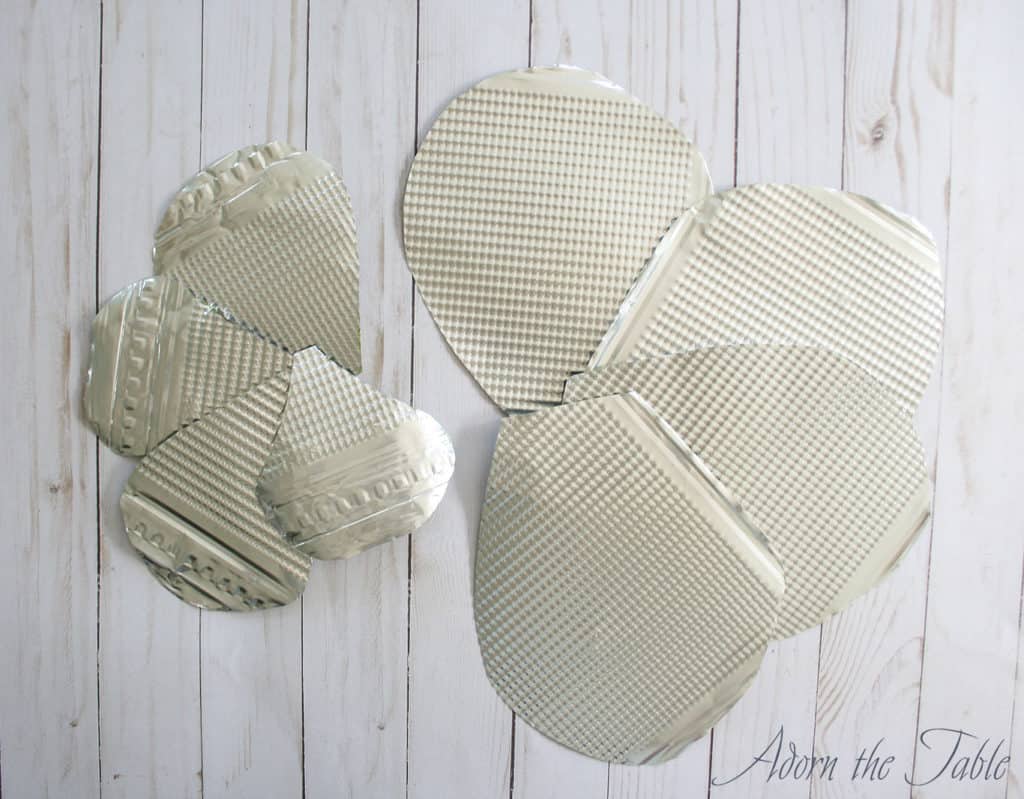
Hint: the metal bends very easily. Be careful to not crease it as you are working with the Dollar Tree foil cookie sheets. Later you will curl the ends of the petals, but you probably don’t want bends in the petals.
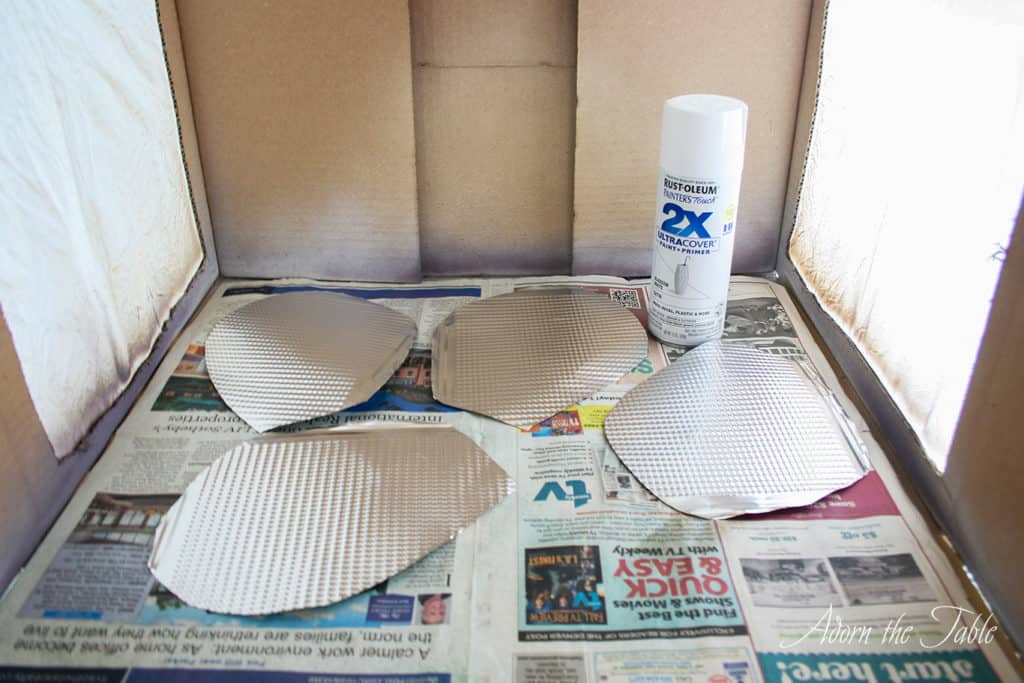
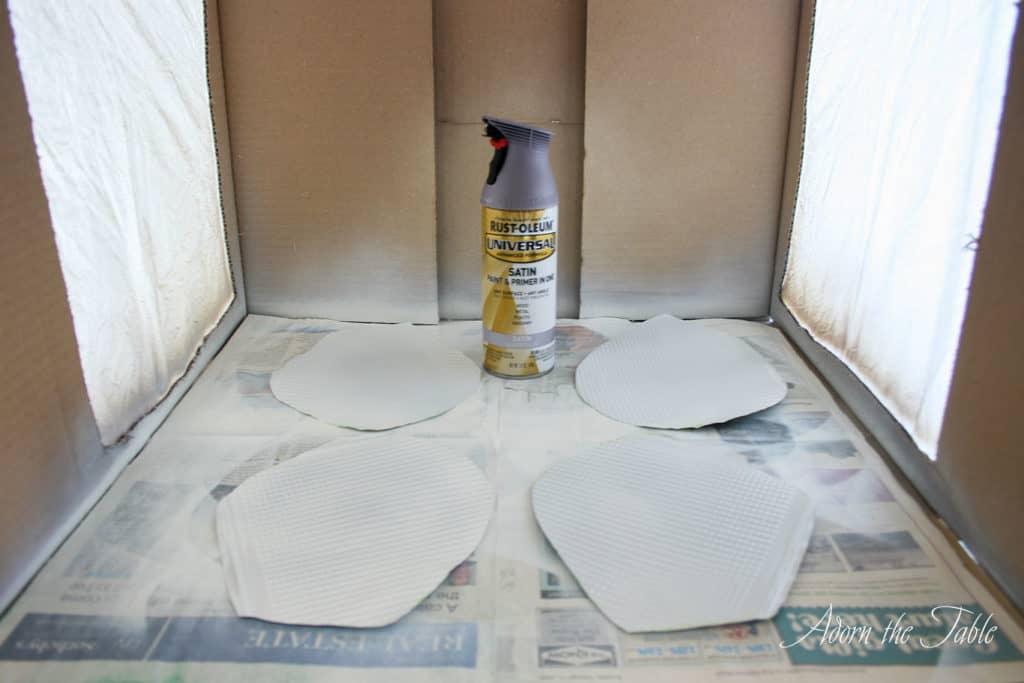
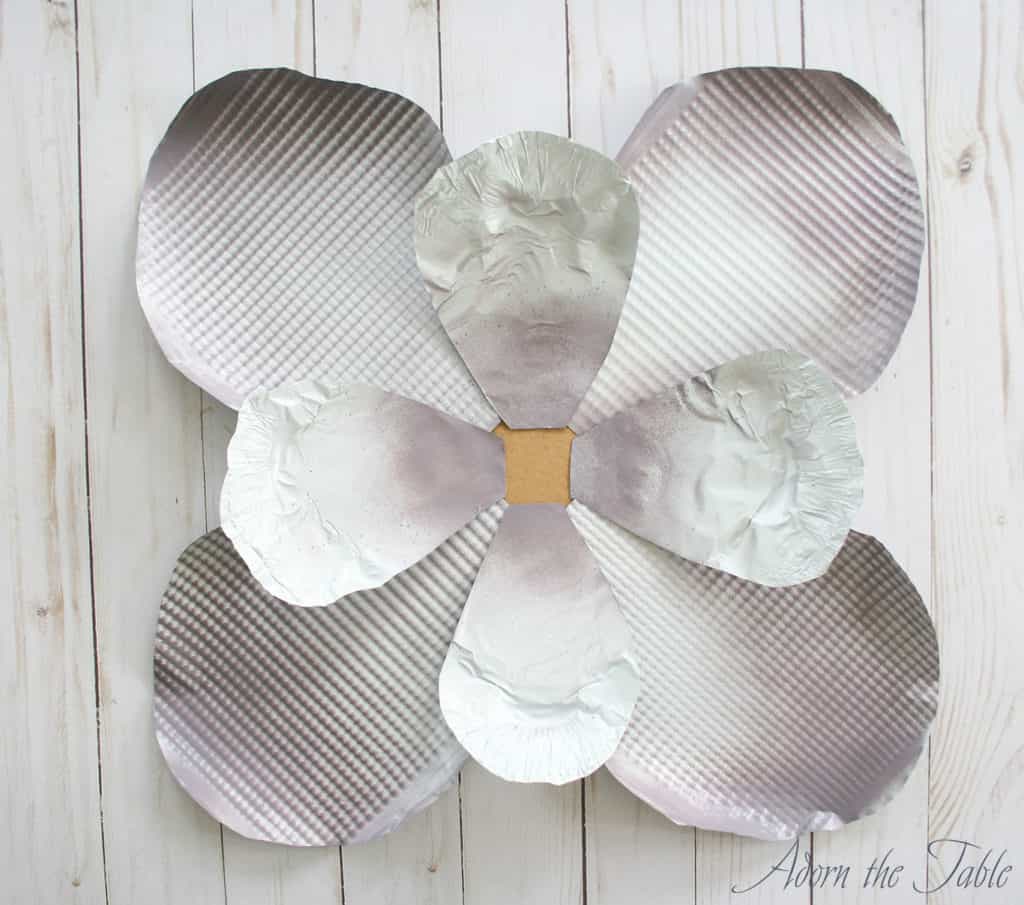
Step 2: Once you have all your petals cut out, prep your area for spray painting. I used satin white spray paint as a base on all the petals because I knew I would be using these metal flowers on a tie-dyed lilac and white tablecloth, and I wanted them to coordinate.
After the white paint is completely dry, add your second paint color to the petals.
I wanted the lilac paint to have a graduated look, and to not completely cover the white paint. I also didn’t want an obvious line of where the paint starts and stops.
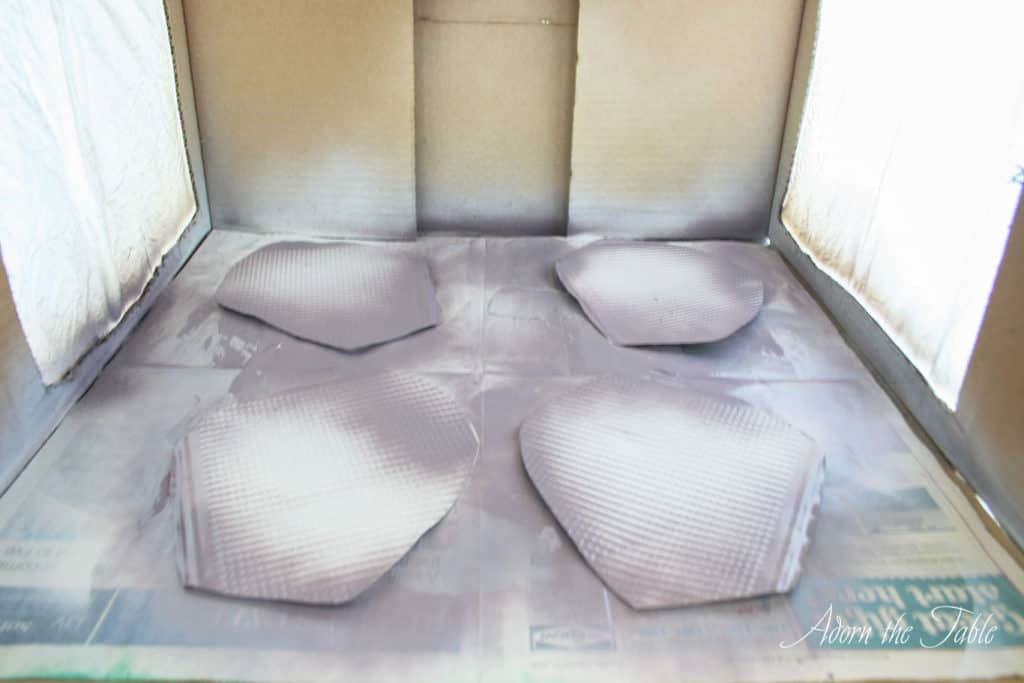
Since I was using spray paint, getting that look was a little challenging. What I found worked was to start spraying way before the petals and then sweep the spray across them, being sure to not stop, or go back over the petal. I did this for all sides of the flower petals.
I wanted the smaller petals to be mostly white, with a little of the lilac color in the middle, so I applied the same technique, but just to the base of the petals.
*Note – nature isn’t perfectly symmetrical, so my spray painting didn’t need to be perfect either. Don’t get down on yourself if it isn’t perfect, just go with it!
Tip: Spray paint both the front and back of the petals. Because when you curl the ends later, the underside will be visible. You don’t want the silver foil from the cookie sheets to be visible.
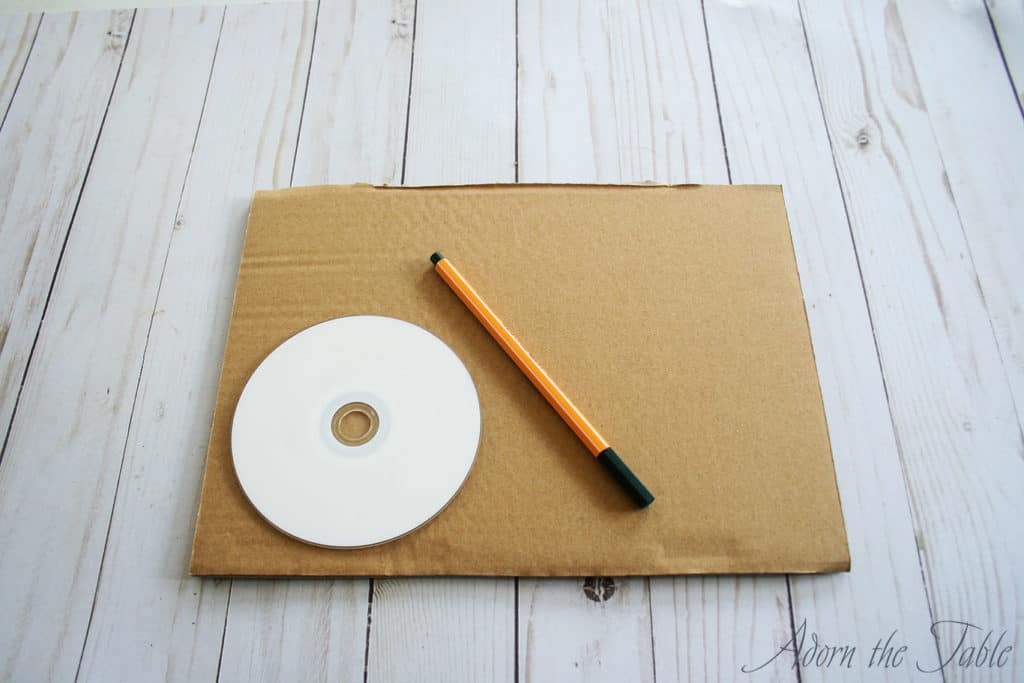
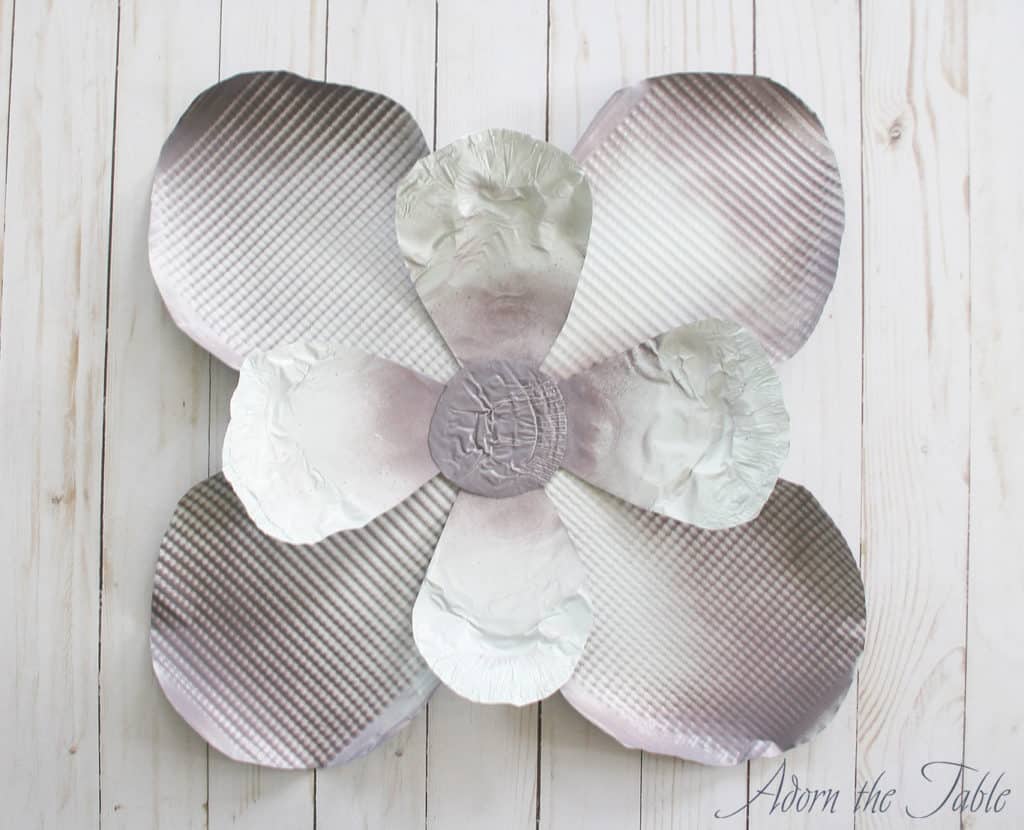
Step 3: Trace a medium-size circle shape on a stiff piece of cardboard and cut it out. For my diy metal flowers, I found that a CD was the right size. The cardboard will be the base for attaching your metal flower petals. Don’t worry what it looks like, as the petals and center disc will completely cover it.
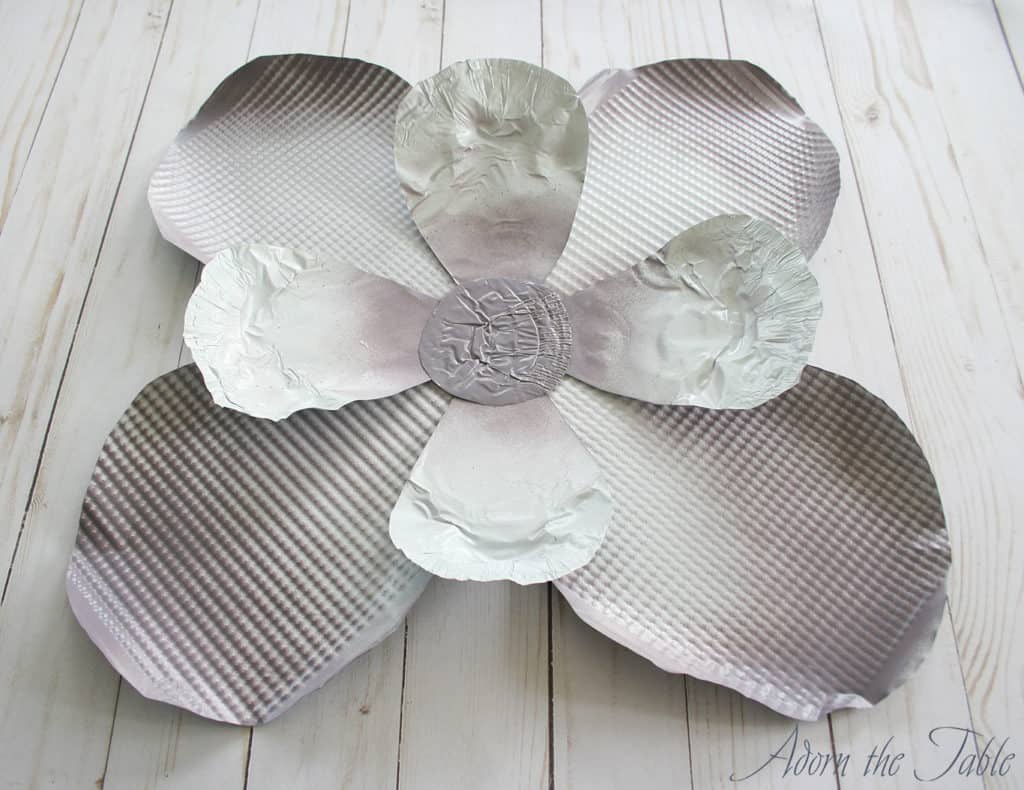
Step 4: Your diy metal flower is almost done. Before you glue the petals in place, you will want to curl the edges of them. This will give them dimension and a sense of realism. I used an empty wrapping paper tube. But you can use anything around the house that is round.
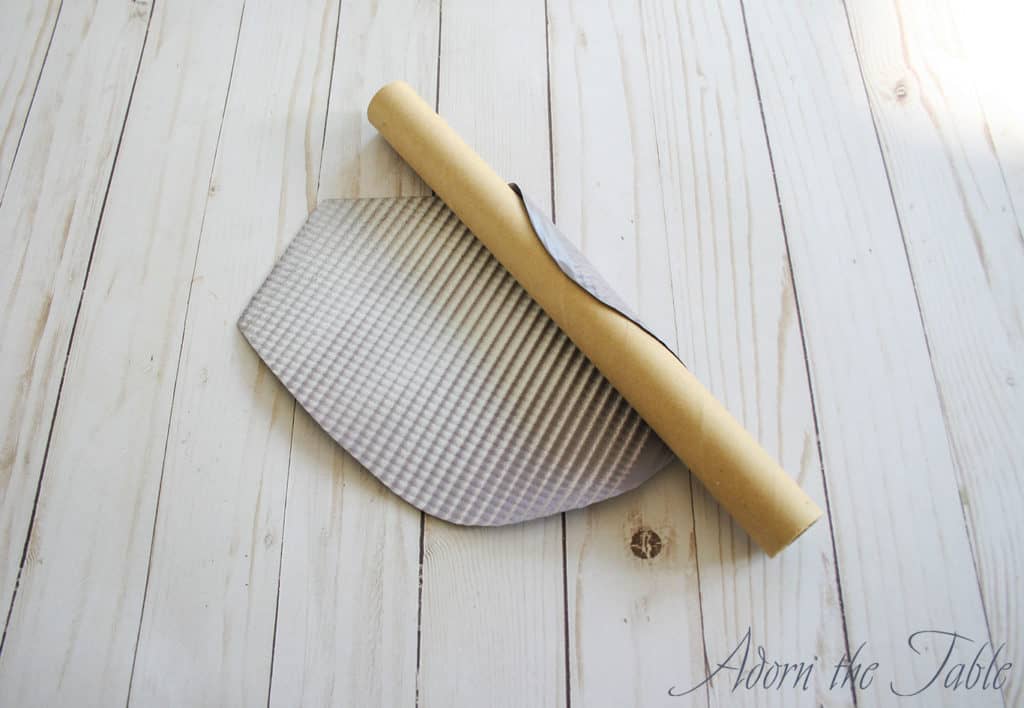
Start on one end, and work your way around the petal, until you achieve your desired look. Some people like a really curled look and others prefer a barely curled look.
Tip: I found that putting the tube a little away from the edge and then gently pulling the edge up and around the tube worked the best for a smooth curl.
Step 5: Layout your petals around the cardboard circle. Once you have the look you want, start to glue each petal in place. I used my hot glue gun because I wanted them to adhere quickly.
Start with the large petals. Once they are glued down, layout the small petals, so they overlap the large petals, and then hot glue them in place.

After all the petals are attached, glue the center disc for your DIY cookie sheet metal flower in place.
*Note: the Dollar Tree foil cookie sheets are very thin, so the heat from the hot glue easily goes through the metal. Be careful when pressing down to attach the petals to the cardboard, so you don’t burn your fingers. (I figured that out the hard way ~ ouch!)
Final step: Tweek the shape of the petals. Either curling them a little more or smoothing them out, until you get the look you desire.
Step back and pat yourself on the back for making these super cute metal DIY foil cookie sheet flowers. Then use them as a centerpiece(s) on your dining room table. Or attach a hook to the back and hang them on a wall.
*See how they look on my Boho Table Setting. Too cute!