Are you looking for inspiration for a creepy Halloween table setting? Or maybe a creepy Halloween centerpiece for your table?
How about black widow spiders? Spiders creep me out! Which means spiders make for a great feature on a creepy-looking table.
What about you? Do spiders give you the heebie-jeebies, or is it snakes, or something else entirely?
I came up with the idea for a black widow-themed tablescape for Halloween when I had the inspiration to use dead red flowers on a table.
How did I go from dead flowers to black widow spiders?
My thought process went something like this:
- If I want to use dead red flowers then I will need to use something black and red
- Black widow spiders are black with a red hourglass shape on their back
- The female black widow spider kills her mate
The black widow spider incorporates death, red and black, and is definitely creepy.
Perfect!
Note: this was my thought process – not that I am saying this is accurate. After doing a little research, I learned that many black widow spiders don’t eat their mate. But it is what came to mind when I was coming up with the concept for my Halloween table setting.
The only problem with this Halloween tablescape is that I kept getting creeped out by the diy spiders. (lol!!) I know they are fake. I mean, I did make them. But they still made my skin crawl.
I must have too active of an imagination!


Do you want to recreate this diy Halloween tablescape? Or use elements from it?
Great! It’s really easy and inexpensive to do.
Here is what you will need to recreate this table setting for Halloween:
Please note that this article may contain affiliate links. I may get commissions (at no cost to you) for purchases made through these links. You can read my full disclosure for more details.
- Black tablecloth
- Creepy cloth from Dollar Tree
- Very tarnished silver tray and tea set
- Super easy to find at thrift stores
- Dead flowers
- Red roses
- Dyed sola wood flowers
- Large black widow spiders
- Pom pom spiders
- Spider place card holders
- Red charger plates (also great for Thanksgiving, Christmas, Valentine’s Day….)
- Black plates
- Red napkins
- Faux leather napkin rings
- Used wine bottles with melted wax
How to Create Your Own Black Widow Creepy Halloween Table Setting
Step 1: Black tablecloth for your Halloween table setting
It’s Halloween. So a black tablecloth is perfect for a Halloween tablescape.
Do you have one?
Maybe you are wondering if it’s the only time you will use a black tablecloth. Trust me, you can use a black tablecloth for other occasions. Like a graduation party, an over-the-hill party, a black and white dinner, and the list goes on.
So, the question is….what type of black tablecloth do you buy?
I have a cheap one that was on clearance. But it isn’t my go-to black tablecloth.
My favorite black tablecloth is a large piece of black polyester fabric.
Yep, just a simple piece of fabric that has a little stretch and doesn’t wrinkle. Plus, the edges don’t fray, so it has never been hemmed (that means – no sewing needed!). And it was cheaper than the clearance tablecloth!!
I used that 40% coupon from the local craft store and bought the length of fabric I needed. *If you want to do the same thing, but aren’t sure how much fabric you will need, check out my Tips for How to Choose the Correct Tablecloth Size post.
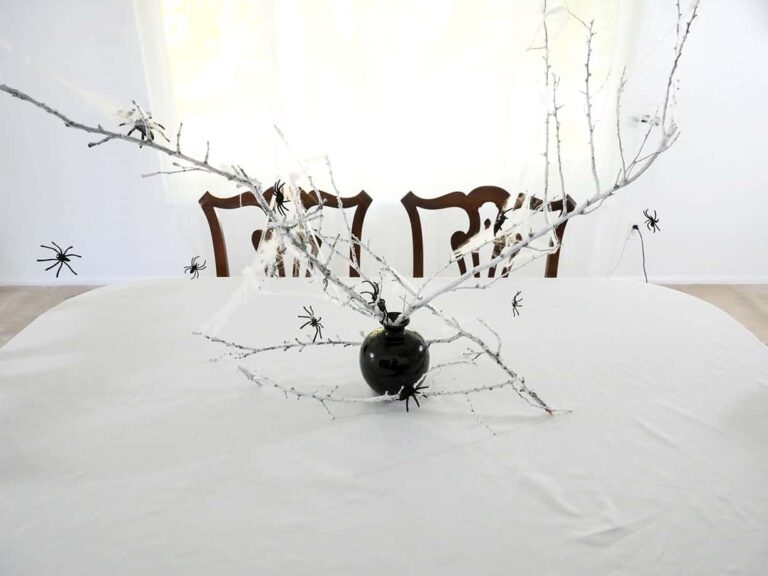
Step 2: Create your Black Widow Halloween diy centerpiece
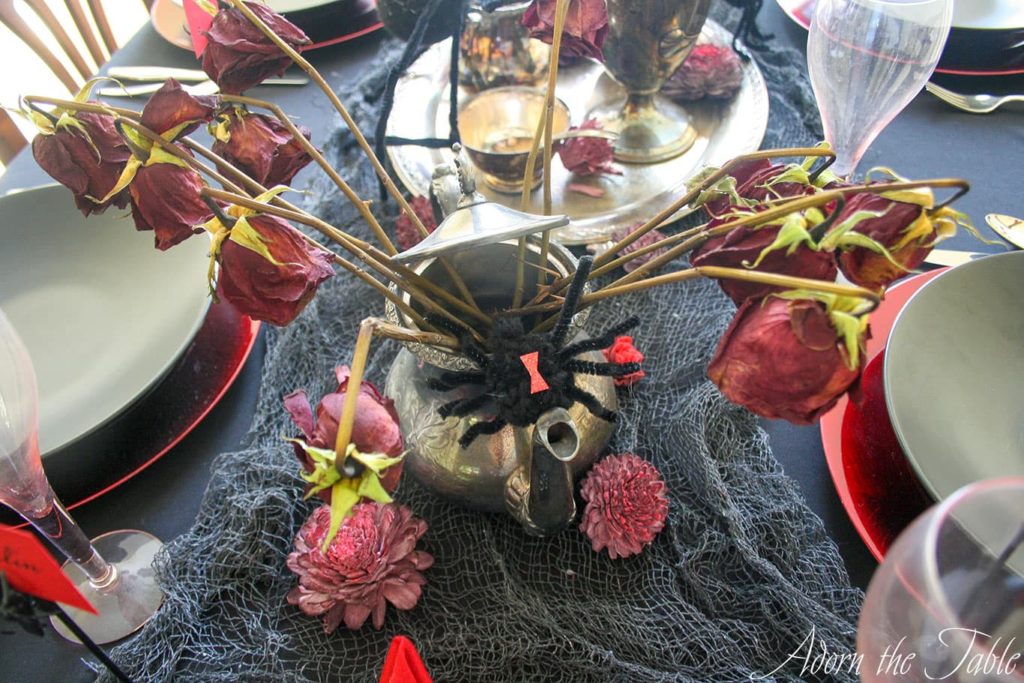
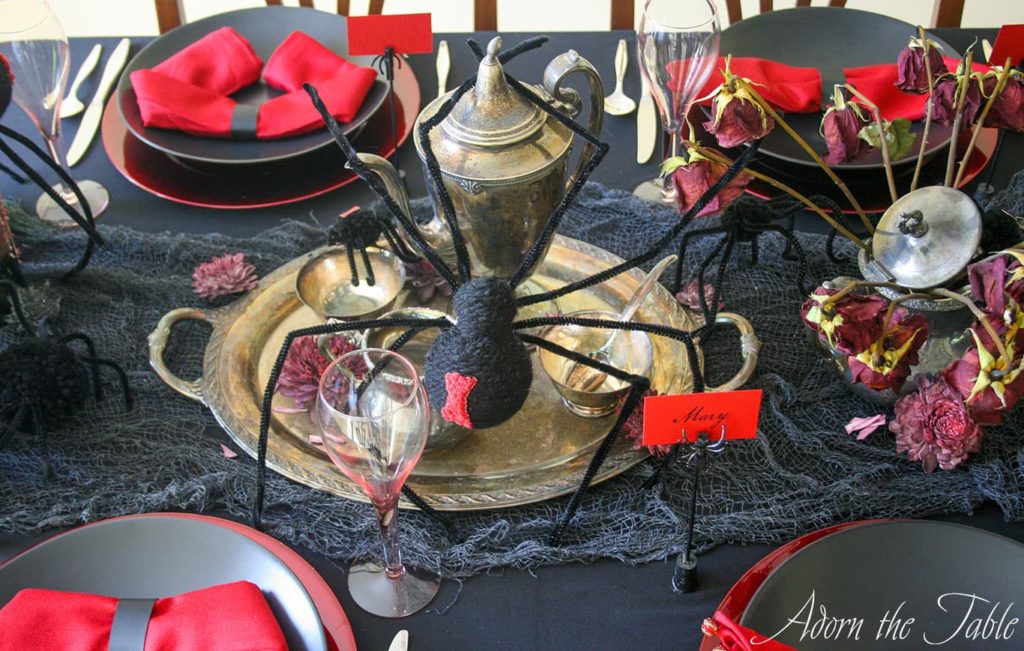
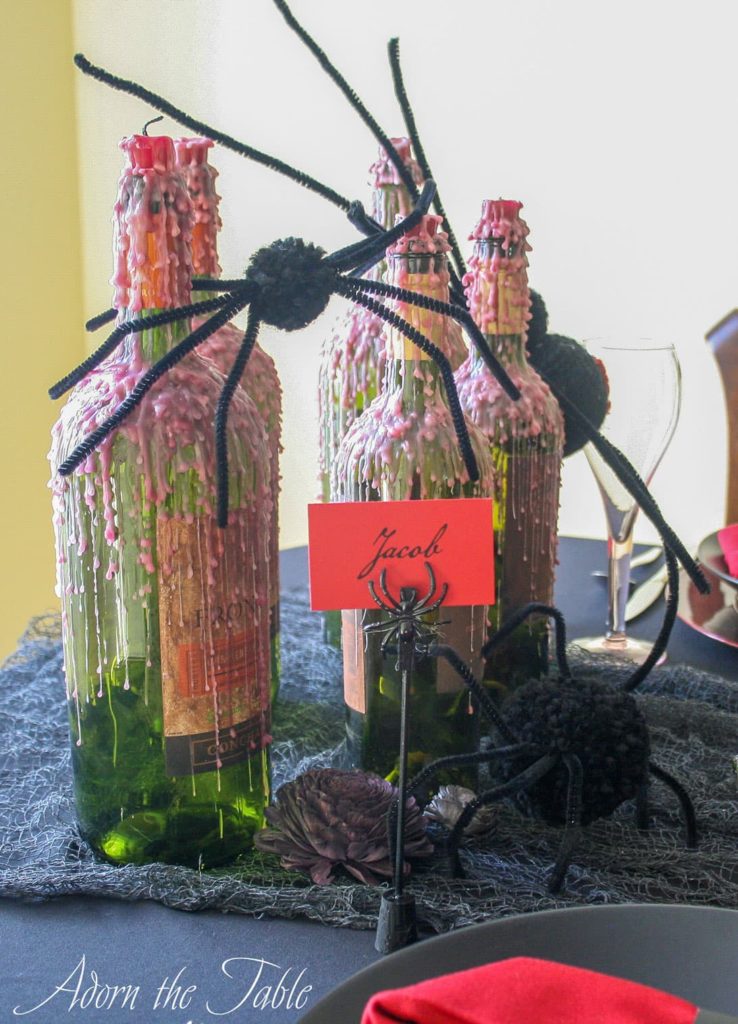
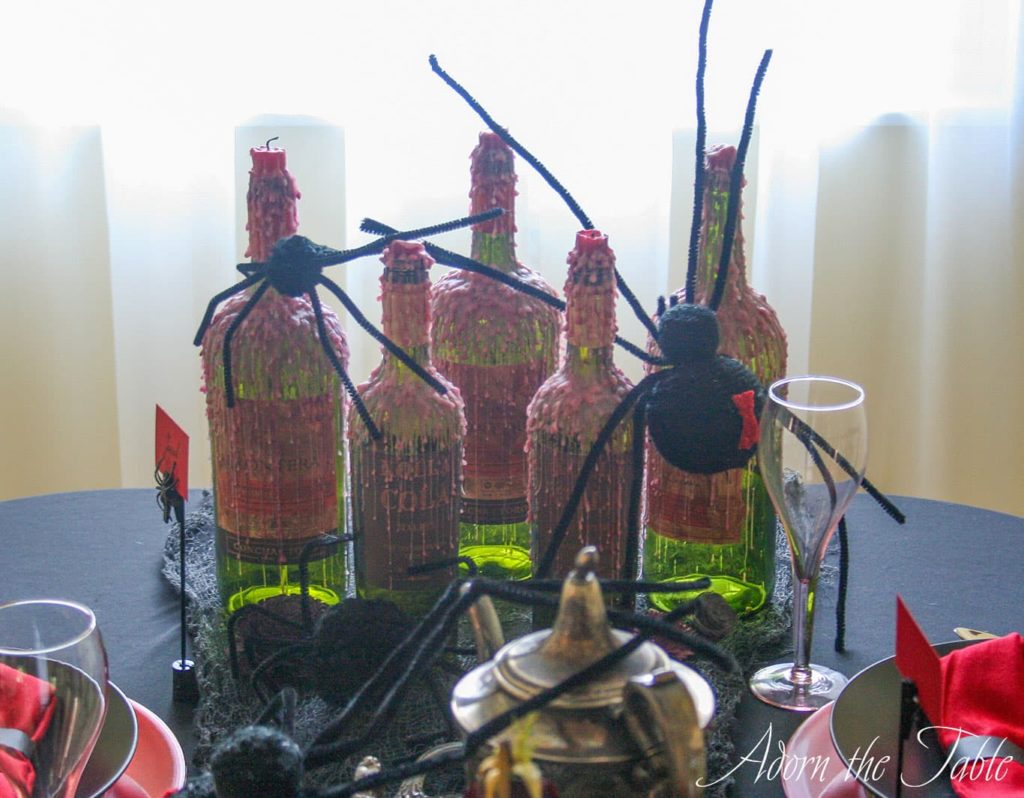
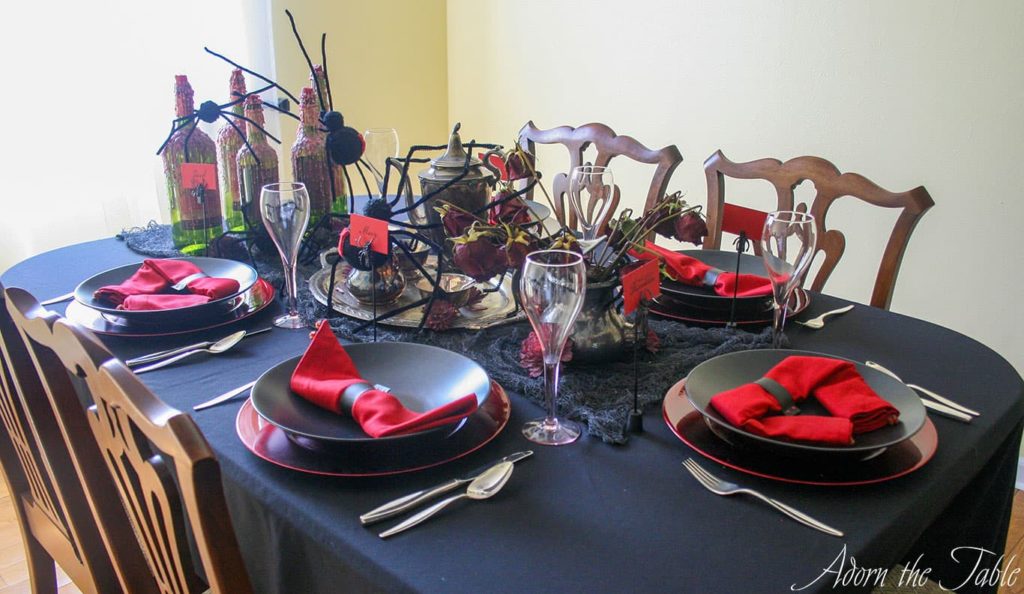
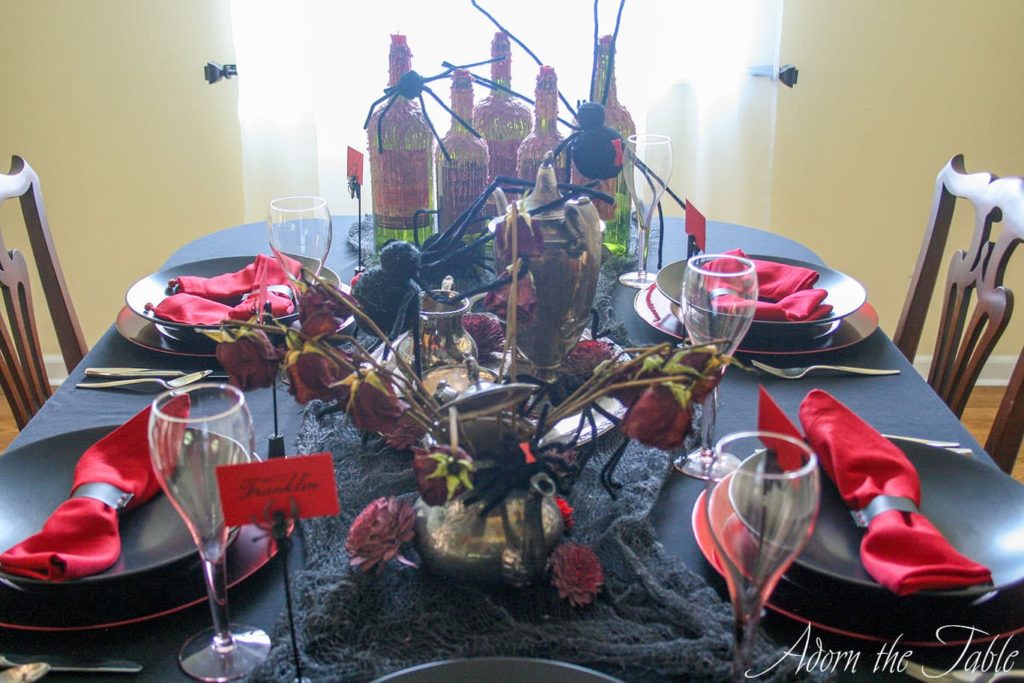
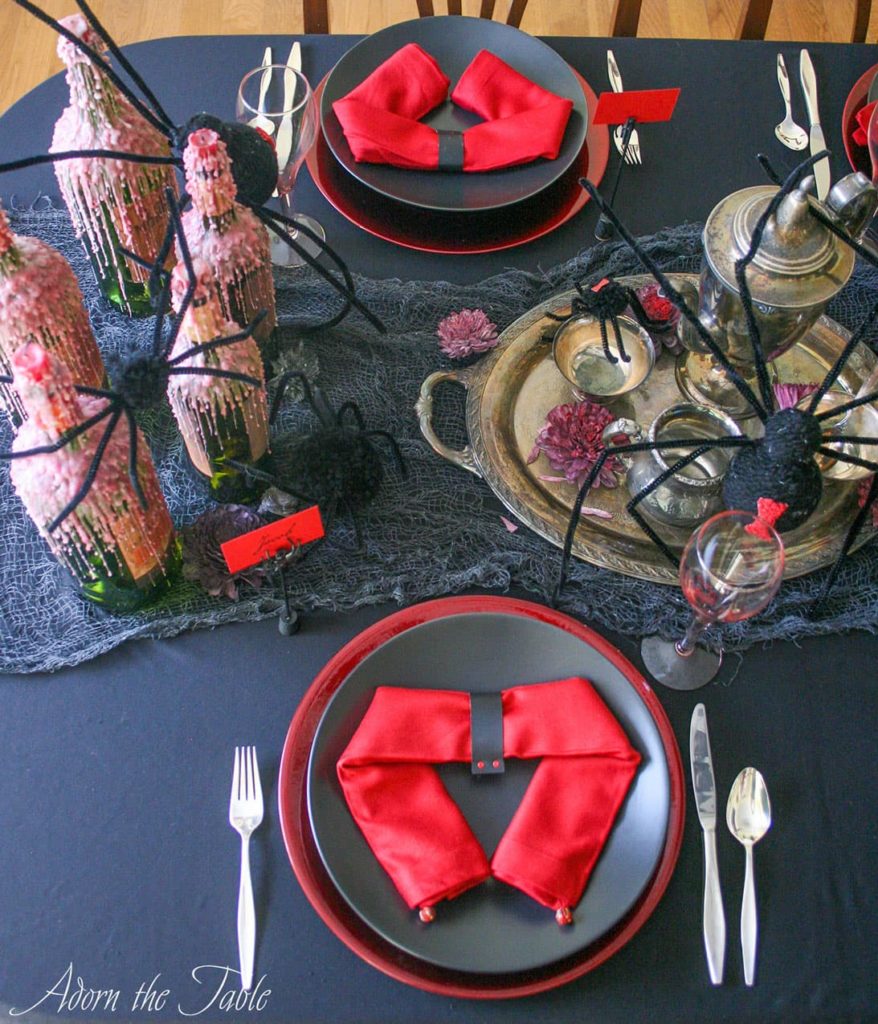
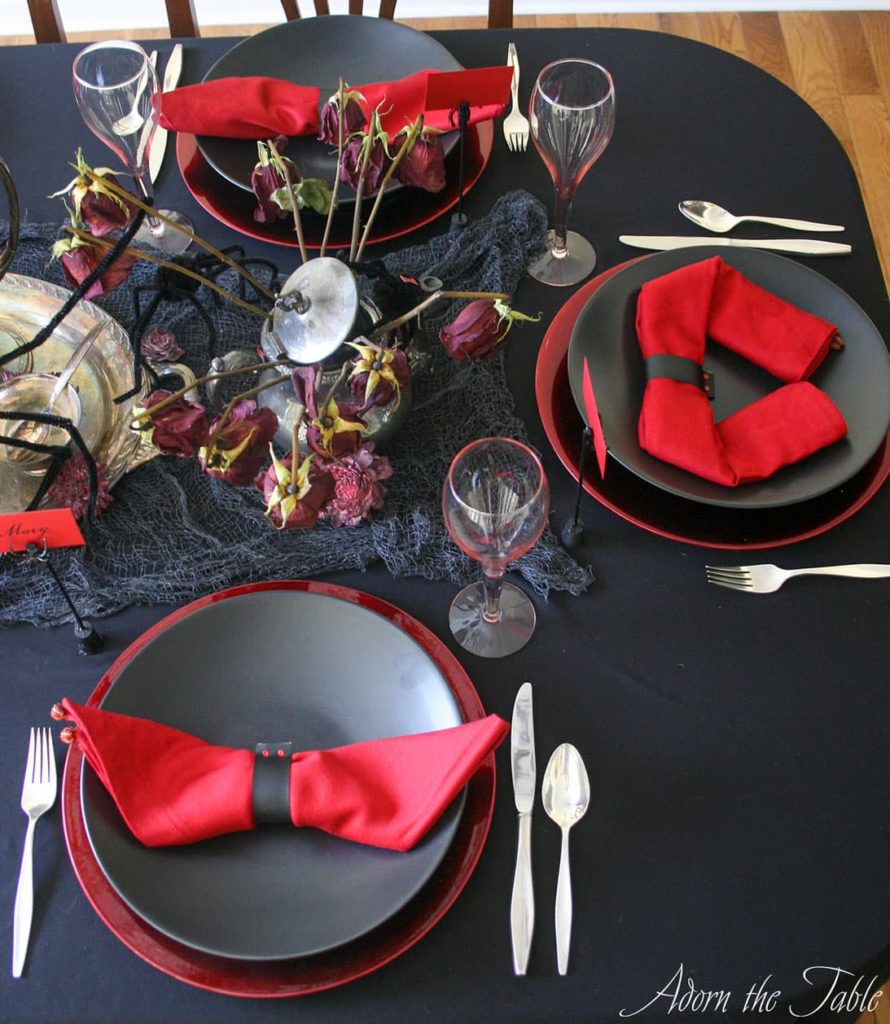
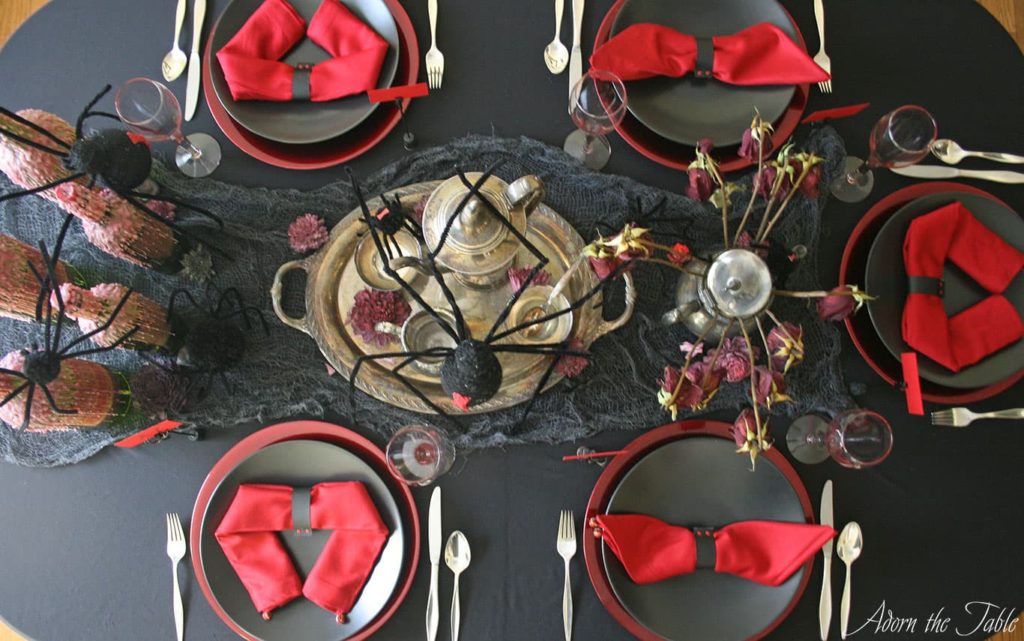
The key to this creepy diy Halloween centerpiece is the Black Widow spiders and everything having a dead-look, or as if the table hasn’t been touched in years.
It is SO easy to replicate this look.
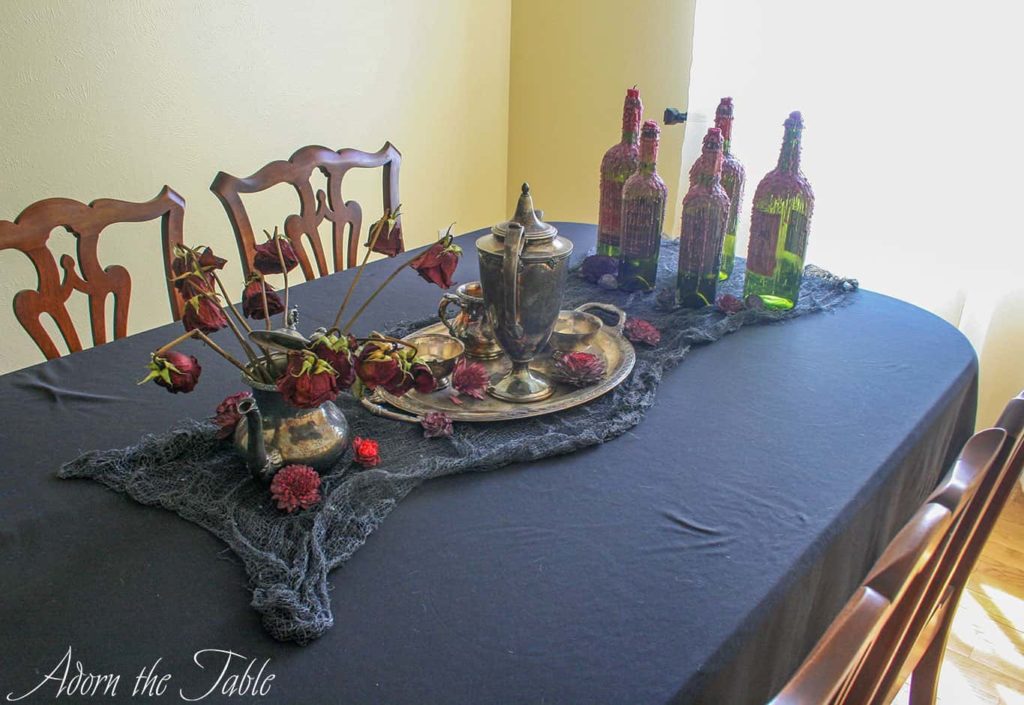
I found the awesome smokey gray cheesecloth-looking fabric at Dollar Tree and arranged it in the middle of the table. I love how it looks old and dusty!
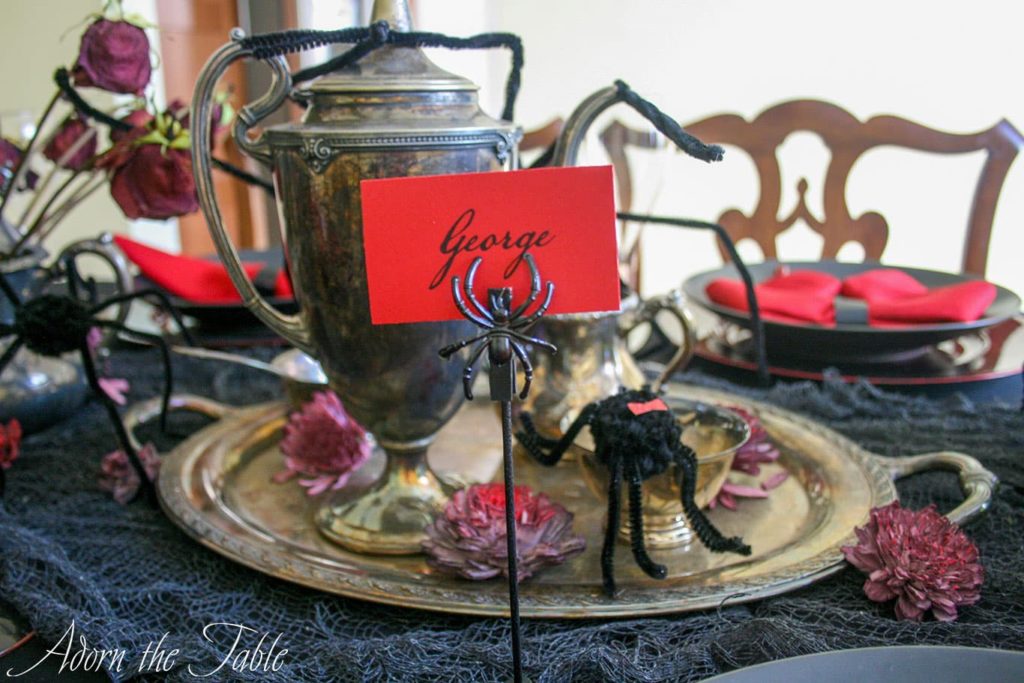
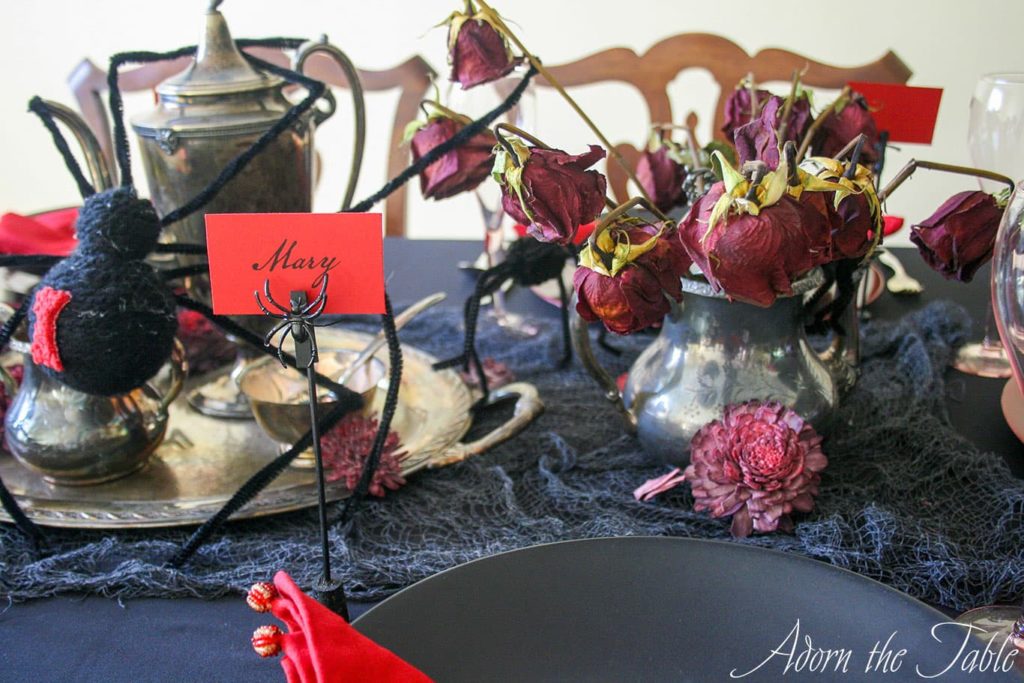
Check out at the silver tray, teapots, and bowls. They are all tarnished and look like they have been sitting on the table forever.
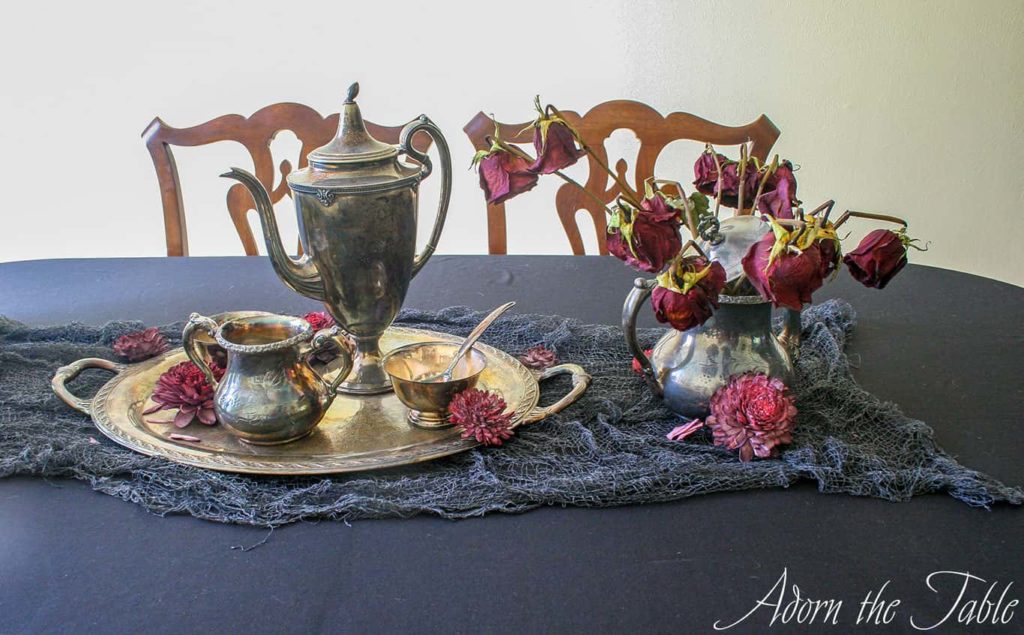
Just go to your local thrift store, garage sale, or auction. People don’t polish silver anymore, so it naturally tarnishes. And they are always being donated.
You will pay almost nothing for a setting like I used. In fact, I bought all the tarnished silver you see for just $2 at an auction this year. Crazy cheap!!!
I used one of the tarnished teapots to hold dead red roses. I bought clearance red roses from the grocery store for a few bucks, knowing that I would let them die. Within a week without water, they were dead and dried out. Perfect for my Halloween tablescape.
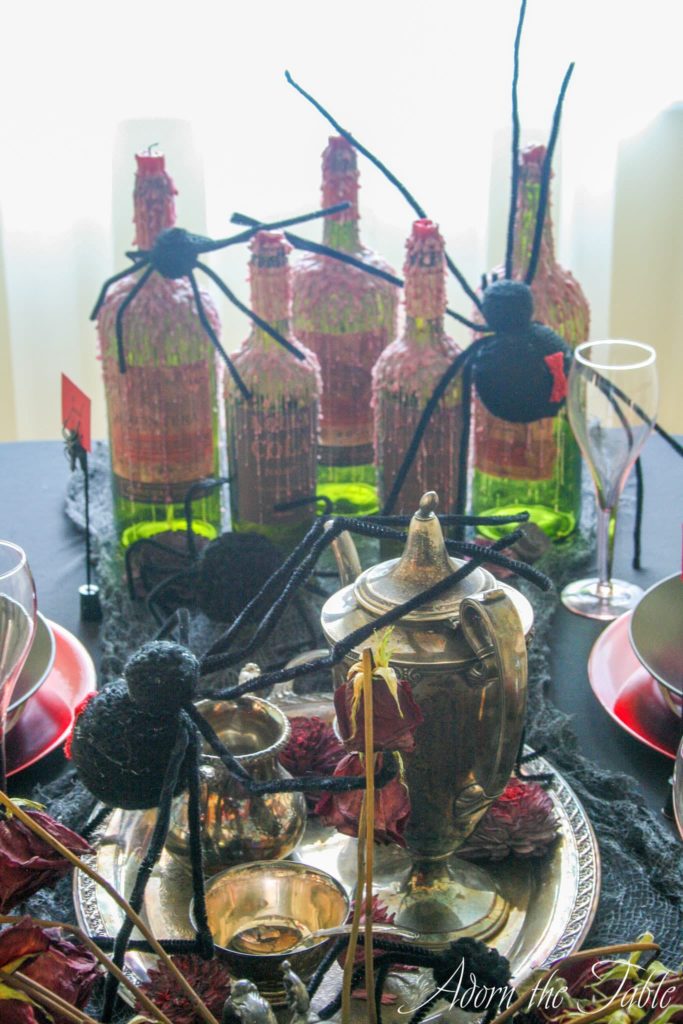
I also made two different types of creepy diy spiders to “crawl” on the Halloween table decor items. One is a large fuzzy spider and the other is a small diy spider made from pom-poms and pipe cleaners. Both creepy spider diy projects are SUPER easy!
It was really fun to make the spiders look like they were crawling over the table decorations. Can you imagine eating with them in front of you? Eeewww!

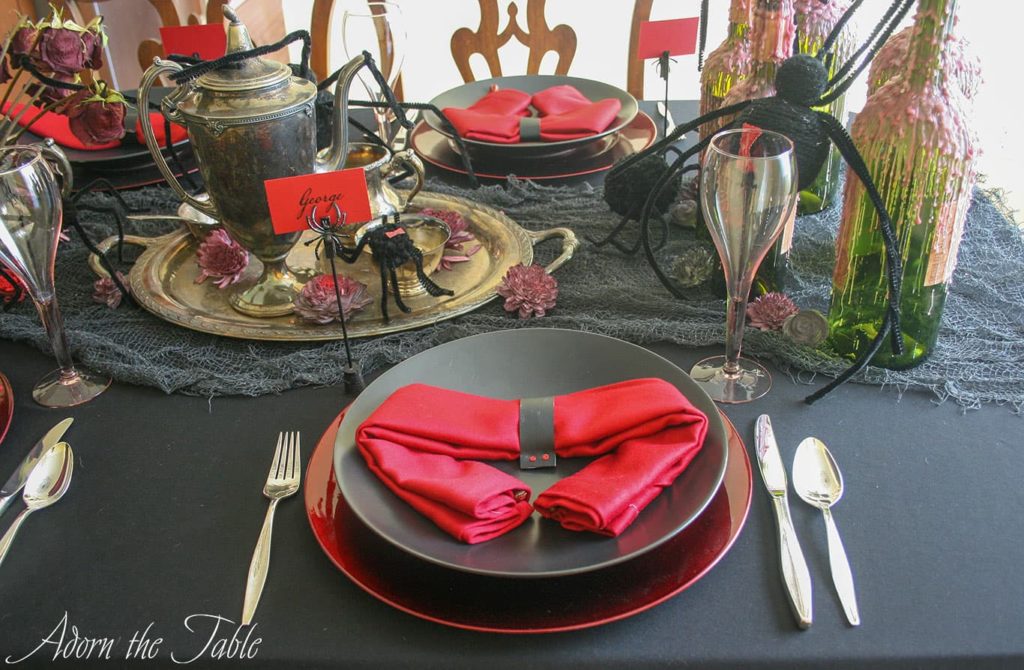
The final item I added to this Halloween table’s centerpiece were the candle holding wine bottles. Since I wanted the tablescape to appear like it hadn’t been untouched for years, the bottles needed to be coated in wax, as if the candles had been allowed to completely burn down and out.
I thought this would be an easy look to achieve, and it was, but not the way I originally planned. See how I did it so you too can create this look here.
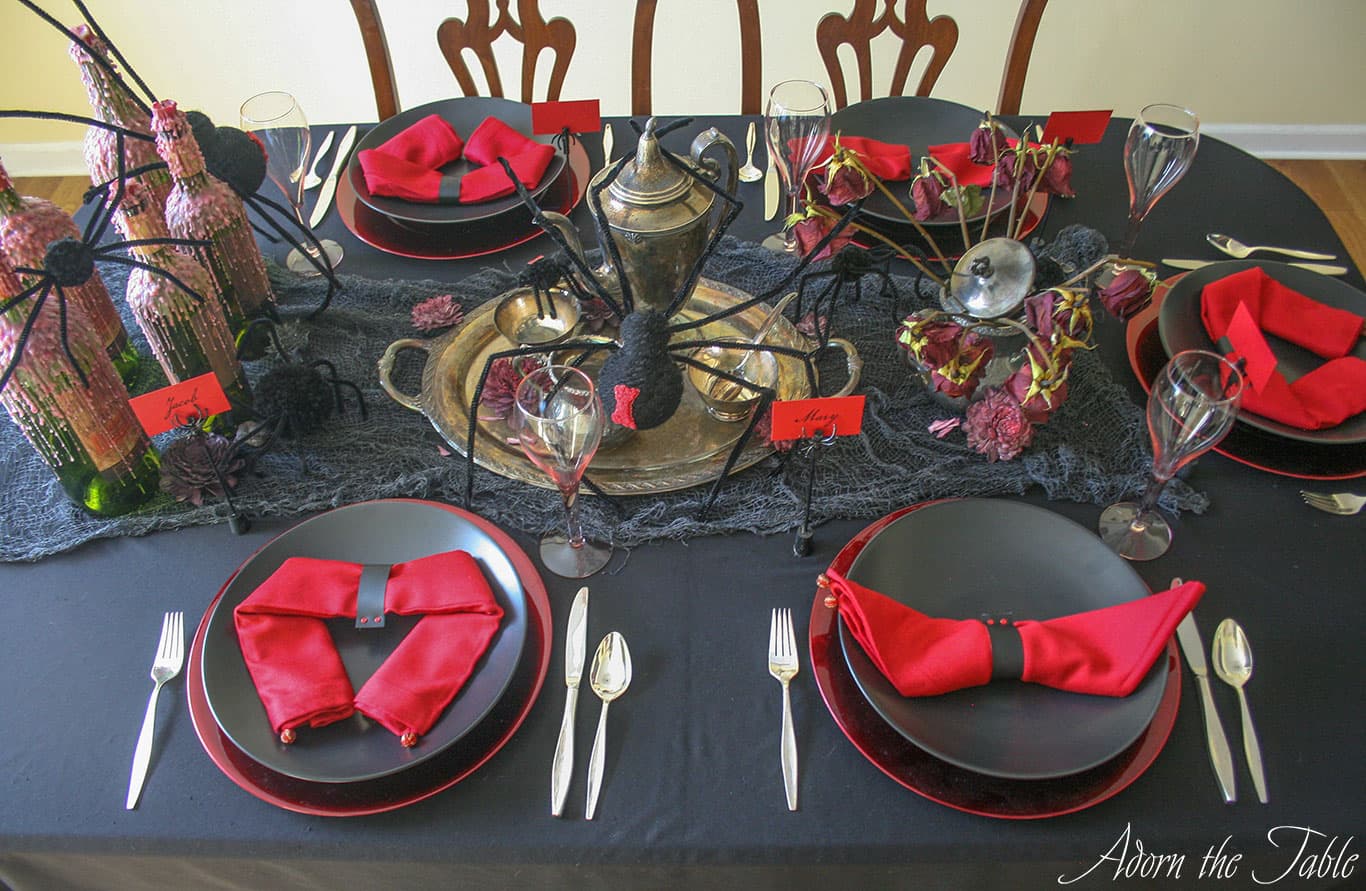
Step 3: Add the Halloween place settings to the tablescape
Once you have your Halloween centerpiece complete, it’s time to add the place settings.
First, lay down red charger plates on top of the black tablecloth. In keeping this a budget Halloween table setting, Dollar Tree has them for $1 a charger.
Next place a black dinner plate on the charger. I found mine at a secondhand store for really cheap. Or you can buy them for $1 each from Dollar Tree. If you don’t want to use (or buy) black plates, white or red dinner plates would work well too.
It’s your Halloween tablescape. It’s up to you.
On the plate, I added a red napkin with a diy faux leather napkin ring. This diy napkin ring is really easy and cheap to make. (Keeping it budget friendly!)
I had fun folding the napkins to resemble a spider and a bat. Whadda ya think?

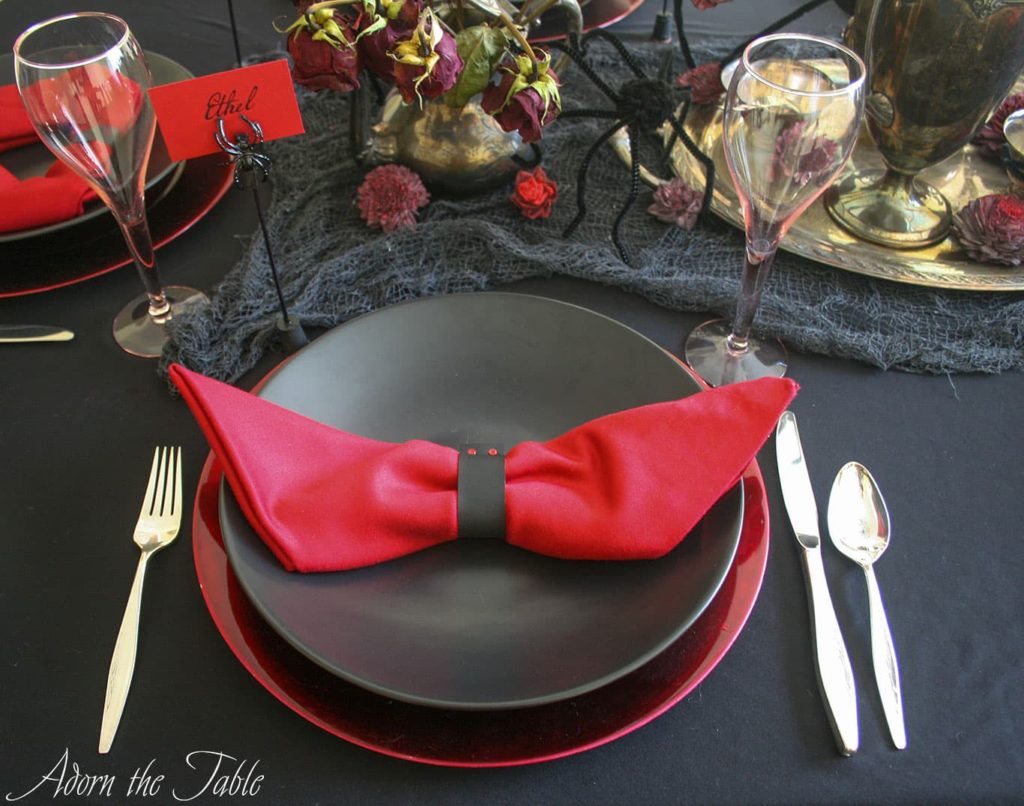
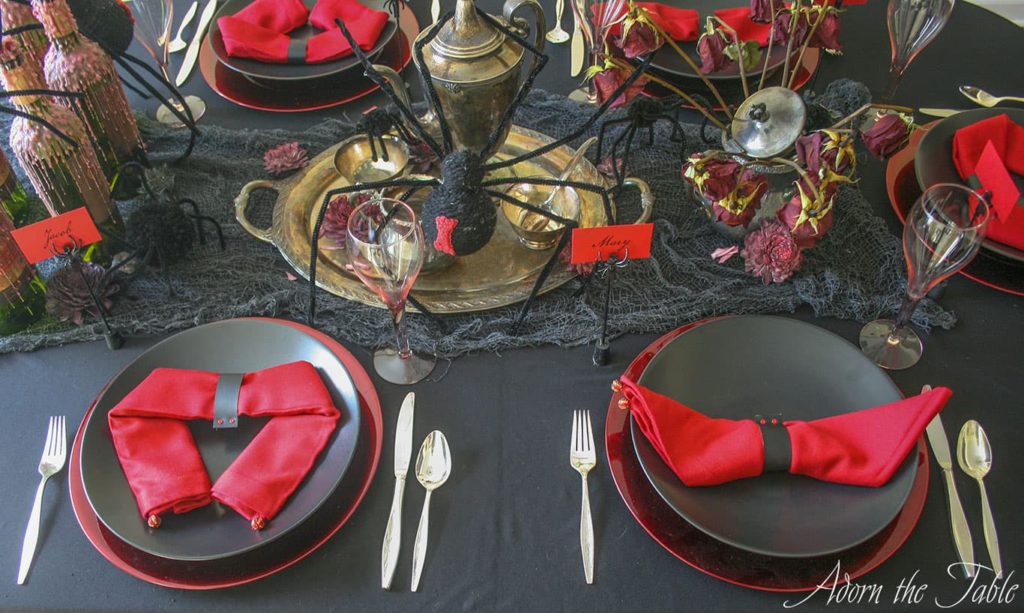
Then I added a creepy spider place card holder and red name cards written in a spooky black font. Just another way to continue the creepy spider Halloween table setting theme.
And finally, I added the silverware and wine glasses to the place settings. I don’t know if you can tell, but the wine glasses have a pink hue to them which really looks red against the black of the tablescape.

Step 4: Complete the creepy Halloween tablescape’s look
To round out the idea of a dead-looking Halloween table setting, I added more dead red flowers. But they weren’t real flowers. They were sola wood flowers I dyed to look dead.
These diy dyeable flowers are amazing! If you haven’t dyed flowers, you’ve gotta try it. It is seriously addictive!!! Plus, you can dye them any color you want. Take a look here.
After I had dyed a variety of sola wood flowers, I placed them all around the Halloween table’s centerpiece. They really pulled the whole look together.
Have a great time around your creepy Halloween table with your friends and family.
I’m sure they will compliment you on how fun it looks and the amazing job you did.
Shop the Table
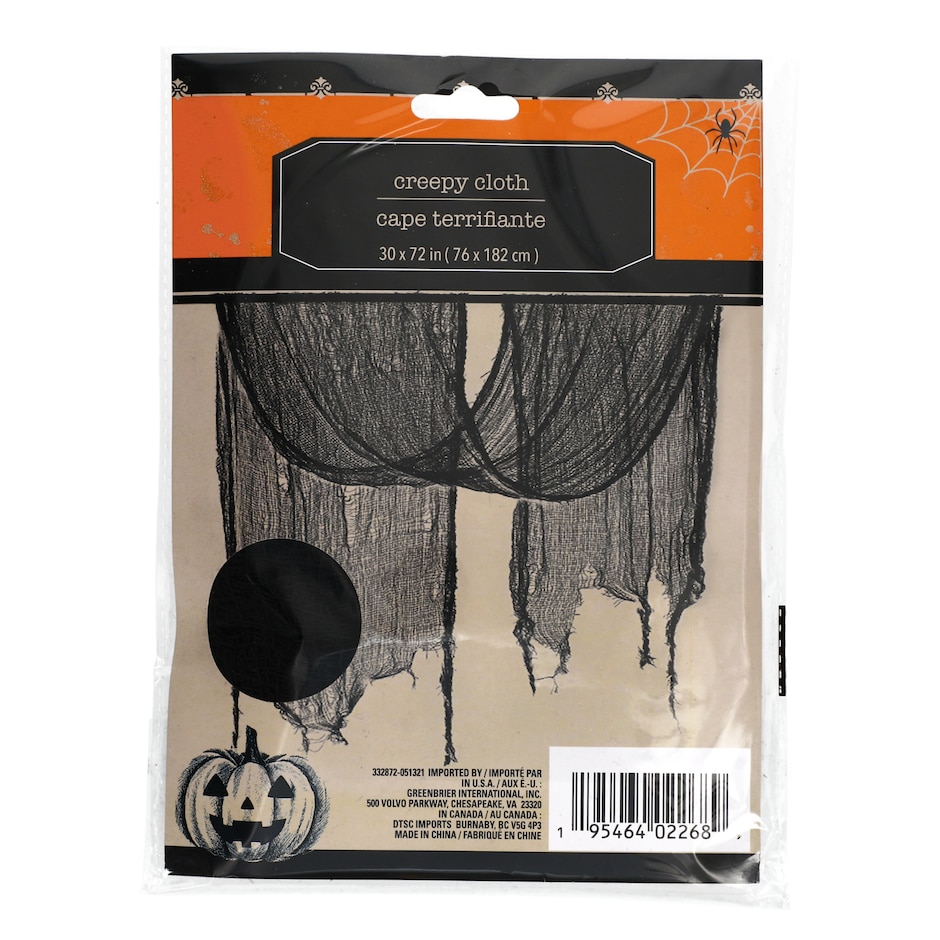
Creepy Cloth
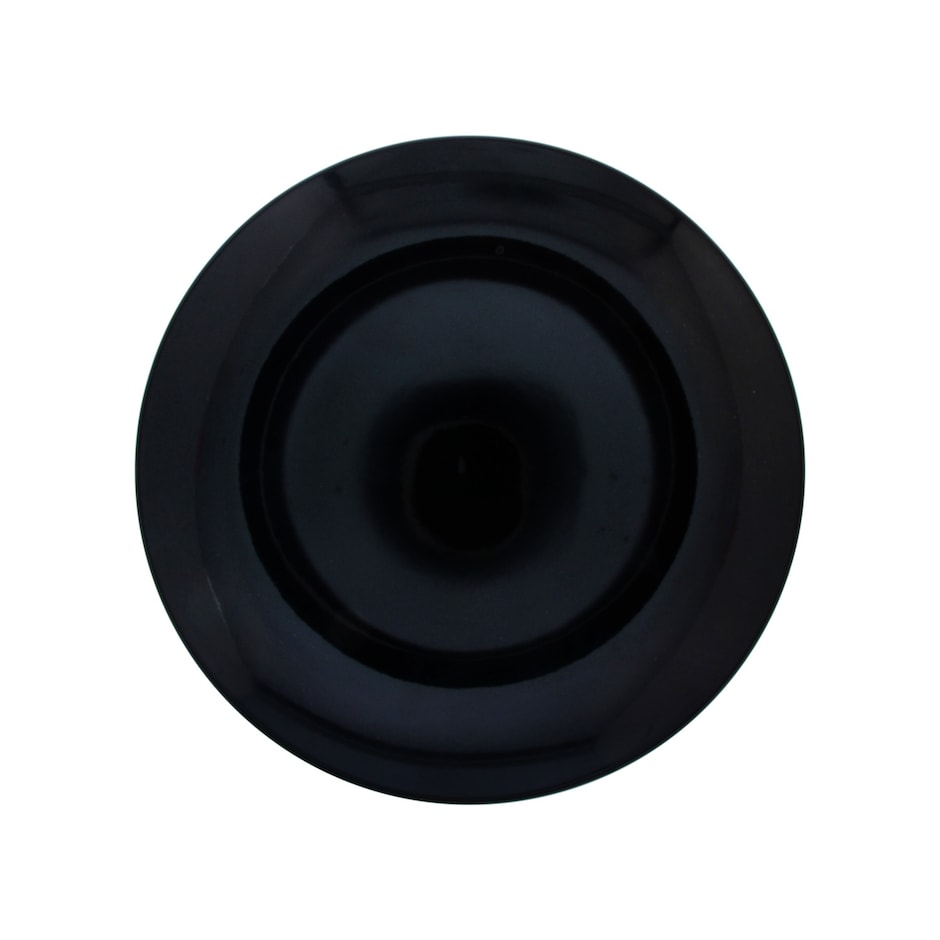
Black Plates

Red Chargers

Black Tablecloth

Red Napkins