This year I challenged myself to create a budget Mardi Gras tablescape.
One that’s cheap to create, but still looks fun, festive, and fantastic.
I set a budget of $30.
Yep, that’s right – ONLY $30!
The caveat to this budget-friendly Mardi Gras table setting is that I would use plates, napkins, flatware, and wine glasses I already own. I would only use white plates and napkins, as I figure most people own white. Plus, they’re neutral.
The idea ~ use what you already own for your basic place settings, and then create the tablescape on a budget.
So, to stay within my budget, I headed to Dollar Tree. The local dollar store where I live.
Since every item is now $1.25, that meant I could get 24 items. Which seemed like a lot, until I started pulling together the items I found. A lot had to go back.
It would’ve been easy to spend at least $50 or more!
Check out how I spent my $30 and how the cheap Mardi Gras table setting turned out…
How to Create a Mardi Gras Tablescape on a Budget
Unfortunately, I forgot to take a picture of everything I bought for this tablescape, before I started using them. So, here is a rundown of the 24 items:
- 6 gold chargers
- 3 tall black candlesticks
- 3 white plastic lanterns
- 3 masks
- 1 purple bowl
- 1 purple tray
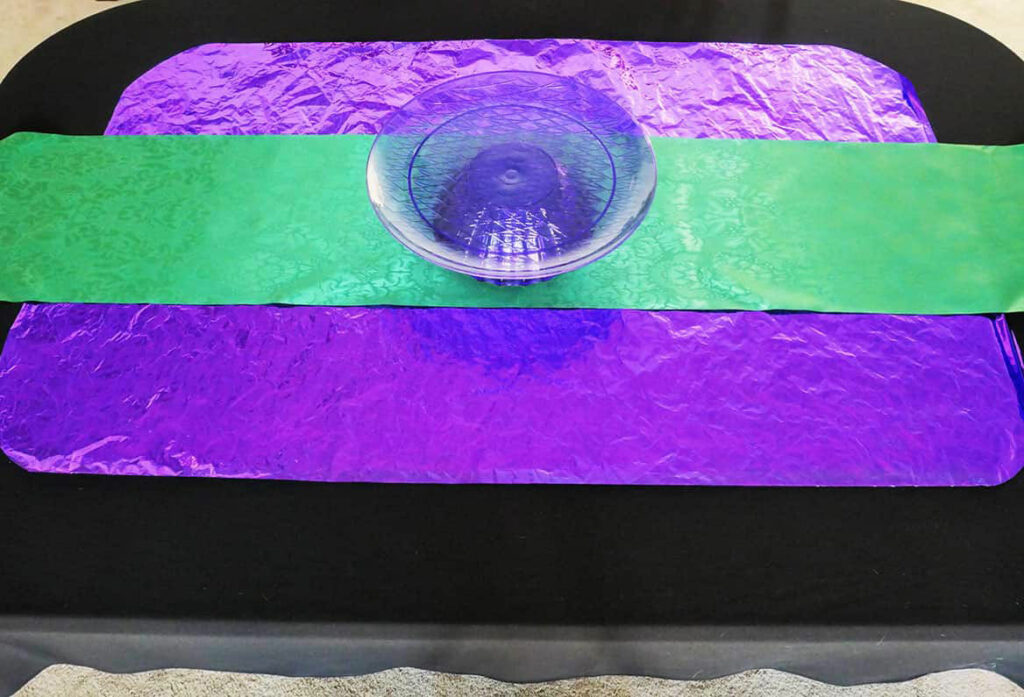
- 1 purple wrapping paper
- 1 green table runner
- 1 set of shower curtain rings
- 4 packs of beads
Video
*If you prefer to watch ~ here’s the video of how to create this Mardi Gras budget-friendly tablescape…
1. Select the foundation for your Mardi Gras table
Okay, so right away I deviated from my own challenge criteria. Lol!
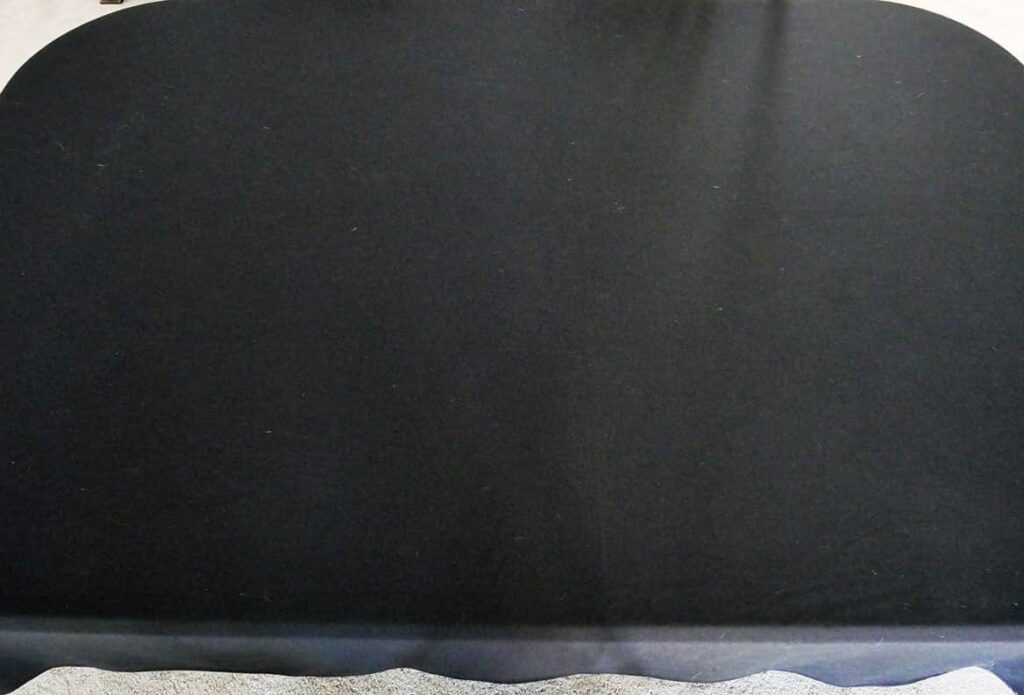
I decided to use a black tablecloth as my foundation piece. I thought the gold, purple, and green Mardi Gras colors would really “pop” off it.
This is a tablecloth I own, but if you want to stay within the budget Mardi Gras tablescape, you could buy a black plastic one from your Dollar store.
It won’t have the same feel as fabric, but the idea will be the same.
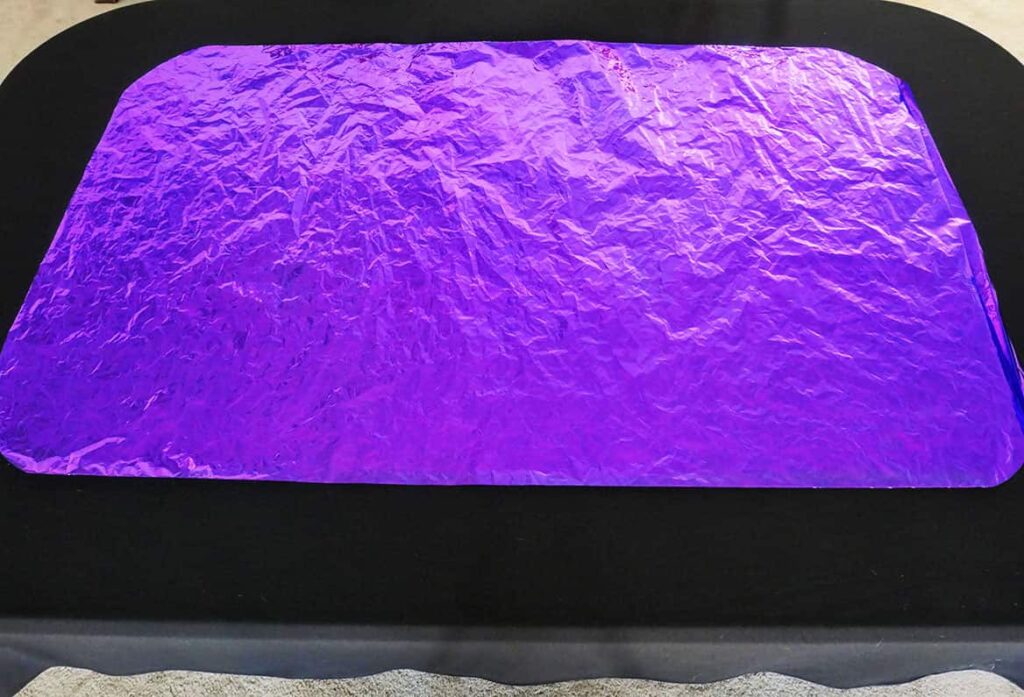
Then I unrolled the metallic purple wrapping paper. It was creased in a few areas, so I decided to crumple it into a ball, so the whole piece was creased.
I also cut the corners so they would be rounded like my table.
On top of the purple wrapping paper, I placed the green table runner. It too had a few creases from being folded, but since it was fabric I was able to easily iron them out.
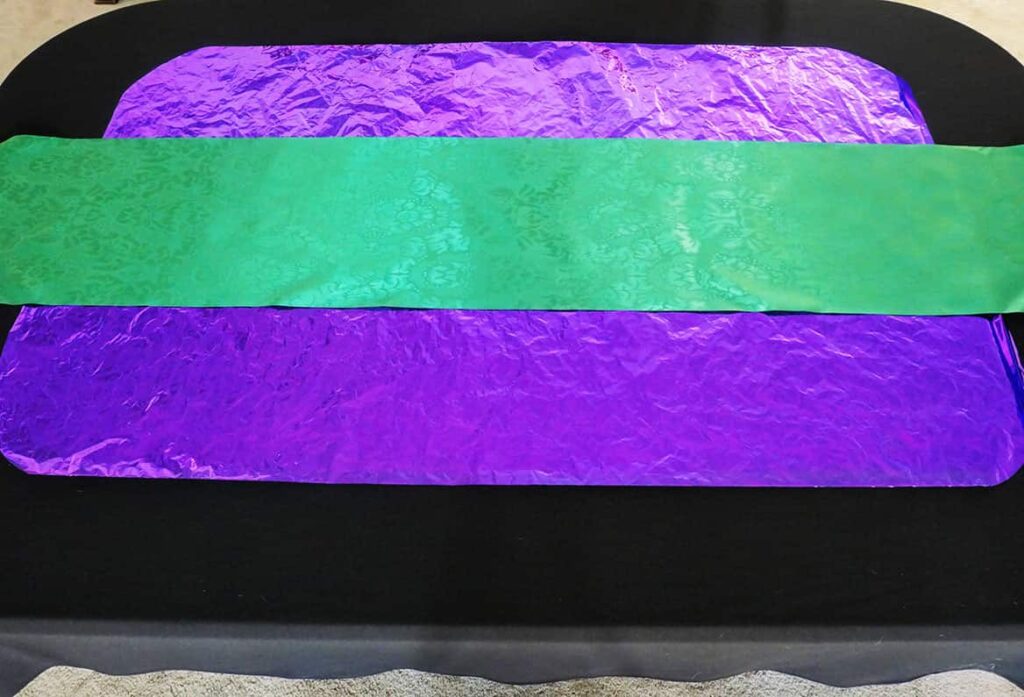
This would be the foundation of my Mardi Gras table.
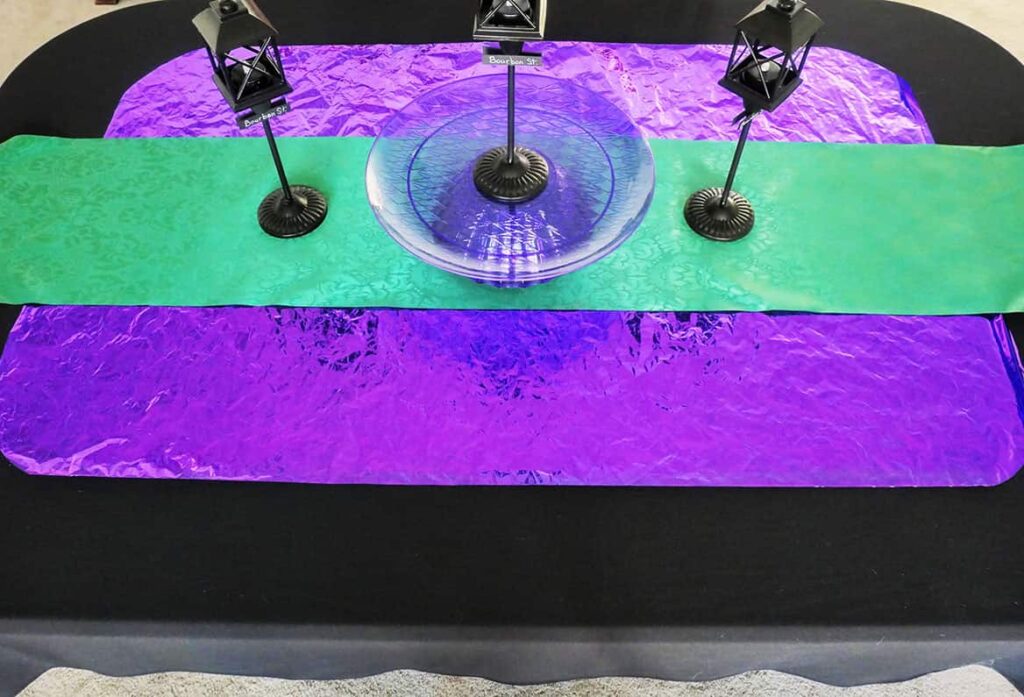
2. Create your budget Mardi Gras centerpiece
Next was to create the Mardi Gras centerpiece.
This is where most of the $30 was spent.
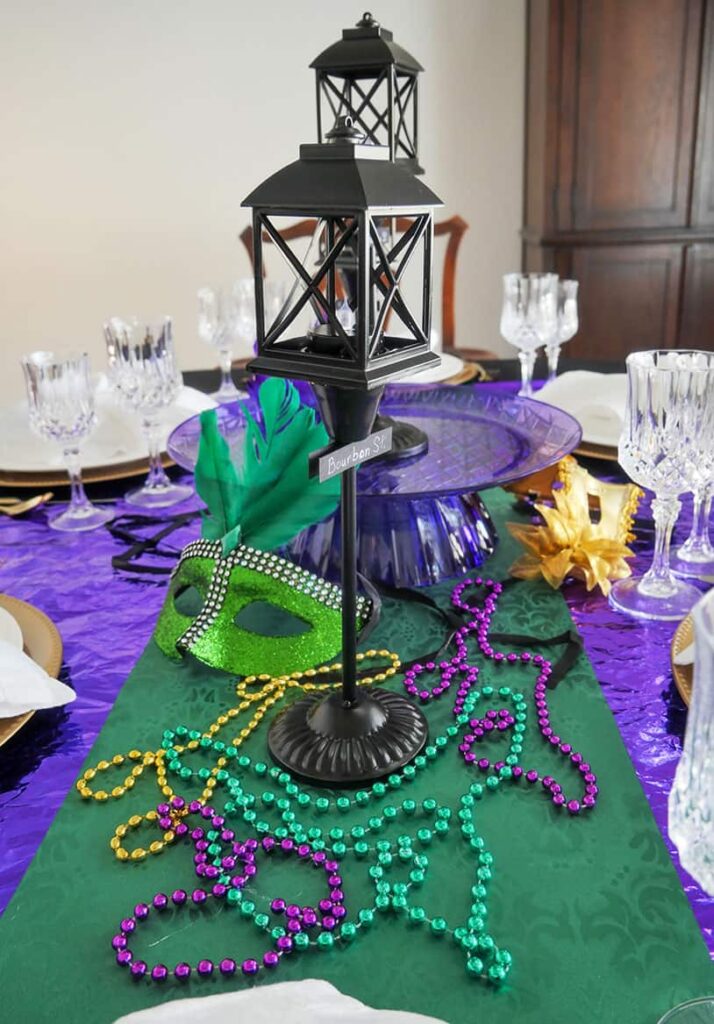
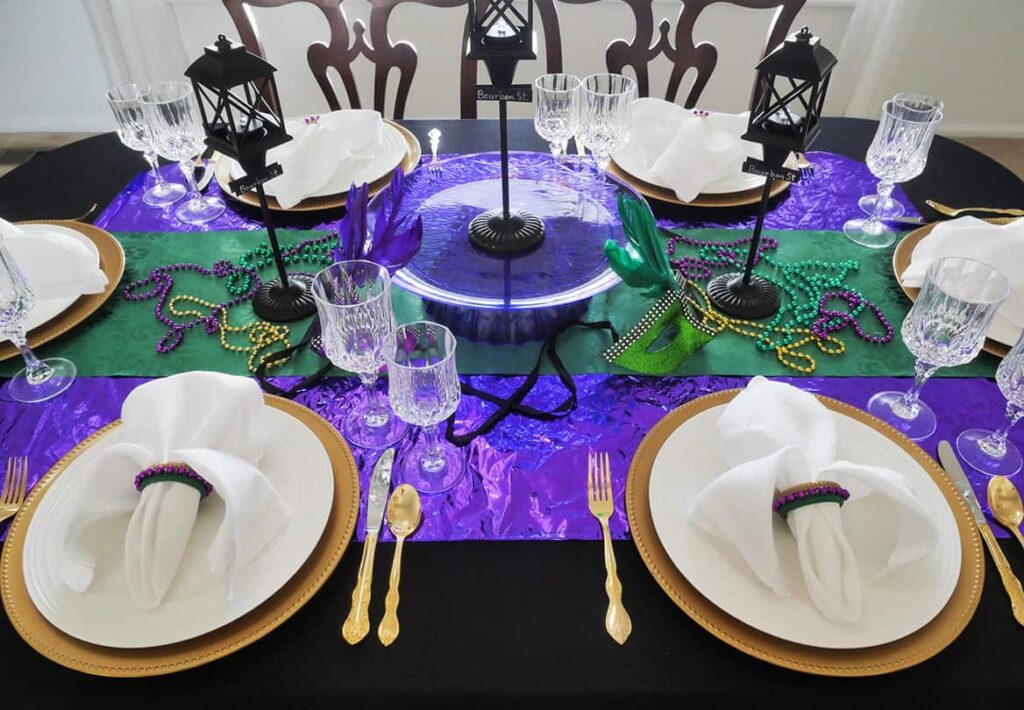
First I took the purple bowl and glued the purple tray on top of it. I used hot glue because then I could take them apart later and use them separately in the future.
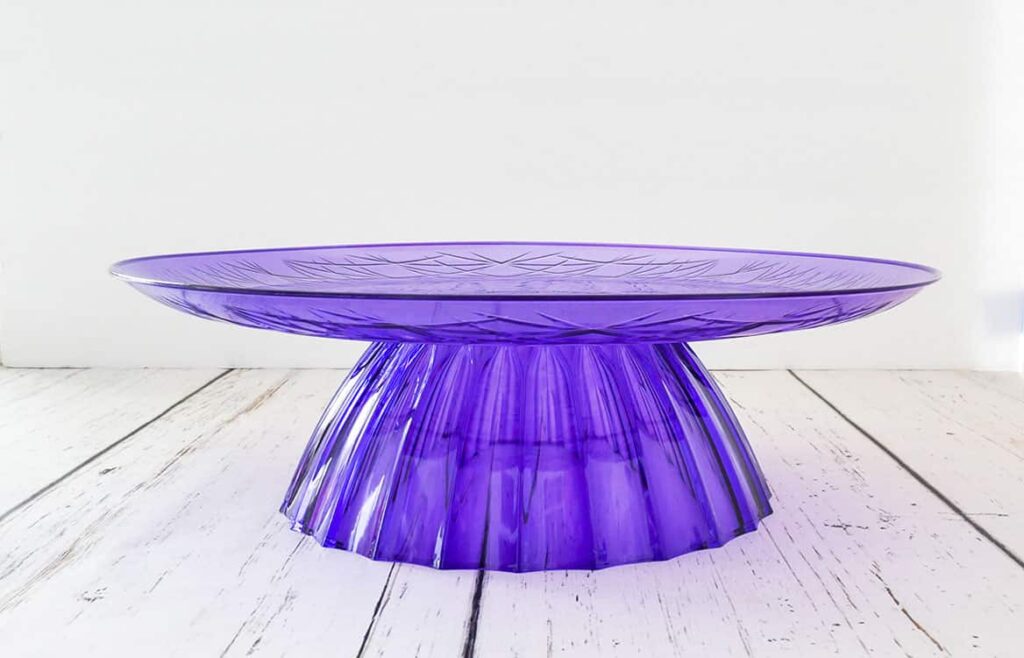
I put that in the middle of the table.
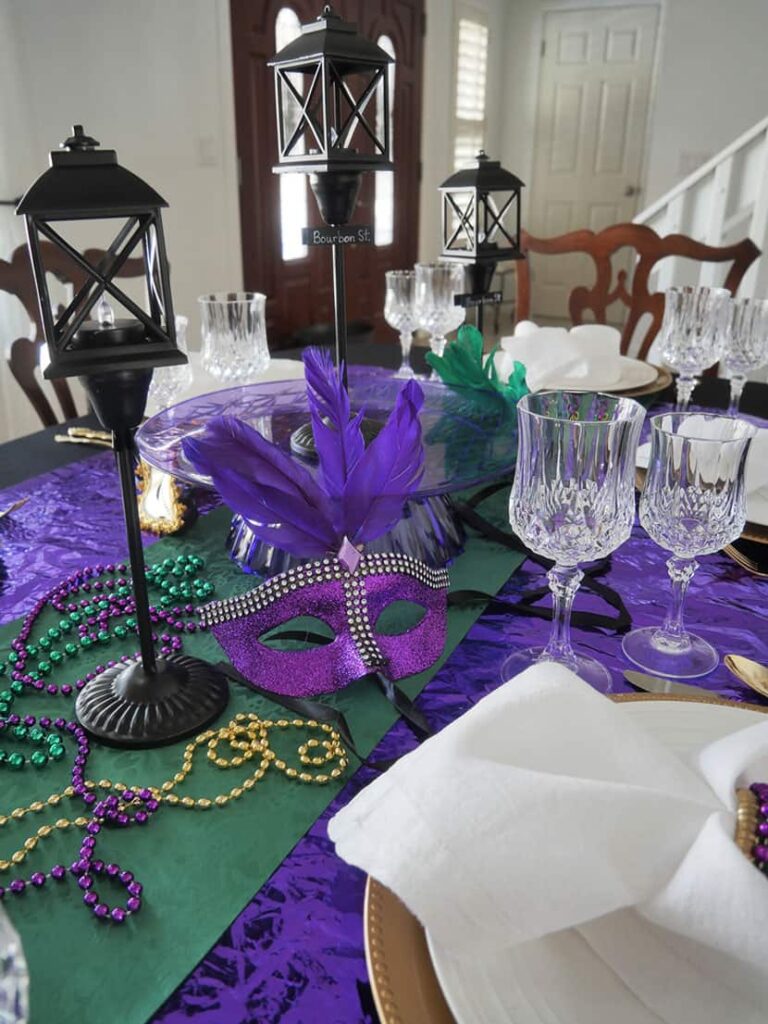
Next, I added the CUTEST streetlight posts I’d diy’d. They were SO EASY!!
Each one was just $2.50 to make.
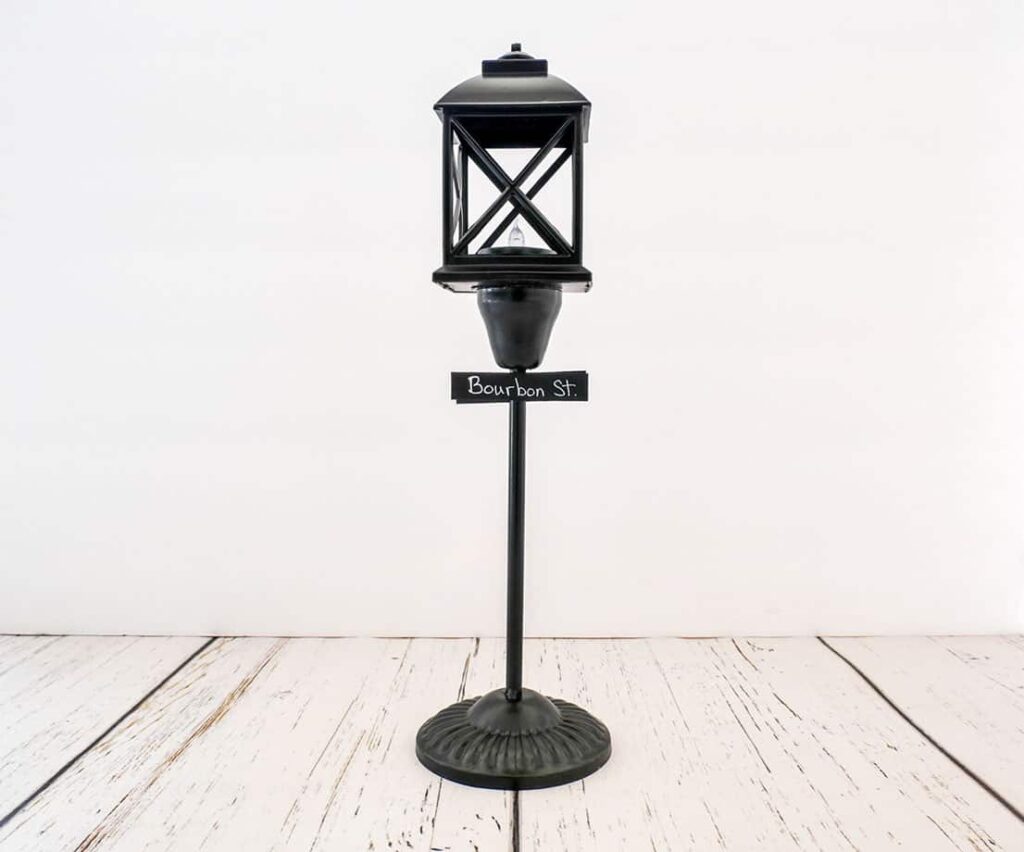
One went in the middle of the tray and then one on each side of the tray.
*I was thinking that a King cake would look perfect on the tray, with the light post in the middle. Unfortunately, they are in the stores yet. Too soon.

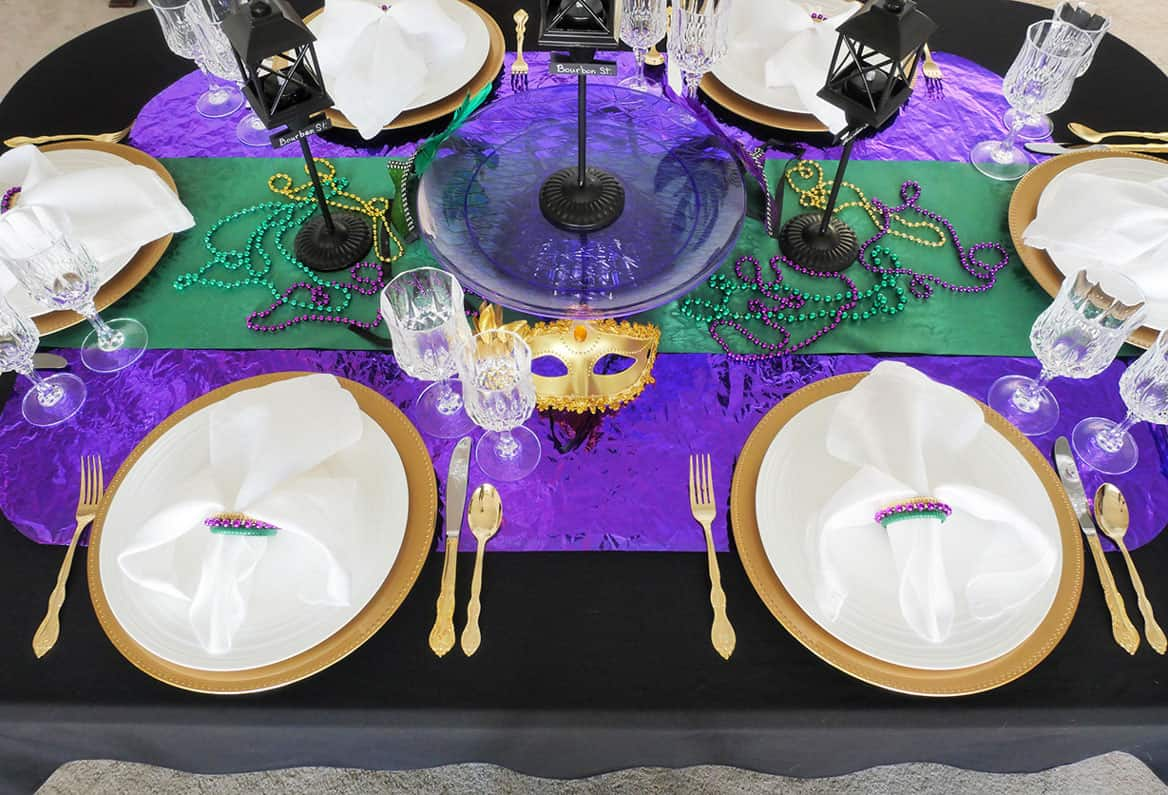
Around the tray, I then place three Mardi Gras masks. One green, one purple, and one gold.
Lemme tell you ~ these masks are SUPER CUTE! For just $1.25, they’re a steal!!
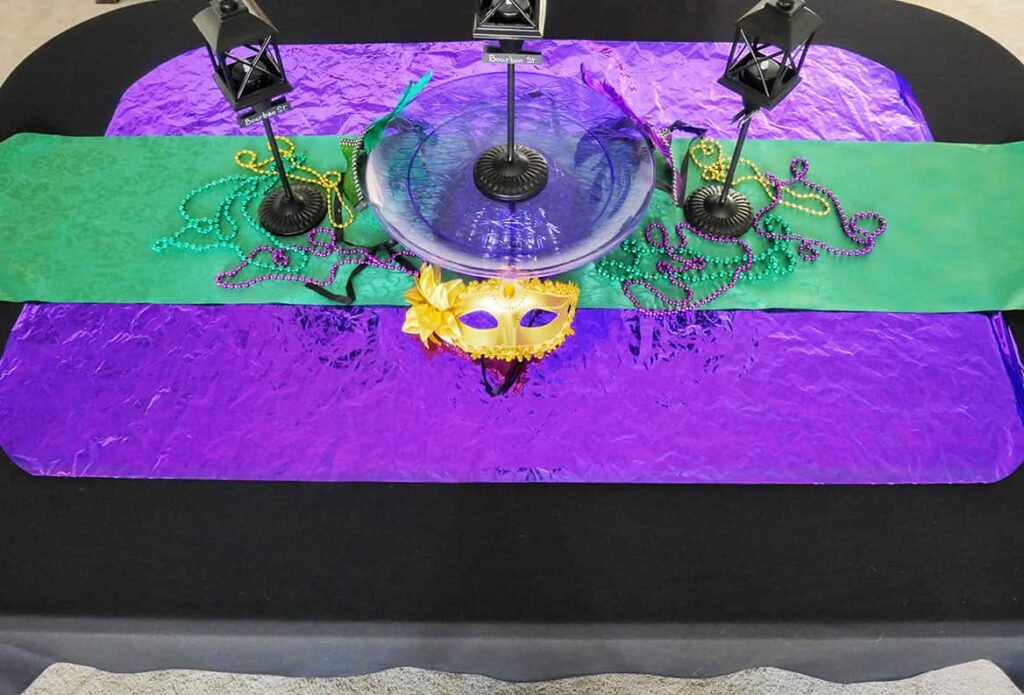
To complete the centerpiece for Mardi Gras, I took the beads and laid them around the table. In a random, haphazard way. Almost like they’d been thrown – haha!
That was it. That was my easy Mardi Gras centerpiece. It cost $17.50. Pretty good!
3. Layout the place setting for your budget Mardi Gras tablescape
To complete the Mardi Gras tablescape (on a budget), I started with gold chargers.
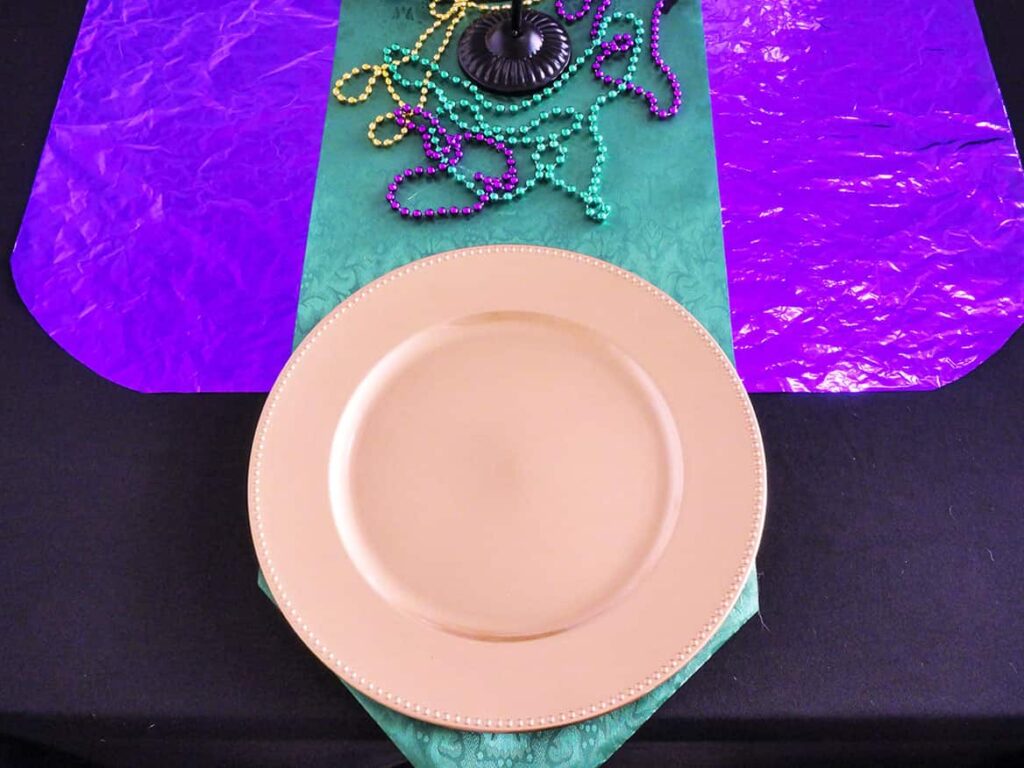
These were the biggest expense when you consider I bought six of them. But I felt they were totally necessary. They added elegance to the table and brought in the gold color.
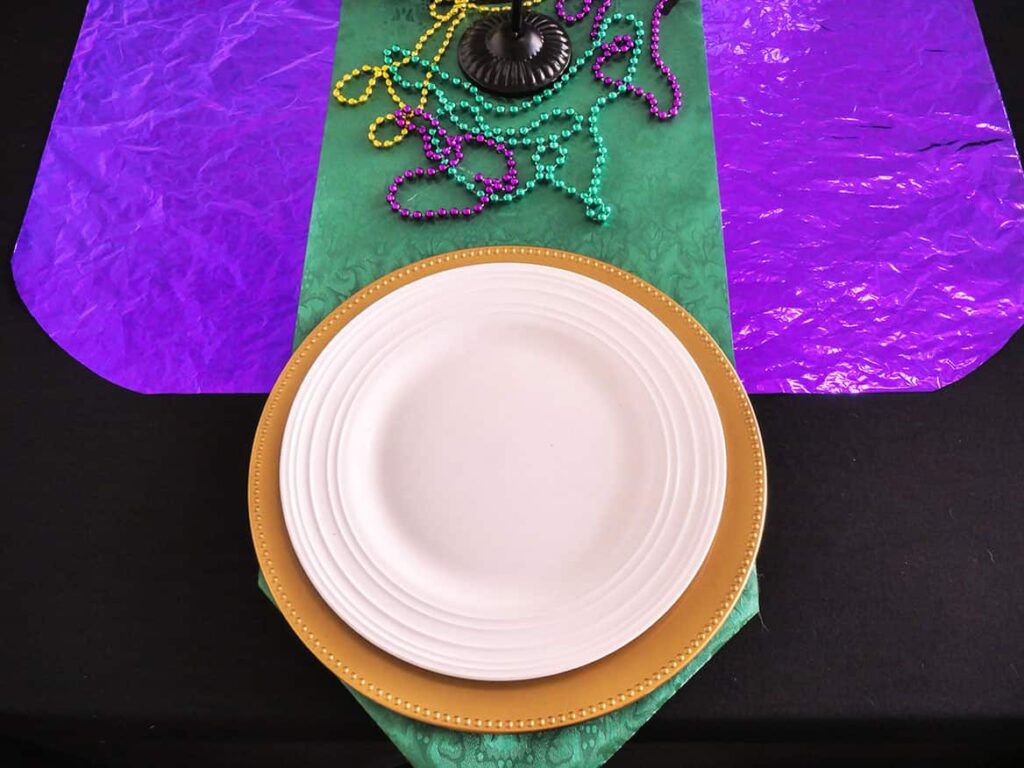
On top of the gold chargers went my white plates.
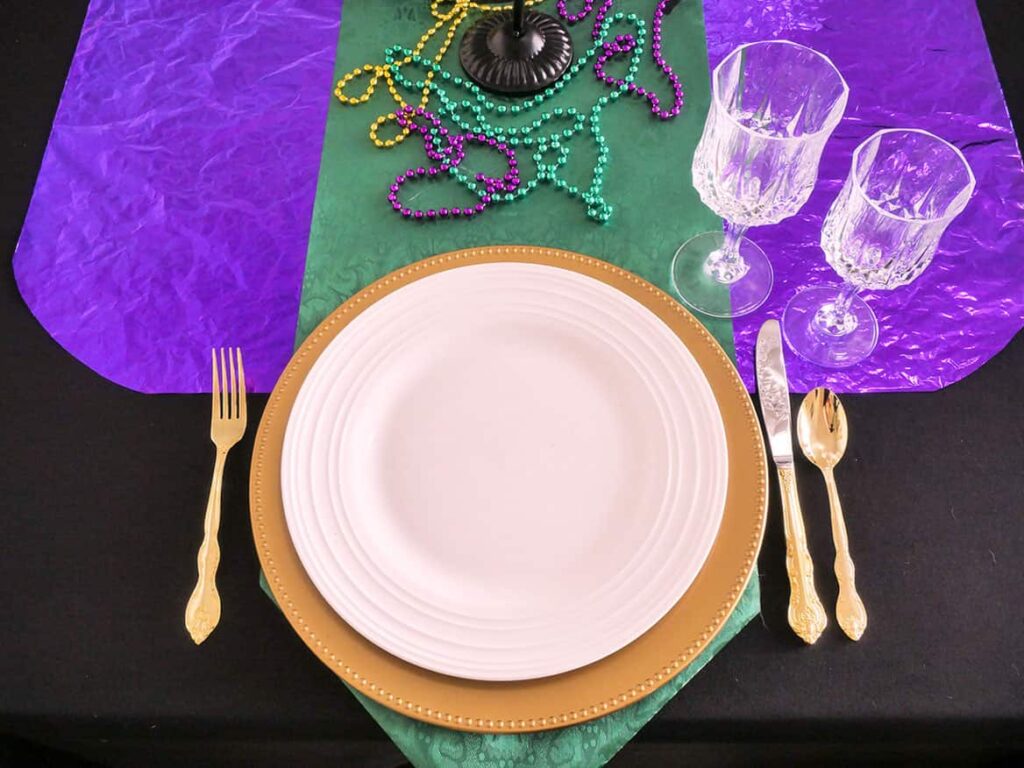
Next, was adding the wine glasses and flatware. Since I wanted to make the tablescape a little elegant, I opted for my really nice glasses.
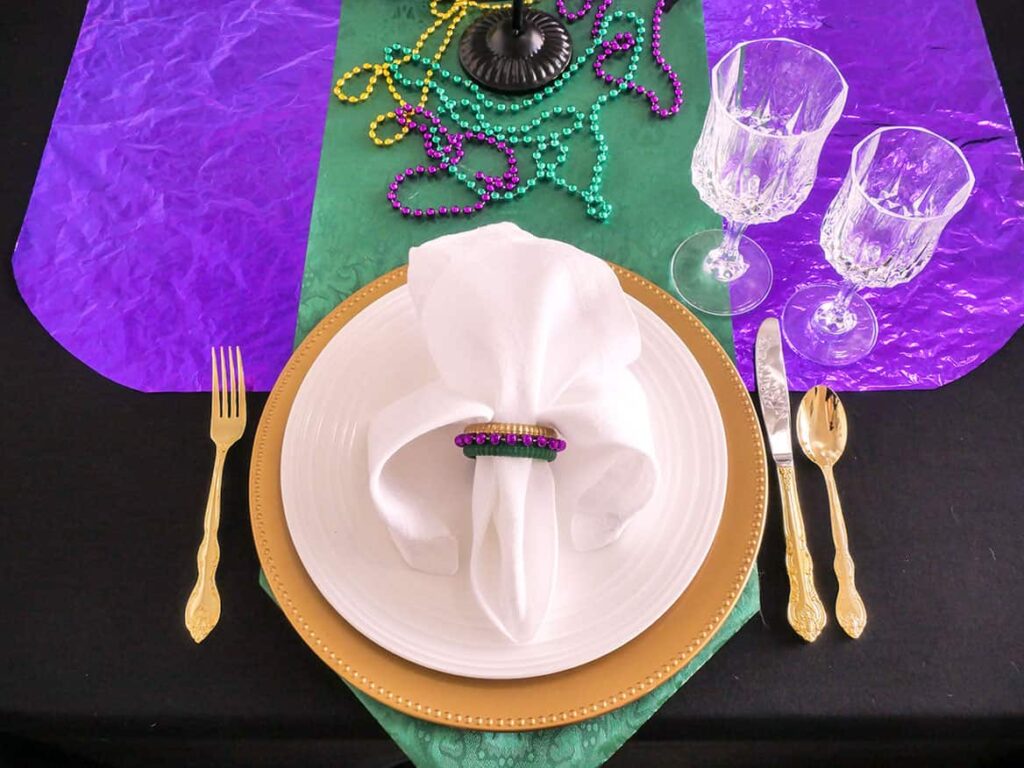
To complete the Mardi Gras place settings, I topped the plate with a napkin shaped like a fleur de lis, and a simple diy Mardi Gras napkin ring.
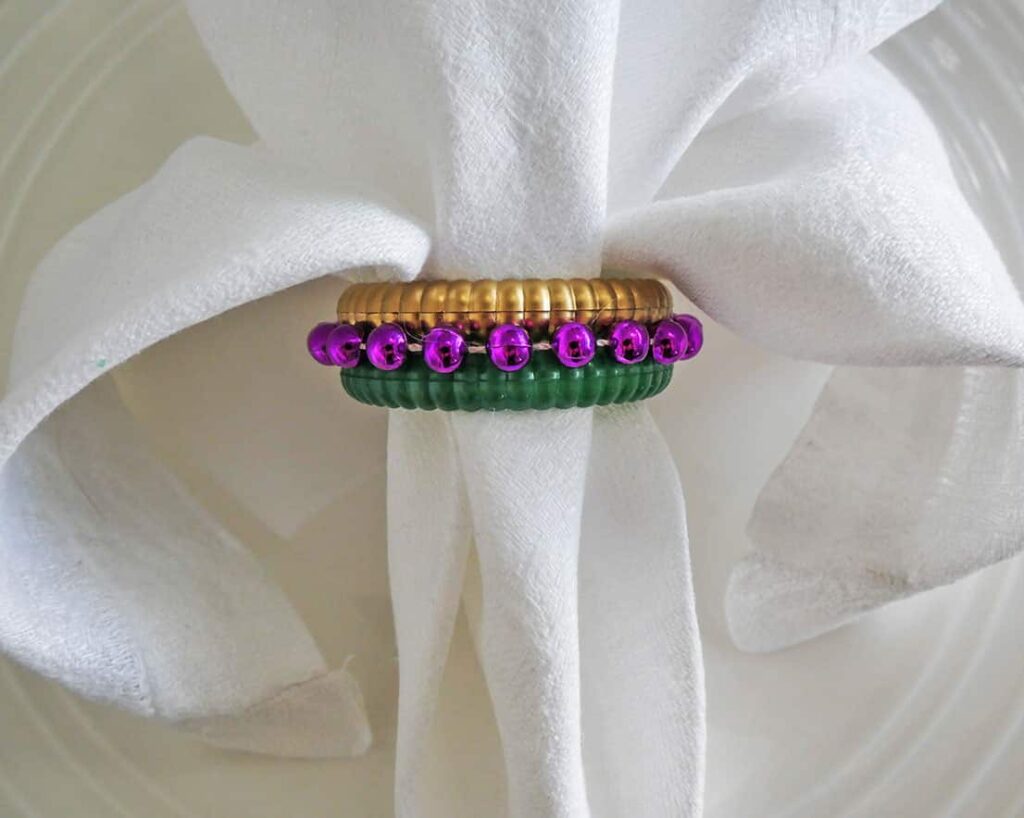
These napkin rings were really easy to make. Just $2.50 and I love how they use all three colors of Mardi Gras!
After completing all of the place settings, step back and take a look at the whole Mardi Gras table.
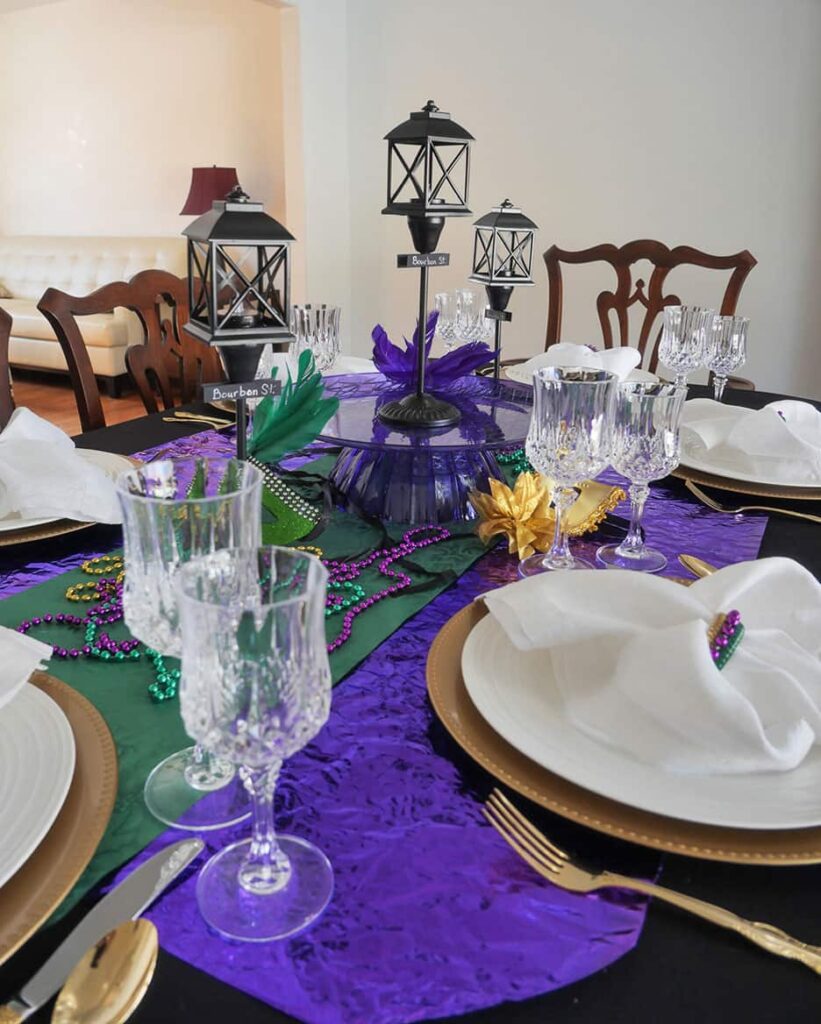
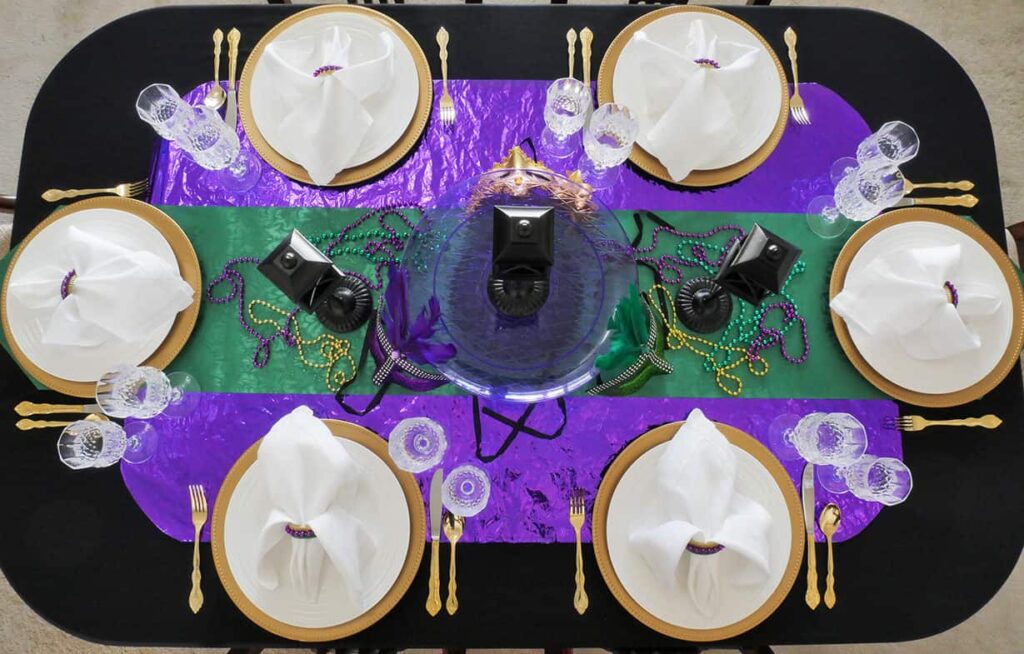
I think it turned out pretty darn good for sticking to a $30 budget.
Whadda you think?
4. Complete decorating the room
When you’re creating a tablescape, also consider what else is in the room. How can you decorate those spaces to pull the whole look together?
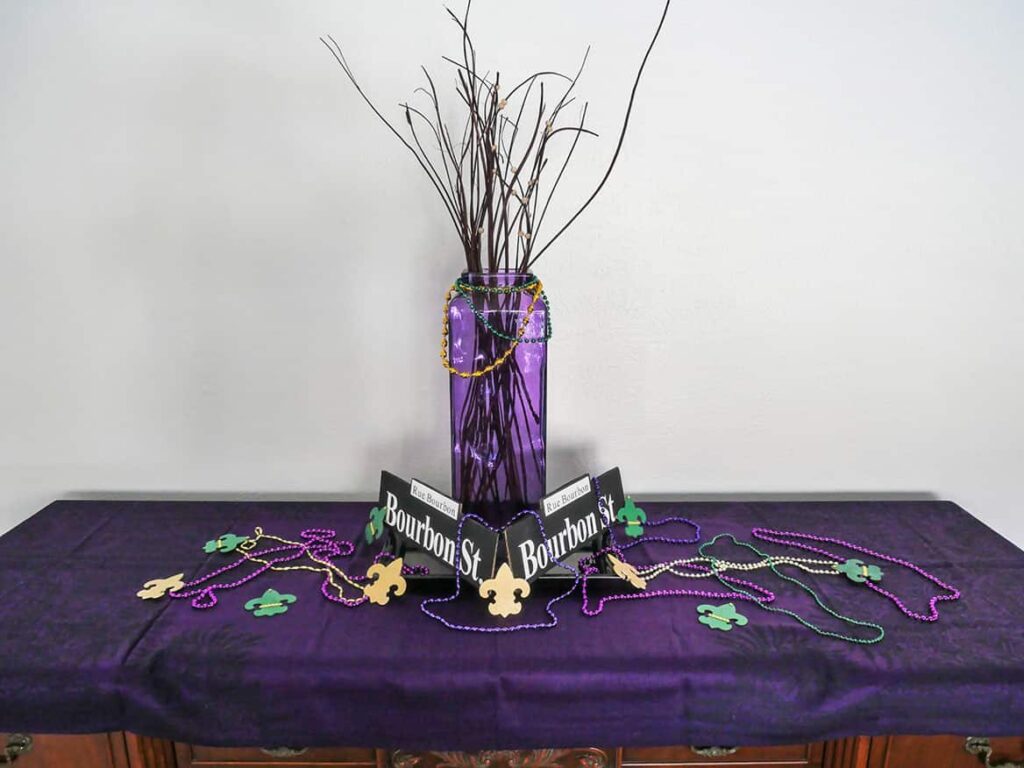
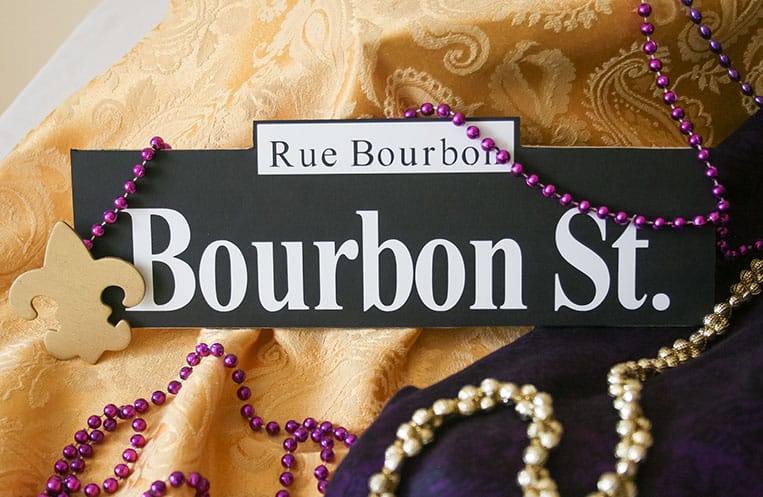
On my buffet table, I added a purple scarf I’d found at a thrift store, a black tray with a tall purple vase, and dried stalks. Then I added two Burbon St. signs I’d made, strings of beads, and fleur de lis I’d previously diy’d.
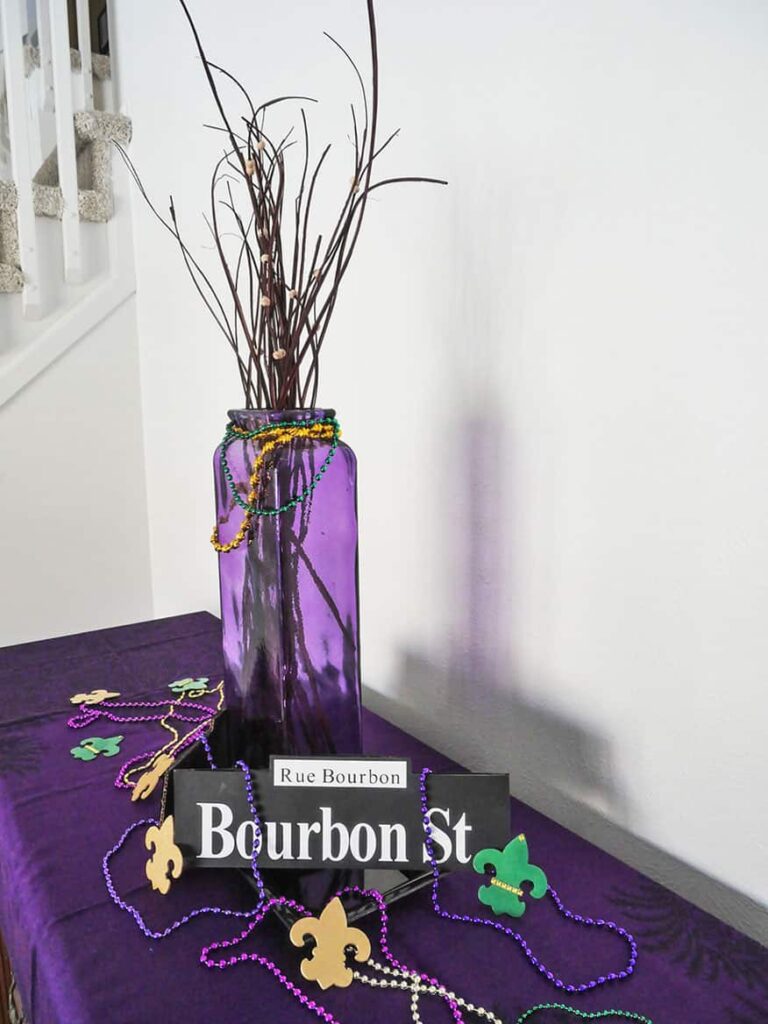
*The buffet was not included in my $30 budget.
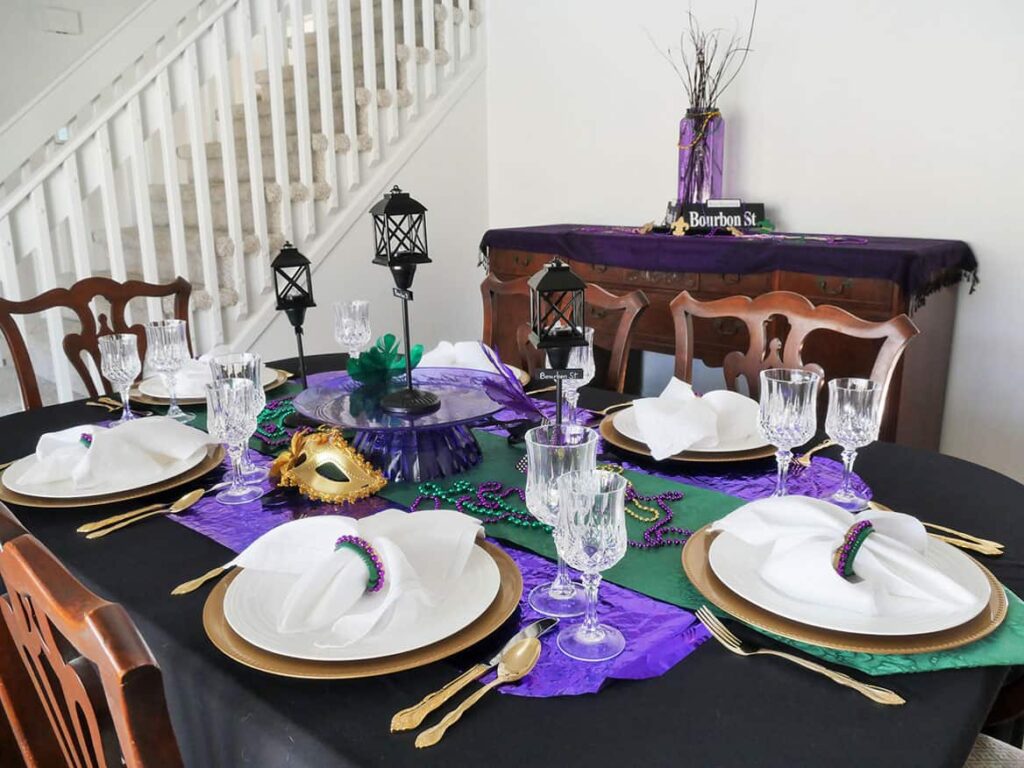
You can see how decorating my buffet table connects and really adds to the look of the Mardi Gras tablescape.
I hope this inspires you to throw a Mardi Gras party. After all, it won’t cost you much!
I love the Mardi Gras Tablescape – very festive especially the way the beads look tossed as though you were at a Mardi Gras Parade with the float riders throwing them at the onlookers. Certainly brought back wonderful memories to be shared with friends – now to design the perfect menu. Thanks
Yay! Glad you like it and the reference to the beads!
I love this tablescape. So cute and $30 is totally doable. My favorite addition is the napkin rings.
I love the napkin rings, too! So nice to hear that you love it.